

Make yourself familiar
Working with any tool becomes easy if we know its different parts and their functions, before actually starting a project. Read on to know more.
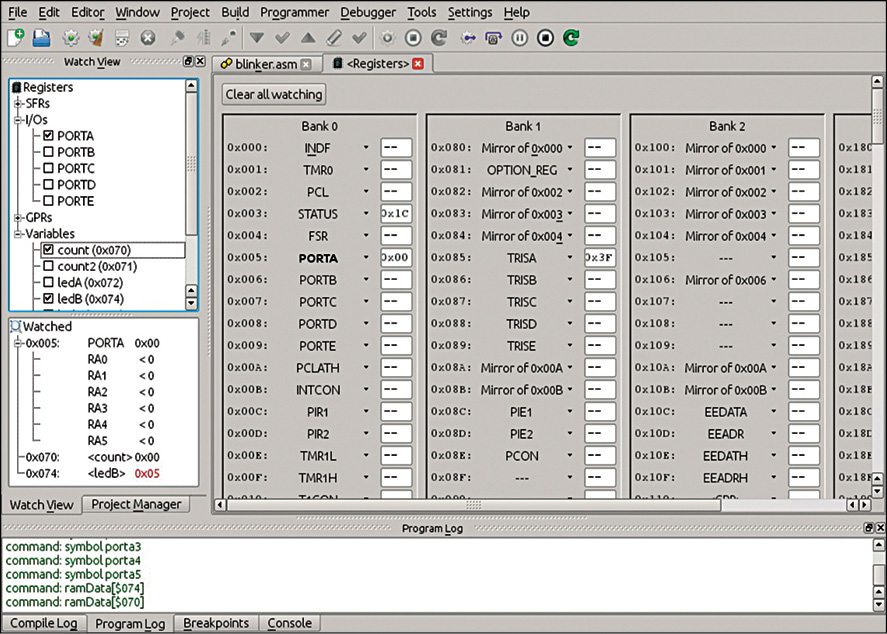
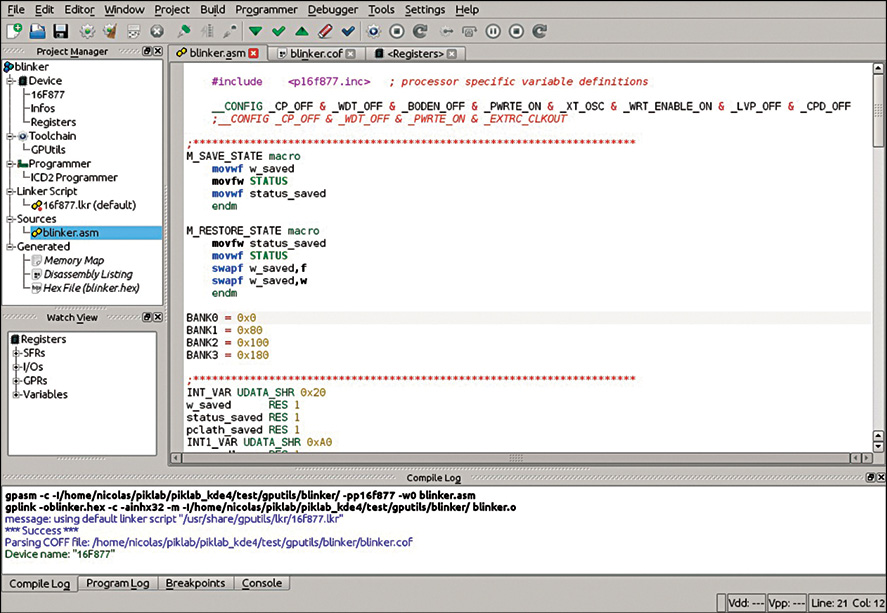
 1. Project window. The main window of Piklab gives information about all the files in the project being worked on, allowing one to open all the project files and change the processor type.
2. Editor window. The upper section of the main window contains an editor window that allows one to read and change the source code and hex files.

3. New project. The new project window (in the project window) allows one to make the basic settings to start a new project. It further allows one to either create a new source file by writing the codes in the assembler or to add an existing source file. In case one is not familiar with coding in assembler, he/she can download them from the Internet, which can then be added to the new project.
4. Compile button. Pressing the compile button at the top of the editor window allows one to compile the project. The messages such as compiling and linking can be seen in a small area called compile log, which is present at the lower quarter of the computer screen. Once the compilation is complete, one should be able to see the message ‘successful’ as the last line in the compile log.
 5. Connect button. The connect button above the editor window allows one to virtually connect to the gpsim simulator so as to start the simulation of the program. This button is to be pressed only after the compilation is successful.
6. Run. Once the simulation is over, press the run button available at the top to see the output of the simulation.
What do the users have to say
Although we can see some benefits of using Piklab, the actual users have mixed reviews about it. The communities such as edaboard.com, Bit Bang Theory and ReviewStream have the following users’ perspective:
1. “I have personally used Piklab to program 16f628a and 16f88 devices, writing the code in ASM and programming them with a JDM serial programmer and haven’t faced any problem ever. I find Piklab very easy to use and it is really a very powerful tool. It does not support MPLAB’s directives so, if you have previously written any code on MPLAB using directives, you need to remove them and change them for standard mpasm code to be able to compile that code on Piklab.”
2. “That’s the best IDE available for programming microcontroller. It can be used to write code, compile it, test it using simulation and debugging tools and even programming the actual microcontroller.”
 3. “Piklab does not always work with the Tiny Bootloader. I had it working when I used Ubuntu 11.04 Natty Narwhal and some version of Piklab that I cannot remember now. But since I upgraded to Oneiric Ocelot and a new version of Piklab, the Tiny Bootloader programming interface stopped working. However, there is another easy way to use Tiny Bootloader with Piklab, which involves installing Tinybldlin, the Linux interface for the Tiny PIC bootloader.”
4. “I love Piklab! It is the best solution to program and debug PIC microcontroller under Linux, but it still has some road to go before it can reach Microchip’s MPLAB IDE.”
Download the latest version of the software: click here
The author is a technical journalist at EFY. The article is based on the Piklab document available at Sourceforge.net


