This article gives a brief introduction to Kinect sensor and explains how to install OpenCV libraries in Ubuntu operating system. The article also covers some useful commands at the end for connecting Kinect to your computer. It can serve as a base for developing complex computer vision applications using Kinect for Ubuntu operating system.
The Kinect
Kinect is a motion-sensing device developed by Microsoft for Xbox 360 video game console. Though initially invented for gaming, people have begun using it for different purposes. With Kinect you can control a television set without remote control, a computer without keyboard, a mouse icon or touch-screen and games without any controller in your hand.

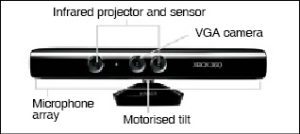
Kinect (see Fig. 1) has an array of sensors and specialised devices to pre-process the information received. Communication between Kinect and a game console, or Linux, is through a single USB cable. Its main features include:
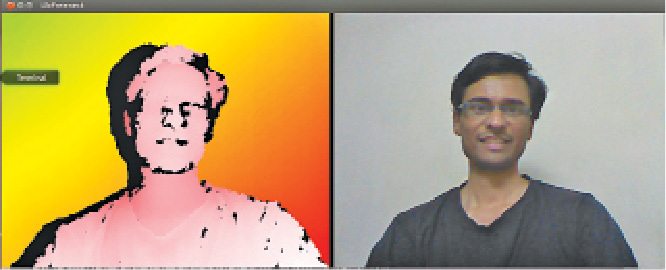
Gesture recognition. Kinect can recognise gestures like hand movement based on inputs from an RGB camera and depth sensor.
Speech recognition. It can recognise spoken words and convert them into text, although accuracy strictly depends on the dictionary used. Input is from a microphone array.
The main components of Kinect are RGB camera, depth sensor and microphone array. The depth sensor combines an IR laser projector with a monochrome CMOS sensor to get 3D video data. Besides these, there is a motor to tilt the sensor array up and down for the best view of the scene, and an accelerometer to sense position.
To get the best out of Kinect, you should be familiar with two terms: natural user interface (NUI) and machine learning. NUI refers to close interaction between a user and the computer. It includes controlling the computer through gestures, or the computer recognising the user’s voice/face. Microsoft Surface, multi-touch and Kinect are a few examples of NUI.

Machine learning, according to Wikipedia, “…a branch of artificial intelligence, is a scientific discipline concerned with the design and development of algorithms that allow computers to evolve behaviour based on empirical data, such as from sensor data.”
Open platforms. The OpenKinect community was founded by the developer of the Kinect open source driver. OpenKinect publishes its code under Apache 2.0 or GPL 2 licences. There is also another organisation, OpenNI, which publishes its work under different licences. There are mainly two open platforms or libraries, namely, libfreenect and OpenNI. These have been developed for almost the same purpose, and both support various languages like Python, C++, C#, JavaScript, Java JNI, Java JNA and ActionScript.

![]() Kinect projects. Among some amazing things/projects that can be done with Kinect include gesture-controlled robot (EFY, January 2013), robot operating system (ROS), Kinect-controlled computers based on user gestures and/or speech recognition, scanning of 3D objects (Kinect enables robots to map 3D objects, resulting in detailed and precise models of people), medical applications like gesture-based control of surgical tools, and in education where writing and calculator applications have already been developed using it.
Kinect projects. Among some amazing things/projects that can be done with Kinect include gesture-controlled robot (EFY, January 2013), robot operating system (ROS), Kinect-controlled computers based on user gestures and/or speech recognition, scanning of 3D objects (Kinect enables robots to map 3D objects, resulting in detailed and precise models of people), medical applications like gesture-based control of surgical tools, and in education where writing and calculator applications have already been developed using it.
Programming with Kinect
For programming with Kinect, we need open source computer vision (OpenCV)—a library for real-time computer vision. We also need libfreenect library that can take the data (such as colour, depth and other information) from Kinect and convert it into a format that is readable by OpenCV library for further processing and developing complex algorithms like face recognition.
Installing OpenCV. For installing OpenCV in Ubuntu 12.04, use the following commands:
[stextbox id=”grey”]
$ sudo apt-get install build-
essential libtiff4-dev cmake git
libgtk2.0-dev python-dev python-
numpy libavcodec-dev libavformat-dev
libswscale-dev libgstreamer0.10-dev
libgstreamer-plugins-base0.10-dev
libv4l-dev libjpeg-dev libjasper-
dev libtiff4-dev libdc1394-22-dev
libxine-dev
$ cd ~
[/stextbox]
Download Opencv-2.4.7.tar.gz from here and extract it to home folder.
[stextbox id=”grey”]
$ cd OpenCV-2.4.7/
$ mkdir build
$ cd build
$ cmake -D WITH_XINE=ON -D WITH_
OPENGL=ON -D BUILD-EXAMPLE=ON
$ make
$ sudo make install
$ sudo gedit /etc/ld.so.conf.d/
opencv.conf
[/stextbox]
At the end of the file, add the following lines and save it:
[stextbox id=”grey”]gedit /etc/ld.so.conf
/usr/local/lib[/stextbox]
And then configure dynamic linker run-time bindings:
[stextbox id=”grey”]$ sudo ldconfig
[/stextbox]
OpenCV-2.4.7 has been installed. Open another terminal to check some of the samples:
[stextbox id=”grey”]$ cd ~
$ cd openCV-2.4.7/samples/c
$ chmod +x build_all.sh
$ ./build_all.sh[/stextbox]
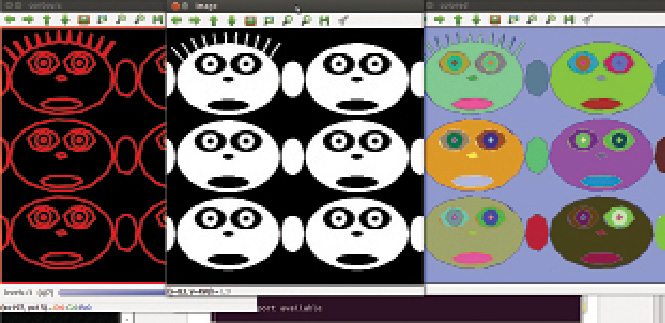
To check any sample, go to that folder and run the sample. For example, in the ‘c’ folder, we have contours, so to run it, enter the command given below:
[stextbox id=”grey”]$ cd ~
$ cd openCV-2.4.7/samples/c
$ ./contours[/stextbox]
You will get the output image as shown in Fig. 2.
Installing libfreenect. To install libfreenect, we need to first install some prerequisites for building it:
[stextbox id=”grey”]$ sudo apt-get install git-core
cmake freeglut3-dev pkg-config build-
essential libxmu-dev libxi-dev
libusb-1.0-0-dev[/stextbox]
Now download the clone from ‘github’:
[stextbox id=”grey”]$ git clone git://github.com/
OpenKinect/libfreenect.git[/stextbox]
Change directory to ‘libfreenect’
[stextbox id=”grey”]$ cd libfreenect
[/stextbox]
Make a directory named ‘build’ and change current directory to ‘build’
[stextbox id=”grey”]$ mkdir build
$ cd build[/stextbox]
CMake is used to control the software compilation process with simple platform and compiler-independent configuration files. CMake generates native make files and workspaces that can be used in the compiler environment of your choice.
[stextbox id=”grey”]$ cmake ..
[/stextbox]


Great article! My company ordered an Azure Kinect and I am trying to use OpenCV within a Kinect application for real-time object detection. However, this has to be done on a Windows 10 laptop. Is this only applicable to Linux?