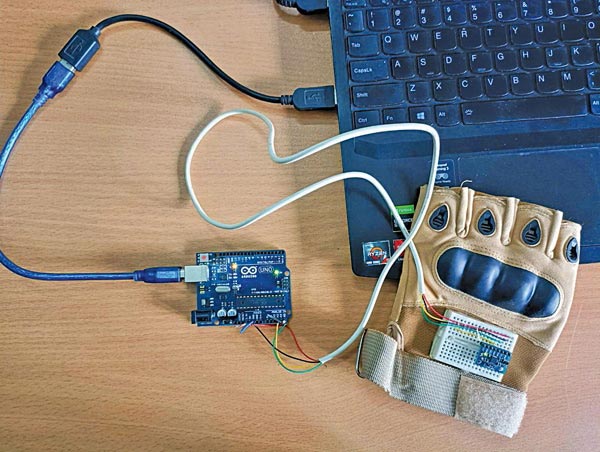
This Arduino-based gaming glove works like a mouse and keyboard in the air and allows you to control a graphic user interface (GUI). Enhance your gaming experience with this amazing gestures glove powered by Arduino. Control virtual games and explore immersive VR worlds using easy hand movements. Take your gameplay to new heights and dive into a world of fun and excitement with this innovative technology.
The glove has an MPU6050 sensor fixed on top of it, whose tilting causes an action similar to pressing a key on a computer’s keyboard or movement of its mouse. You can use it to play any running game, such as Subway Surfers, which uses the A, S, D, and W keys for movement.

| Components Required for DIY Gaming Glove | |
| Components | Quantity |
| Arduino Uno (P1) | 1 |
| MPU6050 sensor (P2) | 1 |
| Hand glove | 1 |
| Jumper wires | 10 |
Here we linked the sensor’s movement in X-axis with the ‘A’ and ‘D’ keys and movement in Y-axis with the ‘W’ and ‘S’ keys. To make it simple, we used only four keys, but with the MPU6050 sensor, you can use your creativity to do much more than that by adding more functionality to increase the fun.
POC Video Tutorial In English:
POC Video Tutorial In Hindi:
DIY Gaming Glove – Circuit Diagram

As shown in the above circuit, this simple gaming Glove project is built around an Arduino Uno board and sensor MPU6050 only. These are connected to each other as shown in Fig. 3.

DIY Gaming Glove – Arduino Code
Though Arduino Uno is used here, its hardware does not officially support human interface devices (HID). So, you can either use Arduino Pro Micro or Leonardo board, which officially supports the HID capability. You can directly use them for HID inputs, but you need to modify the code and prepare the code accordingly in that case.

In this project Arduino Uno has been used, so you need to do some tweaking to make it support HID. You need to install the Flip software; you can install from this link.
Next, you can convert the Arduino Uno into an HID device using the instructions and processes shown in this video.

Now you are ready to do the coding for the gaming glove. Arduino IDE is used to create the source code for this project. Fig. 4 shows the code snippet for getting the MPU6050 value. Fig 5. shows the code snippet mapping the sensor values into HID mouse movements.
Calibrate and map the glove’s x-axis, y-axis, and z-axis movements into HID mouse movements, and also add the key functions, if needed. When the mouse movement or scroll is enabled, the calibrate function is called to read the current tilt values.
This function averages samples to get reliable offset values, which are used as the starting reference point. By subtracting these offsets from every ADC sample, the user can start at any position and use that hand orientation as the current reference axes.
Testing and Working
After uploading the source code, you may assemble the project on a breadboard and fix it on top of a glove, as shown in Fig. 6. Now you can connect the Arduino Uno to USB and play any game virtually by just moving your hand in the air for an awesome experience.

If you have any doubt, please feel free to ask in the comments below.
Also, check out more such interesting Arduino Projects.
Pushpendra Chandravanshi is a passionate web developer and robotics enthusiast


