 This project describes how to build a surveillance camera based on Raspberry Pi (Raspi) that records HD video only when something moves in the monitored area. Live feed can be viewed from any Web browser, including one on a mobile phone.
Security cameras are common in most industries around the world. Their applications can range from preventing theft or vandalism to traffic and weather monitoring and much more. Due to a small form factor, affordable price and low power consumption, Raspberry Pi can be easily integrated in a surveillance camera.
In this project we will first connect Raspi camera to Raspi, and stream live video from it. We can also watch the streaming of content from our Android device. We will also take photographs with different effects.
Raspi is a credit-card-sized low-cost microcomputer that can run Linux operating system and has endless extension possibilities.
Hardware components
We require the following hardware for this project:
Raspberry Pi model B+
This model of Raspi system runs at 700MHz and its 512MB RAM supports HD video.
Raspberry Pi camera module
This module is specially built for the Raspi microcomputer. It has a connector that can be plugged directly into Raspi board, and it also supports HD video.
Power supply
Any power supply can be used that has a micro-USB plug, and which can supply at least 1A of current.
MicroSD card
Raspi does not have any storage on board, so you need to use a MicroSD card to install and run the operating system for this device.
Wi-Fi USB adaptor
You need this to connect the camera to your network.
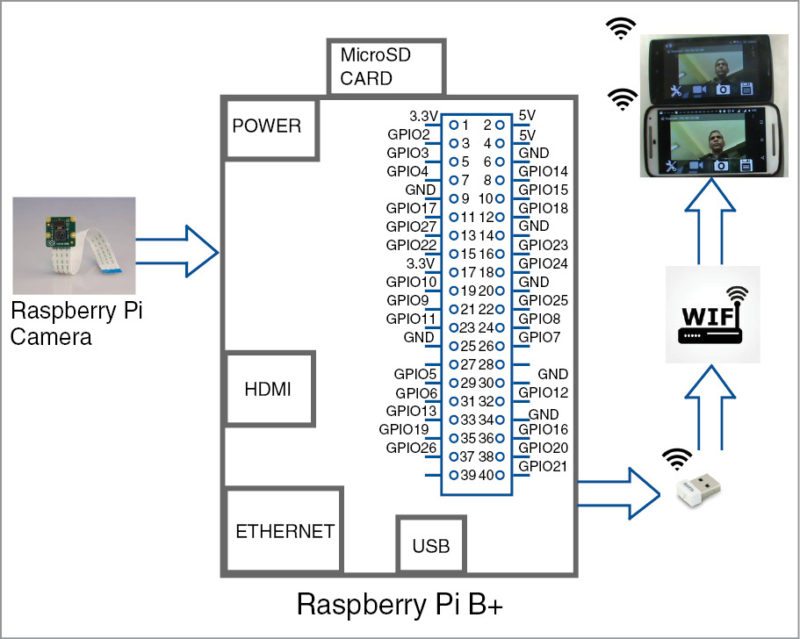
Block diagram of the project is shown in Fig. 1.

Software
Get the software ready
To start, you need Raspi with an Internet connection. Update its operating system to ensure that it has all the latest features and drivers. Run the command given below, in the terminal, to update the operating system installed on Raspi:
$ sudo apt-get update
$ sudo apt-get upgrade
Install RaspiCam Remote for Android
RaspiCam Remote is an app to view Raspi camera module on your Android device. In this project:
1. No software needs to be installed or configured on Raspi; it uses standard NOOBS setup.
2. Pictures can be saved to your phone’s gallery.
3. Continuous video mode (around one frame per second) for camera monitoring can be used on your Android device.
4. It is easily configurable and allows testing the camera’s image filters.
Configure raspi-config
Raspi-config is Raspi’s configuration tool, written and maintained by Raspbian operating system.
You will be shown raspi-config on booting into Raspbian for the first time. To open the configuration tool, run the following from the command line:
$ sudo raspi-config
You will see a blue screen with options in a gray box in the centre as shown in Fig. 2.

Use up and down arrow keys to move the highlighted selection between the options available. In order to use Raspi camera module, select Enable Camera option as shown in Fig. 2. This will ensure that at least 128MB of RAM is dedicated to the GPU.
Note
Selecting raspi-config utility tool provides a way of doing initial configuration of Raspi. Although, it can be run any time.
Click on Finish when you are done making changes. You will be asked whether you want to reboot or not. When used for the first time, it is best to reboot the system.
To test that the system is installed and working, and to take a photo with your Raspi camera module, type the following command:
$ raspistill -o image.jpg // image is
the name of your image
raspistill is a command-line application that allows you to capture images with your camera module.
Setting up RaspiCam Remote app
You may download the app from this link
Install the app on the Android device on which you want to see remote video.
Testing the Surveillance Camera
RaspiCam Remote app
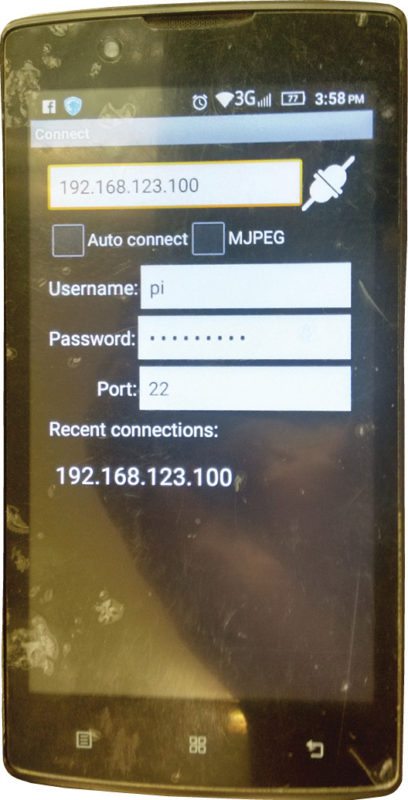
Open RaspiCam Remote app and you will get an initial view to provide login details such as IP address, username and password as shown in Fig. 3. It uses default login account details and SSH port.

You will only need the IP address if you have the default installation in place. You can even access your camera over the Internet if you enable port forwarding for port 22.
IP address on your Raspi. Double-check to see if your Raspi is connected to the network by typing the following command:
$ sudo ifconfig
If Raspi is connected to the network, it would have been given an IP address, such as 192.168.3.113 (yours will be different).
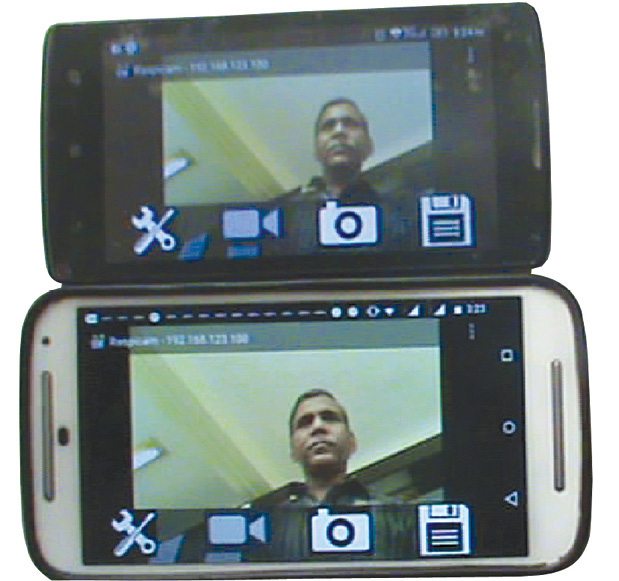
Type the IP address of your Raspi as shown in Fig. 3 and refresh the screen until your Raspi IP address is displayed on the screen. Select your Raspi IP address to connect and view the remote display straight-away. Alternatively, you can set different settings—flip, mirror, rotate, 3D, zoom, negative, solarise, sketch, denoise, emboss, oil paint, hatch, gpen, water colour, film and so on. Also, you can use multiple phones to observe remote video simultaneously (Fig. 4).

Biswajit Das is an electronics hobbyist


Is there any app for Apple iPhone?
the software section is empty. can you tell me what softwares are needed ?
Kindly elaborate your query.