Here’s a beginner’s guide showcasing Pmod compatibility with the popular Arduino Uno platform. We will use a sample project – Pmod NAV – described on the Digilent Projects website. And then… Try to make your own project!
The Digilent Projects website is a good starting point for working on Pmods and Arduino projects. You can browse through more than 40 Pmod projects, many of them based on Fritzing images, which facilitate practical applications.
How to use Digilent Projects?
Each project begins with a short description of its goal, the difficulty level, implementation requirements and in many cases Fritzing images. Fritzing is an application for all electronics enthusiasts. It lets you design electronic devices, create their prototypes on breadboards, and use them as a basis for drawing and editing electronic schematics, and designing PCBs. Even if a project does not include a Fritzing image, like the Pmod NAV project we’re about to review, they all have written instructions for the pins you need to connect at the beginning of the provided Arduino code.
How to configure your Arduino Uno?
If you are new to Arduino, first download and install the Arduino IDE . The installation link can be found on each Pmod project under “software apps and online services”. After downloading the Arduino IDE you may also need to download additional libraries referenced in the “materials” section of the Arduino code for your Pmod project. After clicking the provided GitHub link in your code description, choose “download ZIP” in the drop-down menu below the green “clone or download” button. Once downloaded you must rename this file by removing the “master” text at the end of the folder name (an example of a proper folder name: “SparkFun_LSM9DS1_Arduino_Library”) and move the folder to your Arduino downloads folder (e.g. Documents>Arduino>libraries).
Moving on to the sample project
Returning to your Pmod NAV project, scroll down to the provided Arduino code and click “copy the code” at the top right corner next to the project code title. Proceed by opening a new Arduino sketch, deleting the automatically loaded code, and pasting the code you copied from your Pmod NAV project. The next step requires making sure that everything works by clicking “verify” (i.e. the √ icon) at the top left and confirming that no errors are reported at the bottom of your screen. If you see any errors you can find help by visiting Digilent’s dedicated technical support community on the Digilent Forum and posting under Add-on Boards . Once you receive a “done compiling” message you are ready to connect your Pmod NAV to your Arduino Uno.

Arduino code excerpt
Connecting the Pmod NAV
The Pmod NAV project does not include a supporting Fritzing image, therefore you need to read through the Arduino code to figure out which pins to connect. In Image 1 you can find this information under “Wiring” where Pmod NAV pins 6, 5, 4, and 2 are given under the word “Module” and their Arduino locations are given under “Arduino”. If you have trouble deciding how to place your pins, try visiting the Digilent Wiki . There you can find each Pmod’s pinout(s) on the right side of your screen.
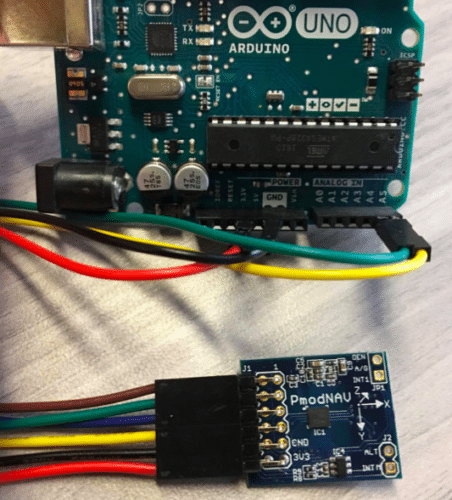
While connecting your Pmod you may also need a cable (not listed in the project’s necessary components) such as the 6-pin MTE Cable and 6-pin Header & Gender Changer, or the Pmod Cable Kit: 12-pin. In this example, the 6-pin MTE Cable was used and it made the whole operation easier. Plugging this cable onto the top row of the Pmod NAV pinout (this project only uses pins 2-6) allowed for quick differentiation and finding the most important pins like ground and power – much easier then when using a standard 12-pin cable. The resulting connections can be seen in Image 2.

Pmod NAV connected to Arduino UNO
Connecting the Arduino to a USB port
After setting up the code and connecting your Pmod NAV to the Arduino Uno, you can connect your Arduino to your computer’s USB port. After choosing the correct port (e.g. Tools>Port>”/dev/cu.usbmodem…”) click “Upload” (i.e. the arrow at the top left of your Arduino script page) and wait for the “Done compiling” message at the bottom of your screen.
Getting results
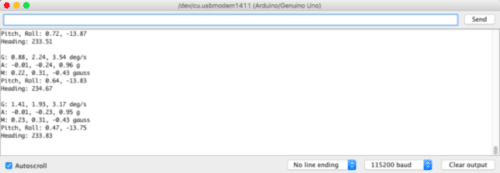
At this point your Pmod NAV and Arduino Uno should be ready to show the results found when running the Serial Monitor (on Macs you can use the shortcut Shift+Command+M, or find this under the “Tools” dropdown menu). The Serial Monitor should show constantly changing output similar to the one shown on Image 3.

Data sent by the Pmod NAV
Other output data
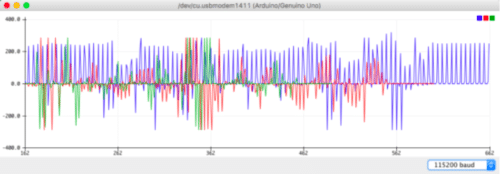
Another output that you can use is the Serial Plotter (shortcut: Shift+Command+L), which plots the position of your Pmod NAV as you move it around. While it’s connected to your Arduino Uno, you can pick up your Pmod NAV and watch the graph update as you change your Pmod’s position by rotating, shaking, or turning it upside down. An example of this output data can be found in Image 4, with different peaks for different Pmod NAV movements.

Graphical representation of data sent by the PmodNAV
Try out the Pmods!
You now know all you need to get your Pmods running with Arduino Uno. Even if you’re a beginner electronics enthusiast, you can now start creating your own projects. If this is not your first project, show others how easy it is to use Pmods with microcontrollers. You can find a wide selection of Pmods at Transfer Multisort Elektronik’s website (www.tme.eu).


