 This device can provide real-time data of the movements of players during trainings and games, like acceleration, angle and directions, as well as their health status. It could be useful for both players and sports audience as it can help in understanding the game better, enhancing the performance of the players and learning the skills.
This device supports both WiFi and Bluetooth mesh network. This means the real-time data of a game collected from different devices can be sent to a device cloud and accessed from anywhere.
Components Required
- WiFi and Bluetooth mesh enabled device like Particle Argon(For mesh you need multiple of this device)
- A MPU6050 sensor
- A Max30100sensor
- Bluetooth HC 05 (optional if you want to get live data over Bluetooth serial port)
- 3-5 V rechargeable battery
As we have collected the components, we can now start the project.
Coding
First set up the argon device for mesh network and add all other devices that you want to work in that network. To do so, download the particle app in your smartphone and follow the instructions in app. We can create code for our device either in particle Web IDE or in Vs Workbench. Here we are going to do coding in particle IDE as this allow us to update the firmware wirelessly from anywhere over OTP.
In the first part of our code, we will include the required libraries and other variables for the sensors. We are using the max30100 and mpu6050 sensor libraries here. We will then enable the system mode as automatic and the system thread for our device. (Refer fig 1).

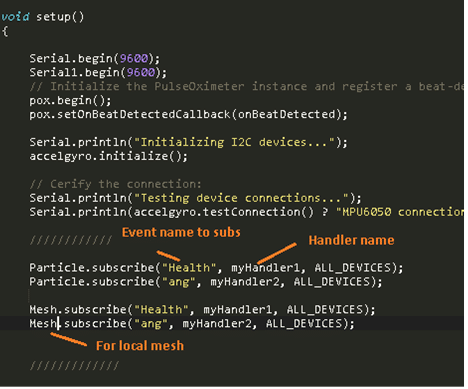
Next, the setup function for our code is created where we have set the serial port for serial communication of Bluetooth, USB Debugging and testing. Here we have set up the two serials, one for USB using “Serail.begin(baudrate)” and the other for Bluetooth HC 05 serial to get live data over Bluetooth using “Serial1.begin (baudrate)”. (Refer Fig 2.)

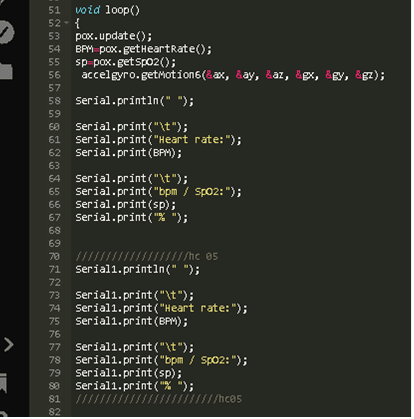
After that we created a loop function that runs continuously in loop. Here in the loop we get data from the sensors and pass it to the variables that we have created before. Then we sent this data to the serial ports. (Refer Fig 3).
Creating Mesh Network and connecting to device cloud
In the next part of code, we connected the device to device cloud and created a mesh network. This part involves two steps: First creating an event and publishing all the data to the device cloud; second creating a local mesh network and publishing all the data to local connected device.
For local mesh network we created mesh using “Mesh.publish” and for cloud connected we have used “Particle. publish”.
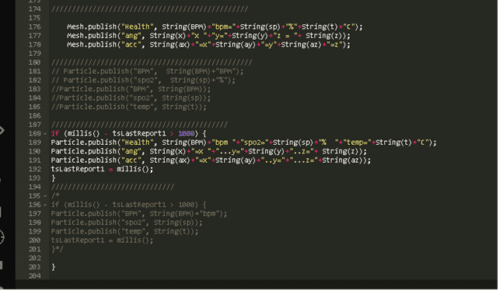
Here in code snippet we have created three mesh events “Health”, “ang” and “acc” that give data of players’ health, angle of movement and acceleration respectively to the mesh network. (Refer Fig 4).
Mesh.publish(“Health”, String(BPM)+”bpm=”+String(sp)+”%”+String(t)+”C”);
Mesh.publish(“ang”, String(x)+”x “+”y=”+String(y)+”z = “+ String(z)); Mesh.publish(“acc”, String(ax)+”=x”+String(ay)+”=y”+String(az)+”=z”);
Mesh Network Event
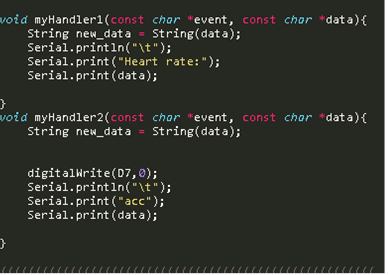
Now by adding “Mesh.subscribe” and “Particle.Subscribe” we can get the events of any other device in our mesh network. We can use it as a bridge or as repeater as per our choice. Another block of code (given below) handles the data of events in mesh network. We can upload such a code in a number of particle argon devices that publish players’ data to device cloud and retrieved the data live from anywhere.
Mesh.subscribe(“Health”, myHandler1);
Mesh.subscribe(“ang”, myHandler2);
Connection
Now, we need to connect the sensors for our prototype. Follow the instructions below to connect the components.
| Particle Pin | MPU and MAX Sensor Pin |
| 3V | VCC |
| GND | GND |
| SCL | SCL |
| SDA | SDA |
| Battery | Battery connection port |
| Particle Pin | Bluetooth HC O5 |
| 3v | VCC |
| GND | GND |
| RX | TX |
| TX | RX |
Testing
Now, turn on your Wi-Fi router and wait till the BLUE light glows, which indicates that our device is connected to the cloud. Then the connection status in particle web IDE will show online.
Now choose the device and flash the code to particle OTA. After successfully updating code power particle with battery, let it connect to Wi-Fi network and to device cloud.
Test 1. Getting Live sensor data over Bluetooth Wirelessly
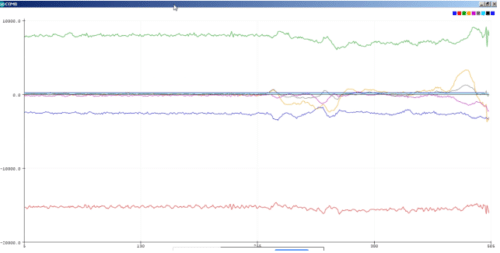
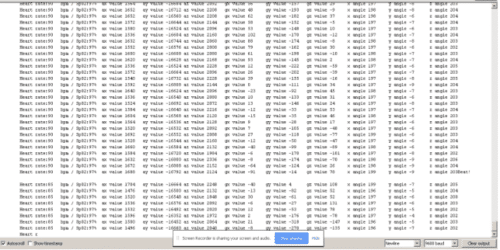
Open the Arduino IDE in your PC and connect the Bluetooth HC 05 to your PC Bluetooth. After that check the Bluetooth COM PORT number and change the port to that port number in Arduino IIDE. Now go to tools menu and open the serial plotter, where you can now see the live graph of sensors data (players’ heartbeat, blood oxygen percentage, acceleration of arm or any other body parts wherever the sensor is attached). (Refer Fig 6.). Now close the serial plotter and open the serial port to see the data value. Refer fig 7.
Test 2. Getting data over mesh network and Device cloud.
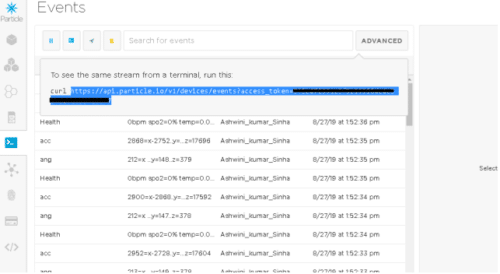
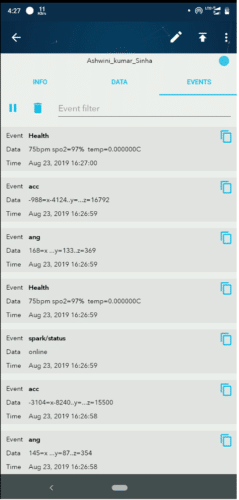
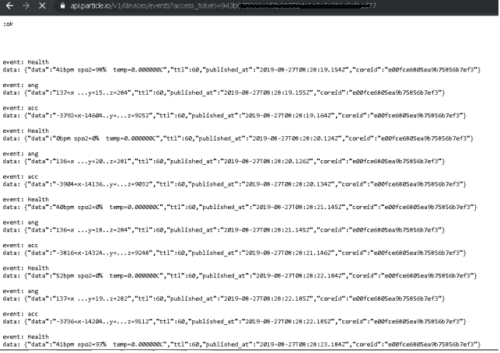
To get the data on the device cloud, open the console and copy the URL and paste it in any browser. After a few seconds, it will start showing all the sensors data with event name. This data can be accessed from anywhere over internet no matter how far you are from the device. Refer fig 8,9, 10. The live data of the sensors can also be accessed from the particle app.
If you found this IoT project useful then you may also like Top 30+ IoT Projects | IoT Project Ideas for Enthusiasts.


Why we have used particle argon in this project?
because it have mesh capability either with wifi or with device cloud. It publishes the data directly to device cloud.You can also use other device like node mcu or arduino raspberry pi. You can use same code and run on raspberry pi if you do not want to use argon. Just install the particle agent on pi. its free upto 50 RPi.
Great project! Do you know where you got the sensor libraries from?
On particle online web IDE click the library icon and search for that
Can I talk with you?? I was working on this
contact me [email protected] for more help
Its coming like unable to receive…
can you elaborate
Can i contact you through any gmail are email?
can i get the report of this project ? i was doing this project
You can create a project report using this article if need more help can contact me at [email protected]