 In these times of COVID-19, it is essential to go through thermal screening for checking one’s body temperature before entering any premises. However, it is a tiring process as it involves measuring body temperature of all people, one at a time.
At the same time, those who carry out thermal screening are required to stand for more than 8 hours a day and check each and every person. This takes a lot of time and effort.
So to come up with a solution that can do this job effortlessly, we have built a Facial Recognition Thermal Screening System. The device works by recognising the face of each person and doing thermal screening to detect the body temperature.
If a person is found to have a very high temperature, then the system will not allow entry and instead will automatically notify that person to take a COVID-19 test. If the body temperature falls between the required normal temperature range and is found to be okay, then entry is allowed after proper sanitization.
Bill of Materials

Prerequisite
Make sure that your RPi has the latest Raspbian installed. It generally comes pre-installed with Python3 but if you didn’t find it, then install the latest Python environment and IDE as well.
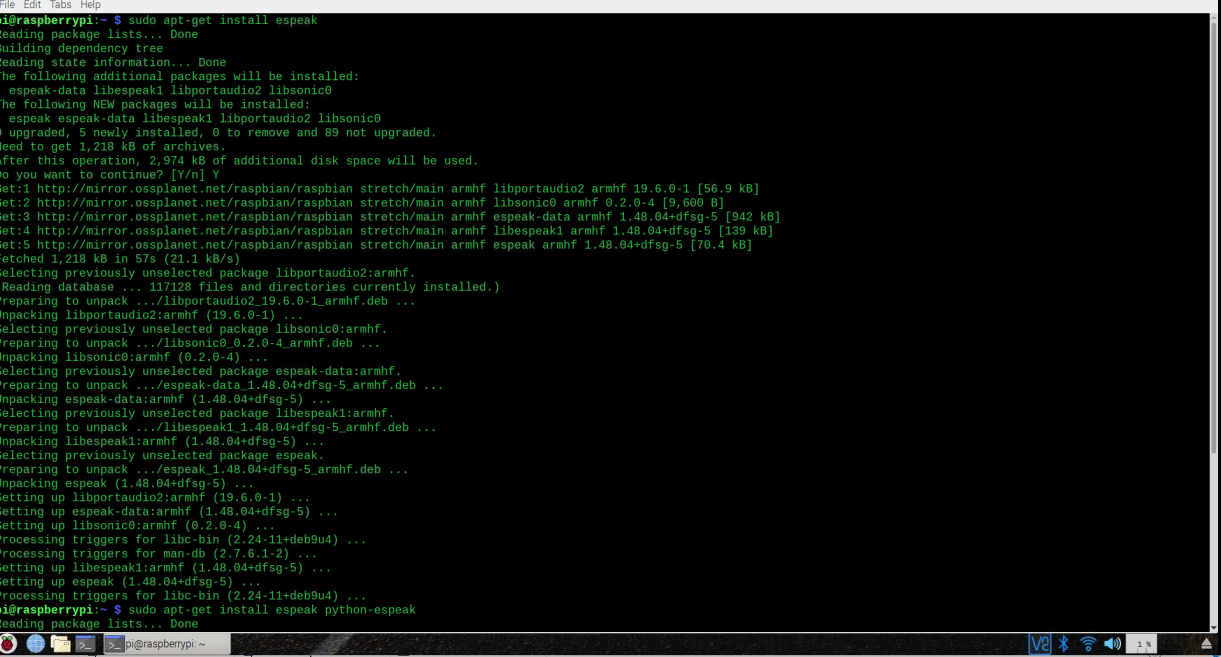
Next, open the Linux terminal and install the following libraries using the command given below (Refer Fig 1):-
sudo pip3 install face-recognition
sudo apt-get install espeak
sudo apt-get install espeak python-espeak
sudo pip3 install opencv2

Coding
After installing the libraries, open the Python IDE and start writing the code by importing the following libraries to it:-
Espeak – To Announce the temperature and detect the face of a person.
Face_recoginition – To recognise the face.
Date and time – To add the date and time of a person entering an area and later store them in the database.
Opencv – To capture the video and process it frame-by-frame for facial recognition.

Next, set the image file name of each person we want to be recognised. If we don’t have an image of the person in the database then it is considered as unknown. After that we will create an array having the list of names and images of all identified people. The name and image need to be in the same order.


After that, the video frame will be processed in the while loop, which will recognise the name of the person and then match with the respective face that was detected. If it is different then it will use the MLX90614 sensor to measure the temperature of the person. Thereafter, using espeak the name and temperature of that person will be announced.
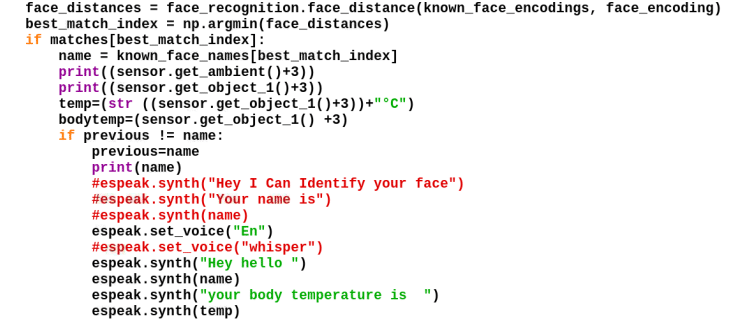
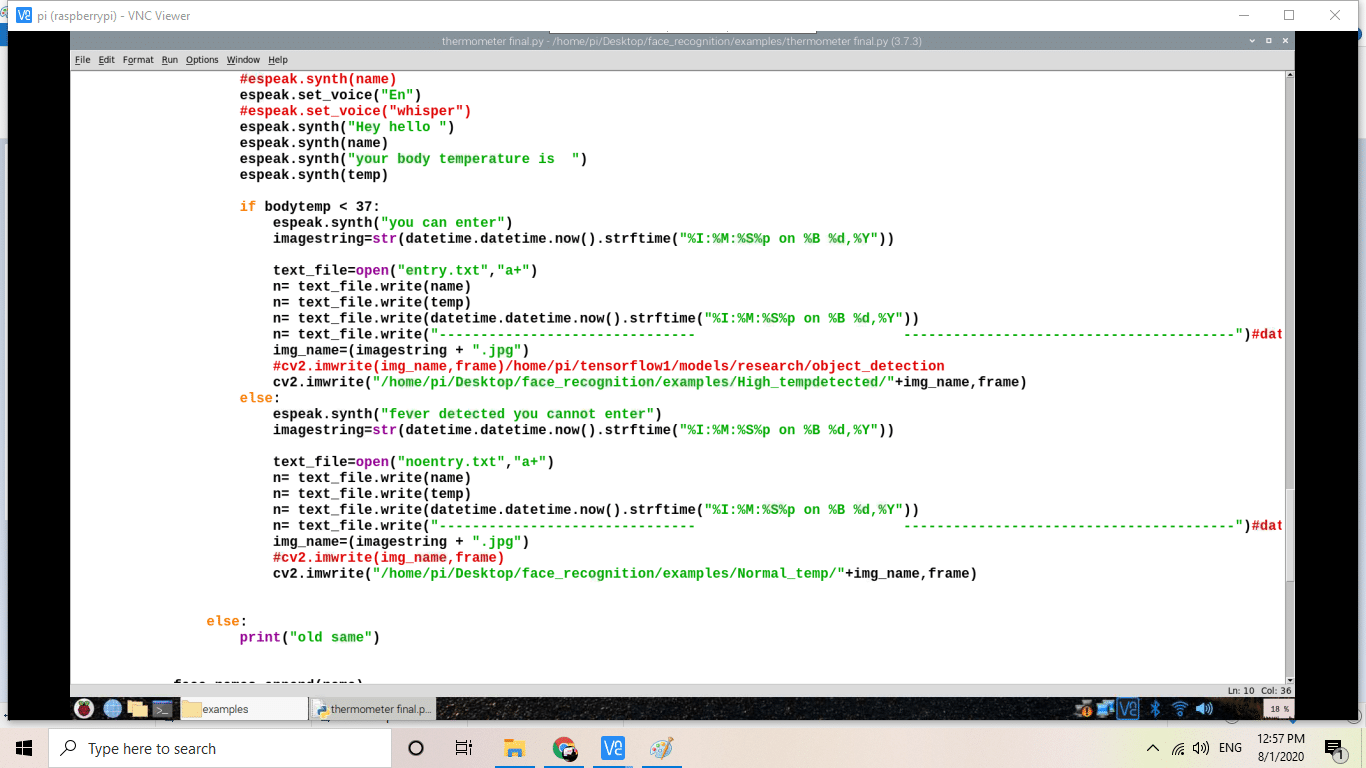
Next, the if() statements that we had written check whether the temperature is greater than 37 degrees Celsius or not. If the temperature is detected to be greater than that, then the system tells the person to not enter the area. It also captures the person’s image and temperature and saves them in a database folder with a timestamp.
If a person’s temperature is found to be below 37 degrees Celsius, then the system allows that person to enter an area after proper sanitization. The person’s image is also saved in a separate database folder, which includes name and temperature along with a timestamp.
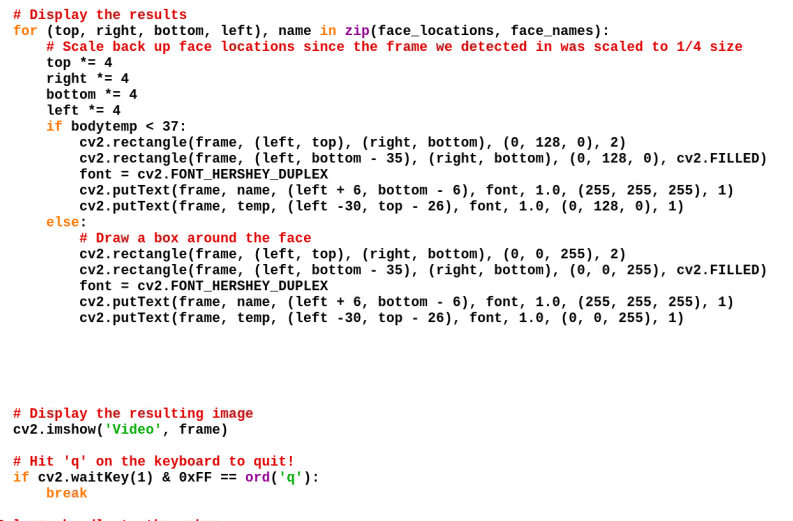
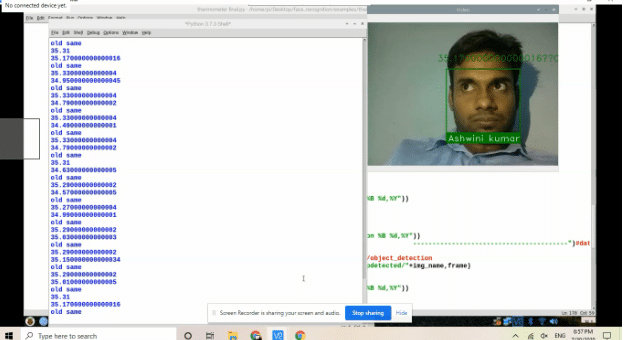
Below, we have the code that shows the image (taken from the captured video) along with the name and temperature. The outline of the rectangular frame showing your name and image will change its colour depending on the detected temperature (red = high temperature, green = low temperature).
Connection
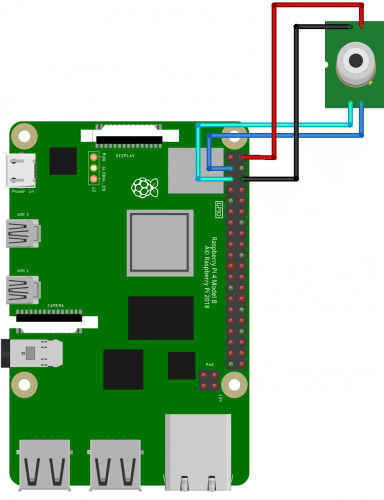
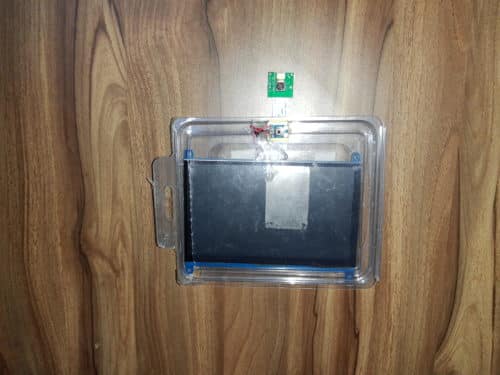
After coding, connect the MLX sensor as shown in the table below. Connect the camera, HDMI display and sensor as shown in the picture below.
| SDA | RPI SDA |
| SCL | RPI SCL |
| GND | RPI GND |
| VCC | RPI 3V |
Testing
After setup, now power the Raspberry Pi and mount the device on a wall or a door. Rerun the code and wait for a few seconds. It will show the temperature and face of the person standing at the entrance. If the person is detected to have a high temperature/fever, the device will not allow entry to that person.

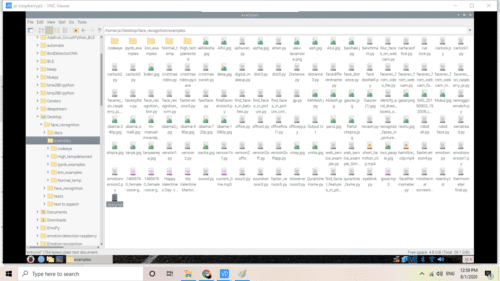
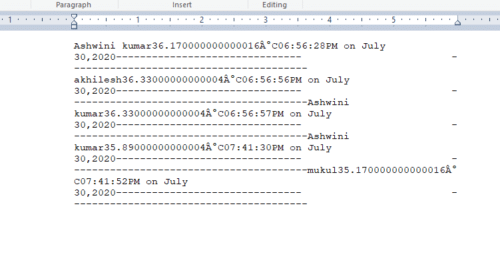
Now we will be able to check the database for information about each person going through the thermal screening process.


Sir I would like to get schematic connection/the block diagram of this project
The MLX 9061 connection is according to I2C connection Like SDA of MLX goes to SDA of Raspberry Pi
SCL goes to SCL for Pi GND for GND and Vcc to 3V pin
why do we need a HDMI display?
HDMI Display is needed so that the person can see the output and video of the recognized pic in the real time
Does the given source code contain all the codings needed to start testing this device?
yes, but you need to change the image name in code wt your image file name. Also keep your image file in the same folder where you have kept the code
Im doing this as my mini project. I really need some help. Is there any way i can contact you?
Thanks in advance
Ping me @ [email protected]
Hello sir ! I would like to have a connection diagram or schematic diagram fro this project please help me out in this !
Thanks for letting me know that part is missed. Updated with diagram check.
Thank you !
Hello sir ! I would also like to request for the source code which I’m not able to download from this website as it is displaying the “page not found”error
I have chosen this as my mini project plz do the needful
What problem are you facing can you elaborate. The code is attached at end of article we have cross-checked its downloading.
Hello ! I have selected this as my mini project so , Could you please check the problem of “page not found “while downloading the source code .
Download code from here:-https://www.electronicsforu.com/wp-contents/uploads/2020/08/code.zip
Hi, please refresh the page or temporarily turn off the antivirus from your computer. You can easily download the Source Code.
We are getting opencv2 error ,like we aren’t able to install opencv2. Could you please help us out ?
Uinstall open cv then install open cv using this sudo pip3 install opencv-python
Hi, Can we use AMG8833 thermal camera instead of MLX90614 temperature sensor ?
yes , you need to change code
Do you have the sample coding or any application that are using AMG8833? I am stuck to write the code when using the AMG Thermal camera. I dont know how to take the temperature record. tq
https://www.electronicsforu.com/forums.
Try to get any library for the AMG8833
You can now ask the community using our forums. Someone surely give solution help you out because comment reach is only limite to me but fouram question reach to all experts with make DIY and they can help you better