
BCD Stands For Binary Coded Decimal. A Watch Which Is Neither Analog Nor Digital, This Is A Binary Watch Which Shows Time In Binary Numbers.
Why Did I Make This?
I Want To Make A Watch Which Represents My Profession, So Instead Of A Simple Watch I Came With A Unique Idea. This Watch Shows Time In Binary Digits. While Studying Engineering I Have Learned About Binary Coded Decimals, So I Applied That Knowledge Here. This Unique Way Of Representing Time Is Not Easily Understood By Normal Users And Definitely It Catch Eye In Crowd.
Features of BCD Watch
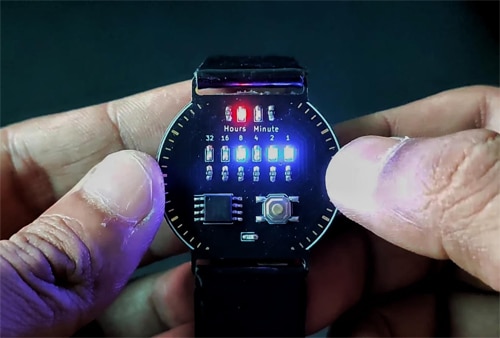
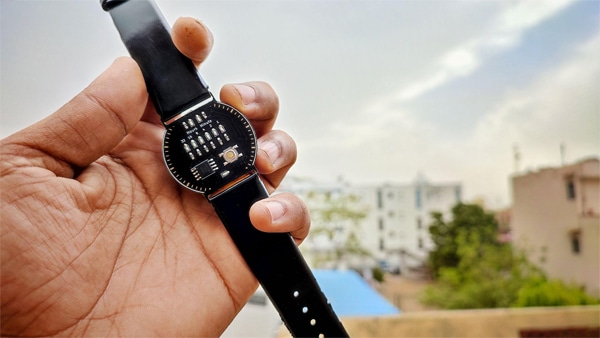
There Is A Single Button In The Watch. If The Button Is Pressed Then It Will Show Hours And Minutes In One Second Of Delay As Shown In The Image. When It Shows Hours The Red Led On The Top Will Glow And When It Shows Minutes The Minute Led On The Top Will Glow.
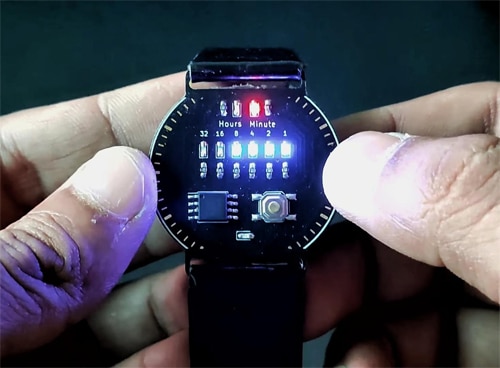
Setting Hours:
When The Button Is Pressed For 3 Sec It Will Go Into Setting Mode, Firstly The Hour Led Will Blink Means It Is In Hour Setting Mode, The Hours Can Be Increased By Pressing The Button.
Setting Minutes:
When The Button Again Pressed For 3 Sec It Will Go In Minutes Setting Mode, The Minute Led Will Start Blinking. The Minutes Can Be Increased By Pressing The Button.
Come Out From Setting Mode:
Now To Come Out From Setting Mode Long Press The Button Again For 3 Sec, After Long Pressing It Will Show Normal Hours In Minutes With One Second Of Delay As Before.
Battery Low Notification:
When The Battery Goes Below 20%, The Both Hours And Minutes Led Will Blink 3 Times After Showing Time. If Battery Is 0% It Will Not Show Time, Only The Red Led Blinks 3 Times To Indicate The User Charge Immediately.
Circuit Diagram And Working
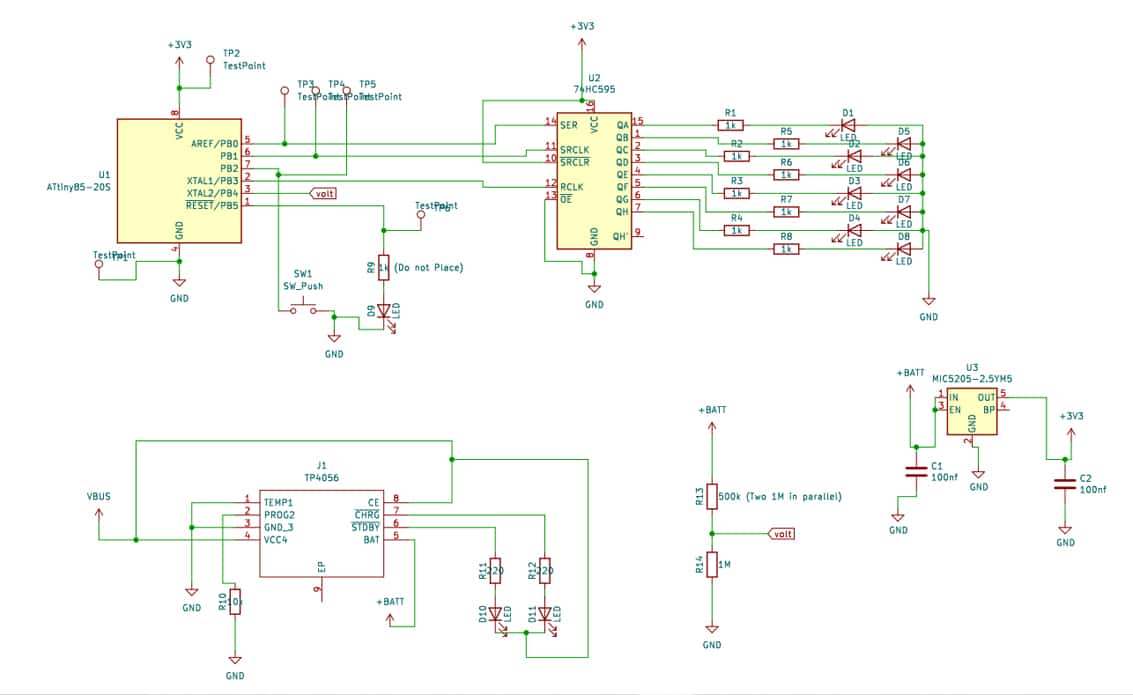
Microcontroller:
The Watch Is Very Small, So I Wanted To Choose A Small Controller With Good Flash Memory. The Attiny85 Microcontroller Is Great For This Job, This Comes With 8kb Of Flash Memory.
Expanding Pins:
The Attiny85 Has Only 5 Gpio But This Is Not Enough For Me So I Used 74hc595 Shift Register To Expand My Pins. The Single Shift Register Only Uses 3 Pins Of Microcontroller And Can Give 8 Pins As Output.
Battery Charging:
To Manage The Charging I Used A Tp4056 Ic Which Handles The Charging Current. Also, I Am Detecting The Voltage Of Battery Via Voltage Divider To Notify The User That The Battery Is Low.
PCB Design
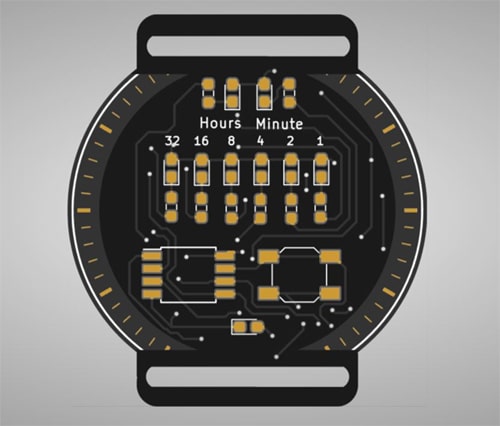
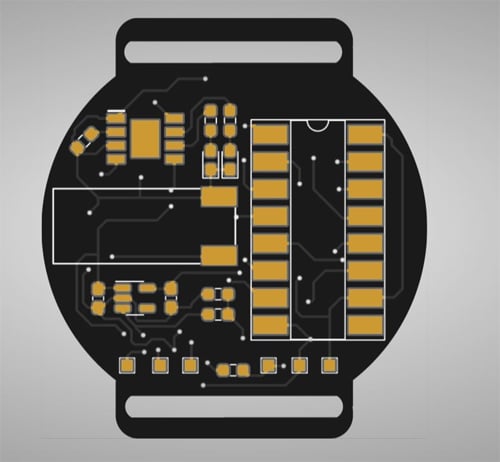
I Have Converted The Circuit In Pcb. As Shown In The Pcb Is Of Round Shape To Give A Feeling Of Watch, There Are Two Slots At Sides To Mount Watch Strap On It. I Have Ordered The Pcb From A Pcb Manufacturing Company. Instead Of Green Pcb The Black Pcb Looks Good And Suits Our Project.
Programming Using ICSP
The Arduino Ide Is Used To Program The Watch. First Of All, I Need To Install The Attiny85 Board In Arduino Uno. Open Arduino Uno Go To The Files >> Preferences And Copy The Link, Paste It In The Additional Board Manager Section, Separate Other Links By Comma “,”.

Go To The Tools >> Boards >> Board Manager, Search Attiny85 And Install Attiny85 Board.
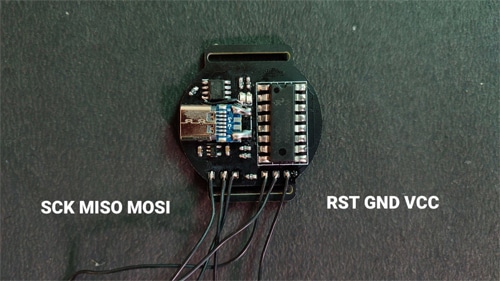
Take An Arduino Uno Upload Arduino As Isp Example In The Arduino Uno. Connect The Pins Of Arduino As Given Below.
|
Arduino Uno Pins |
Icsp Pins In Pcb |
|
3v3 |
Vcc |
|
Gnd |
Gnd |
|
13 |
SCK |
|
12 |
MISO |
|
11 |
MOSI |
|
10 |
RST |
Setting Fuse Of Attiny85 :
To Set Fuse Download The Folder From The Github Link Given Below And Extract The Folder. Github.
Find The Folder “Fuse ” And Open It. Type Cmd At Top, Where The Path Of The Folder Shows. It Opens The Command Terminal With The Path Of The Same Folder.
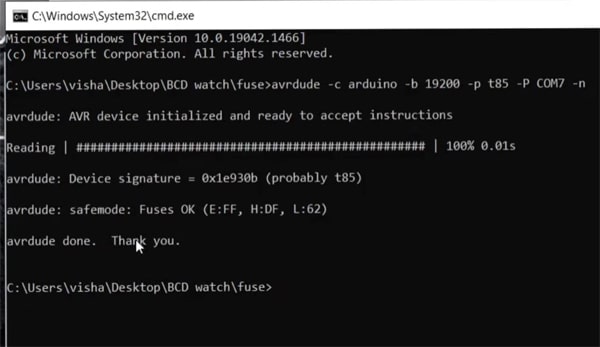
Type The Below Line In The Command Terminal To Detect The Controller, In The Command Below Change The Com Port Via Com Port In Your Pc Where Arduino Uno Is Connected, Which Can Be Seen By Device Manager. After Inserting Command If You See Fuse Ok As Shown In Image Then Controller Is Detected.
avrdude -c arduino -b 19200 -p t85 -P COM7 -n
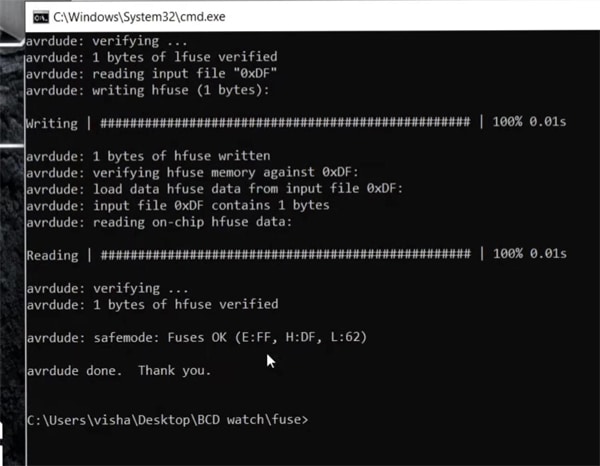
After This Command Type The Command Below To Set The Clock Frequency Of 1 Mhz To Run It On Low Power.
avrdude -c arduino -b 19200 -p t85 -P COM7 -U lfuse:w:0x62:m -U hfuse:w:0xDF:m
Programming :
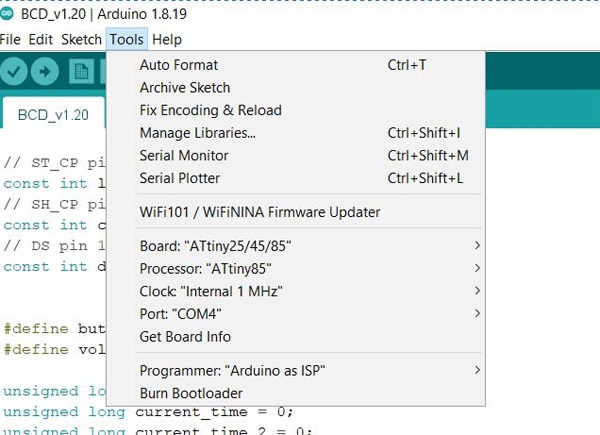
Open The Program In Arduino Ide, Given In The Folder. Click On Tools And Do The Setting As Shown In The Image. Now Go To The Sketch And Click On Upload Using The Programmer. Once You See The Program Uploaded Disconnect Board From Arduino Uno.
Battery And Strap
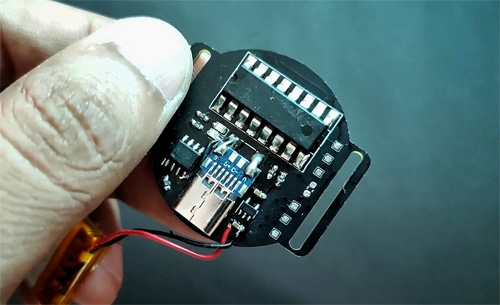
Take A Li-Po Battery And Connect It To The Input Capacitor Of Ldo. I Am Using A 300mah Battery Which Runs Around 8 Days.
Now At The Last Attached The Strap To The Pcb I Am Using An Old Watch. The Final Look Is Given In Image.
Something Need To Know
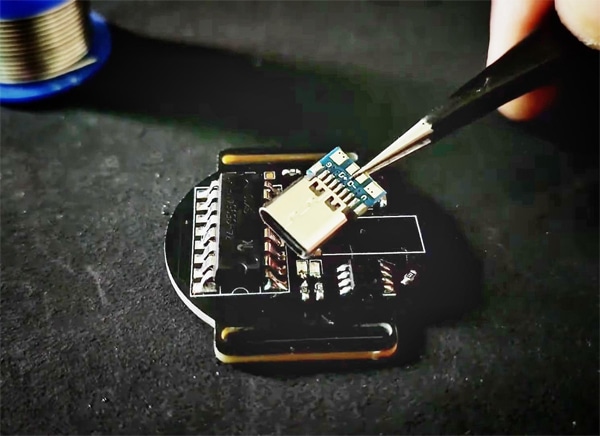
- I Used A Type C Female Socket For Charging, The Type C Pins Are Difficult To Solder For Me So I Decided To Buy A Pcb Already Soldered With A Female Type C Socket As Shown In The Image.
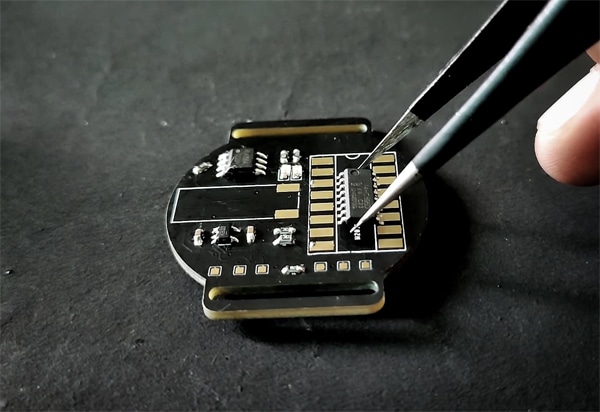
Wrong Ic Pads - I Made A Mistake While Choosing The Smd Package Of 74hc595, So The Smd 74hc595 Is Too Small To Solder So I Decided To Solder A Tht Ic By Spreading Legs, Which Works Great For Me.
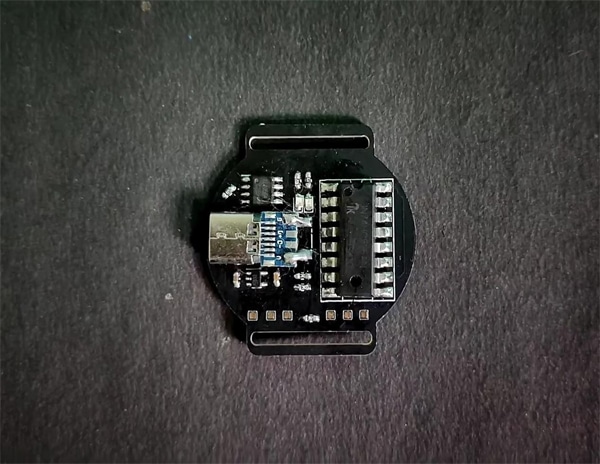
Soldering 74hc595 - In The Project I Am Calculating The Time Basis Of Millis, The Millis Is Running On Clock Frequency Of Microcontroller. The Internal Internal Clock Frequency Isn’t A Perfect Basis Of Time, So That’s Why The Rtc Module Is Perfect For Time Based Projects. So This Watch Has A Time Difference Of +- 2 Minutes In 24 Hours.
So We Have Built A Bcd Watch And Learned A Lot, Like Setting Fuse Bits, Icsp Programming, Shift Registers Etc. I Hope The Articles Are Enjoyable. Now You Can Rock In You Friend Circle With This Cool Looking Bcd Watch.
Vishal Soni is an Electronics Engineer


very interesting project… its also admirable how fit all this in an old watch.
> I Have Ordered The Pcb From A Pcb Manufacturing Company.
Can you mention where you got the PCB done from ?