The $35 Raspberry Pi is a credit-card-size computer developed with the intention of promoting computer science. It is a pleasant exodus from the monotonous computing world. Here is how you can get your Raspberry Pi up and running.
Most computer science students get to learn high-level programming languages and application development but they don’t really understand computers. The fun of controlling the real world with a real computer is never exposed to them.
A normal computer lacks the capability to communicate with the real world through real interfaces.
With a normal computer that has a monitor, keyboard, mouse, printer and modem connected, hardly anything can be done, except the intended use. Of course, the printer port on a PC can be used to interface with the real world but that will be very clumsy and cumbersome—not to talk of the non-availability of an easy programming environment for that.
The Raspberry Pi is a pleasant exodus from that monotonous computing world. You can hold this palm-size computer in your hand and at the same time interface with the real world with its 26 input/output (I/O) pins. With a Raspberry Pi in hand, robotics is no more a fancy imaginary world of big and serious people but a real and authentic one.
You can get this computer for a small amount of money. In the UK, the Raspberry Pi Model-A costs $25, while the price of Model-B is $35, plus local taxes and shipping/handling fees. In India, at many hobby outlets, it is available for only ₹ 2600. In fact, the latest B Model with 512MB RAM is no less than a Celeron computer of yesteryear, yet with a whole lot of imagination and possibilities to tap.
Model-A and Model-B
The first model of Raspberry Pi that appeared was Model-A, which had only one USB port and no Ethernet socket. Later, Model-B came into market with two USB ports, Ethernet socket and 256MB RAM. The latest one has as much as 512MB RAM. It is built around a BCM2835 Broadcom processor. It consumes 5V electricity at 1A current. As power consumption is less, there is no heat dissipation and no clumsy heat-sink is required. The operating system is based on the light-weight ARMv6 instruction set that a typical Broadcom processor understands—all open source and based on Linux variety.
Wiring it up
Connect the peripherals as shown in Fig. 1.
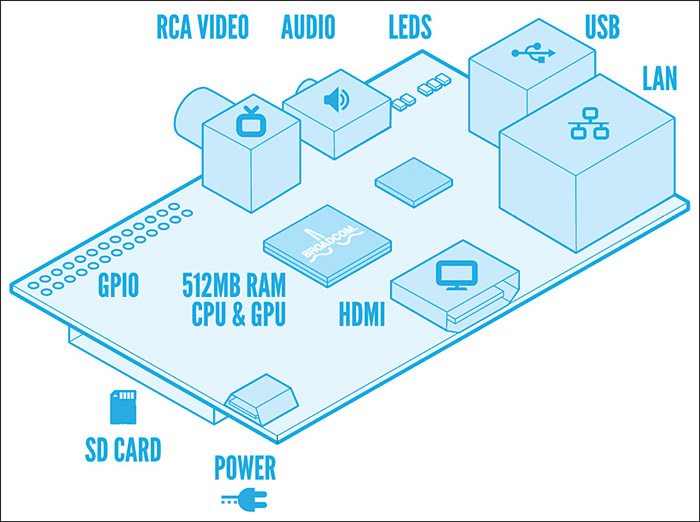
Video cable connection
Unfortunately, the normal PC monitor—a VGA monitor—does not support connectivity with Raspberry Pi. The Raspberry Pi team, in fact, has thought beyond this and provided the latest and oldest connectivity for video.

The VGA technology is old and the last of its kind. It is fast being replaced with DVI or HDMI. However, almost every TV—old or new—has an audio/video input socket at its back for connectivity with a VCP, VCR, gaming console, etc. Connect one end of an AV cable to this TV video input port and the other end to the yellow ‘TV video output’ on Raspberry Pi. The monitor is ready now. There is also a display serial interface (DSI) output for connecting to a flat-panel display or tablet. The latest TVs (plasma, LCD and LED TVs) have an HDMI input slot at their back. Just insert an HDMI cable at both ends and your audio and video problems are solved as the HDMI cable can carry both audio and video. Also, Raspberry Pi can produce full-resolution HD pictures at 1920×1080 on the latest HDTV set.
However, for connecting it with a DVI monitor, just use one HDMI-to-DVI plug (available very cheap at electrical and computer stores).
Audio cable connections
In case you are using a TV, the same TV can be used as audio amplifier for the weak audio signal from the Raspberry board. Get another pair of audio/video cord, whose one end goes into the left and right audio input socket at the TV end and the other ends meet the Raspberry Pi board with a stereo pin jack. So you are all set with the cable connections.
Keyboard and mouse
The computer market is replete with USB devices, so finding a USB keyboard and USB mouse is just a child’s play. Connect them to the two USB ports of Raspberry Pi. No order is required, just use any USB port for any device. For connecting additional USB devices, you will need a USB-powered hub. This kind of hub has a separate power supply of its own.
Power supply
The Raspberry requires 5 volts and 1 ampere but it works fine at 5 volts, 0.7 ampere. You can even run it well on four dry pencil cells (4×1.5 = 6 volts). But more than 6 volts may damage the Raspberry Pi beyond repair.
The supply goes to the board through a micro USB power connector that normally comes with a smartphone charger from companies like Samsung and LG. However, if you are a Nokia user, don’t worry. Go to the local mobile store and get the adaptor shown in Fig. 3.
That’s in fact good, as the chances of damaging the onboard power socket are minimised. Besides, you can power the Raspberry Pi from most of the mobile chargers as majority are 5V, but do check the voltage rating before connecting them. Take caution, never try to power a Raspberry Pi board from another USB port of a computer as this will result in malfunction of the board.
Storage device
Now you are ready with all the basic peripherals for the Raspberry Pi, except the storage device. For storage, Raspberry Pi uses ordinary SD cards. These days SD cards come very cheap. If you have a microSD card, just get a micro-to-SD adaptor (from a mobile store or computer store) and insert the microSD card into the adaptor and you are done. A 2GB card is fine, but 4GB is recommended. However, you can buy as large as 32GB SD card for the Raspberry Pi board.
Setting up the board with an operating system
Preparing the SD card
The first interesting task is to prepare the SD card for a Raspberry operating system. What you need here is a computer with a good Internet connection. A 256kbps or 512kbps broadband connection is just fine.
Download the image of the operating system from ‘https://www.raspberrypi.org/downloads’ You can download any of the below-mentioned images to get started:
1. Raspian ‘wheezy’
2. Soft-float Debian ‘wheezy’
3. Archlinux ARM
4. RISC OS
After downloading the zip file, extract the image in a suitable folder. Insert the 2GB or 4GB SD card in a card reader and connect it to the computer where you have downloaded the image. At this stage, before moving further, determine what identity is given to the SD card by your computer—sda, sdb, sdc etc. Any mistake here will lead to complete data loss from your computer’s hard disk.
Linux user. Just after inserting the card, issue below-mentioned command at the terminal prompt to see what name has been given to the card (look for the highest order like sdc and sdd):
‘ls /dev/sd*’
The result will be something like:
efy@Acer-AOD255E:~$ ls /dev/sd*
/dev/sda /dev/sda2 /dev/sda4 /dev/
sda6
/dev/sda1 /dev/sda3 /dev/sda5 /dev/
sda7 /dev/sdb1 /dev/sdb2 /dev/sdc
SD card has been identified as ‘/dev/sdc’ in the case mentioned above.
To double-ensure, just unplug and re-plug the card a few times and notice the changes. Now use ‘cd’ command and go to the folder where you have extracted the image: ‘Desktop/Raspberry-PI/OS’ is the directory where we extracted the image.
cd Desktop/Raspberry-PI/OS
This image file now needs to be written on the SD card to make it the OS. At the terminal prompt, issue the following command:
sudo dd if=2012-09-18-wheezy-
raspbian.img of=/dev/sdc bs=4M
Where 2012-09-18-wheezy-raspian.img is the name of the image. /dev/sdc is the memory card where we want to put this image.
(When it prompts for ‘su’ password, supply the password.)
This will use ‘dd’—the powerful image creator program of Linux—and transfer the image to the SD card. Other than wheezy, archlinux will also get installed the same way. However, for xbmc, the Internet connection is required while transferring the image onto the SD card.
Windows user. Use ‘image write’ program downloaded from ‘https://launchpad.net/win32-imager-writer.’ Run the .exe file. You will see a window as shown in Fig. 4. Browse to locate the path of the image file. Take care that you select the right device, otherwise it may format your hard drive.
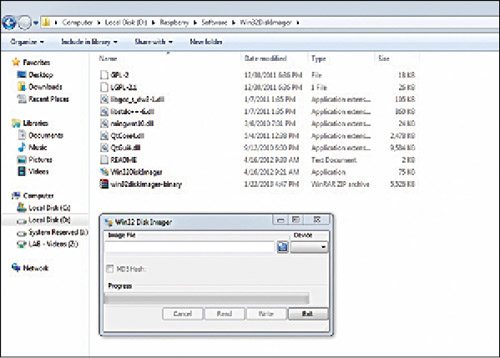

Once the write is successful, you can immediately put the SD card in your Raspberry Pi and boot it for the first time.
First boot. Insert the SD card on the back side of the Raspberry board, connect the cables, keyboard, mouse and power supply. A login prompt appears after a handful of lines.
The default login is “Username: pi, Password: raspberry.”
By default, Raspberry Pi does not start the GUI mode. So type ‘startx’ at the prompt and the beautiful GNOME desktop unfurls on the monitor screen. A TV screen output certainly lacks clarity but on an HD TV it is very good. Generally, the display works for most of the TVs and the HDMI displays but occasionally it goes awry and the picture becomes snow-like—very large or very small. For that you need to change the resolution setting of the displays.
Space and time. Play with icons on the desktop. Right-click, left-click, explore the Raspberry Pi your way. Go to a terminal window and change the date by the following command:
pi@raspberrypi:
/$ sudo date –
set=’2013-02-02
23:30’
This is necessary as some of the programs will not install if the date is not correct.
Raspberry team has not included a real-time clock on board to keep the cost within limit. Therefore every time it reboots, the time changes back.
Raspi-config. To do the basic first-boot configurations, open ‘LXTerminal’ and type ‘sudo raspi-config.’ You will see ‘raspi-config’ utility. This utility also appears when you boot the system for the first time.
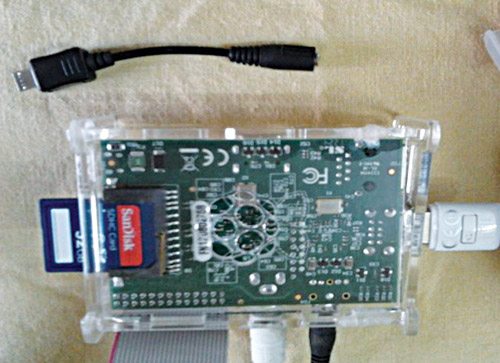
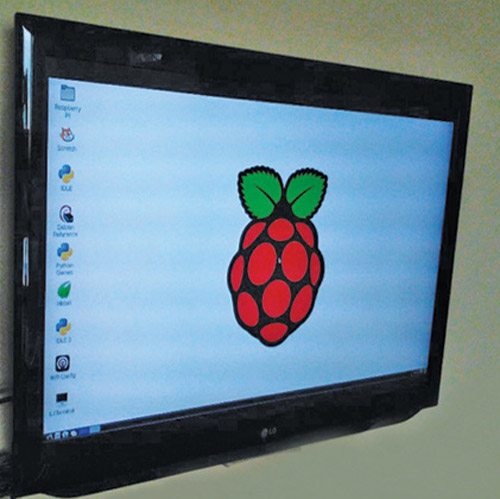
Following are the Raspberry Pi configurations:
expand-rootfs. This option expands the root file system to fill the SD card. Bring the cursor on it and then press ‘Enter.’ Don’t worry, the Raspberry Pi will not fill up the entire disk; it only will mark its territory up to the edge of 32 GB or 4 GB.

Overscan. Change/trim the display portion. In case you see the display centered at the middle, select this option.
Overclock. The default speed of Raspberry Pi is 700 MHz. You can increase the clock frequency up to 1 GHz but that’s really an expert’s job. For the time being, leave that option.
Ssh. This enables or disables ‘ssh’ server. Bring the cursor above it and then press ‘Enter.’ It will start ‘ssh’ server, which by default is ‘off.’ ‘ssh’ server will help Raspberry Pi get connected over a network and run it headless.
Every time you make any changes here, you have to reboot the computer for the changes to take effect. This time, before reboot, open the SD card, put it into the card reader and dump some MP3 and video files (mpg, swf, avi) into it. Restore it back to Raspberry Pi and restart for the next stage of setup.
Convert your old TV into a music box
Connect the Raspberry Pi to the network router using Ethernet cable. You will immediately see network LEDs flickering. For most of the routers you do not need any configuration other than your router, which should be configured for DHCP.
Once the network is set up and the Internet is available, it is just a child’s play now. First, update Raspberry Pi.
‘sudo apt-get update’ updates the available packages of Raspberry Pi.
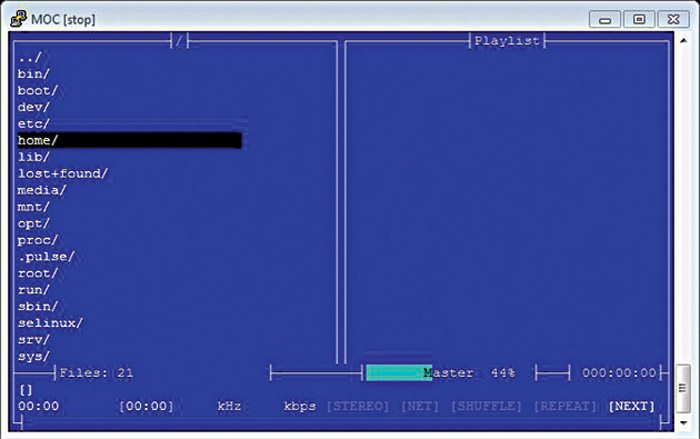
‘mocp’ is a beautiful console music player for Linux. By default, it is already installed on Raspberry Pi. In case it is not there, install it by using:
sudo apt-get install moc
The above command will check all the dependencies and install ‘moc.’
Install all the other associated programs by:
sudo apt-get install mpd alsa-util
amixer
In the terminal window, write ‘mocp’ and press ‘Enter.’ The moc player will jump into the play mode now. Select the MP3 file using the arrow keys and press ‘Enter.’ The song will start playing from the TV speakers now. Try to control volume by ‘mpd set 80,’ which will increase the volume by 80 per cent.
However, to run all kinds of media files, install vlc player by:
sudo apt-get install vlc
The author is a mechanical engineer and presently works as additional general manager at NTPC Limited


