Model rocketry is an interesting hobby. To have a safe and predictable flight, rocketeers must have keen interest and some experience in the field. Lack of insight into the underlying technology reflects badly on them. Here is a simple guide to DIY model rocket.
Model rocket launch system
Every model rocket flight begins with a single event; an igniter is electrically initiated, which, in turn, ignites the black powder or composite propellant. To have a guaranteed flight, the rocket must be held in position before launch and guided during the first fraction of a second of flight until it is going fast enough for its fins to keep it flying in the proper direction.
The second function is to provide adequate electrical current to cause engine ignition. So the launch system for a model rocket is designed to do two important jobs. The first job, handled by the launchpad, is to hold the rocket before and during launch, and the second job, cared by the launch controller, is to ignite the rocket engine/motor.
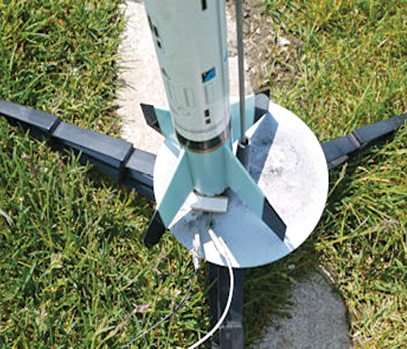
The launchpad is usually designed to aim the rocket straight up, and is adjustable so that the model rocket can be aimed either vertically or within 30° to any side of vertical to correct for wind conditions. A small tube, called launch lug, on the model rocket fits over the launch rod to keep the rocket straight on the rod. By the time the model rocket’s launch lug leaves the launch rod, the rocket is already going fast enough for its fins to provide adequate guidance to keep it moving in the desired direction.
The igniter, held firmly in place with an igniter plug, is placed with its bend all the way to the bottom of the nozzle and firmly in contact with the propellant. Electrical current delivered by the launch controller is adequate to heat the igniter, which causes the propellant to ignite. The thermoplastic coating on the end of the igniter helps protect against igniter shorting out against itself, which could result in inadequate heat reaching the propellant to produce ignition. Coating on the igniter also burns when the igniter is heated, producing additional heat for rapid rocket engine ignition.
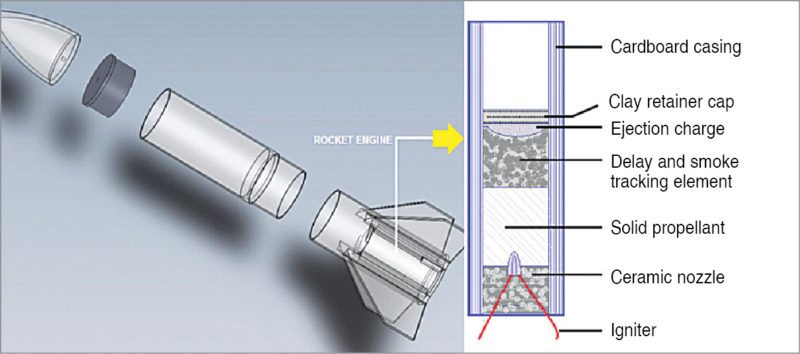
Most model rockets are reusable. But, the rocket engine (also known as rocket motor) is a non-reusable device, hence a new engine is needed for each rocket flight.
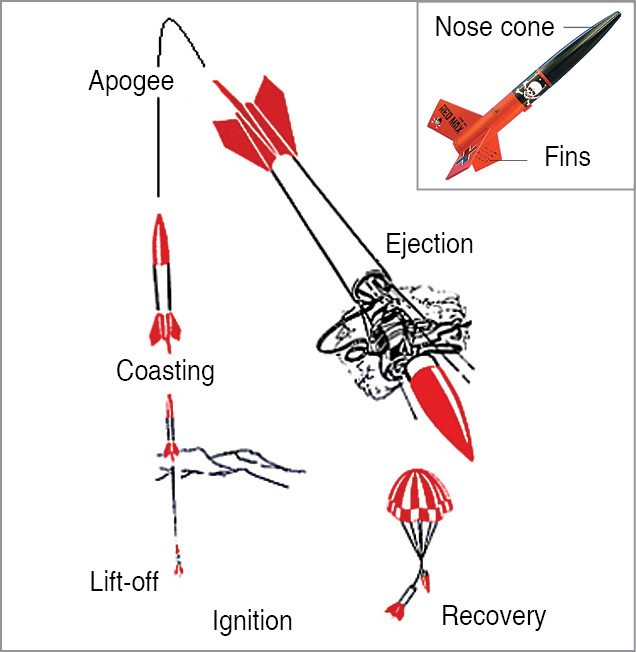
In a typical model rocket (with a strong cardboard tube as airframe), the nose cone guides the airflow around the rocket and the fins keep the rocket travelling straight. The recovery system, located inside the airframe, is used to get the rocket back safely and intact for repeated use.
After ignition, the flight starts from the launch pad (lift-off). When the powered flight ends, delay charge allows altitude gain (coasting). At the peak of the fight, the rocket arcs over (apogee) and charge pressurised inside the rocket pushes the recovery system out (ejection). Finally, the refurbishing process comes into play to fly again (recovery).
Model rocket igniter
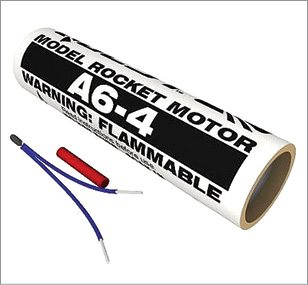
The electrical igniter used in launching the model rocket provides enough heat to cause the temperature of the propellant to reach the desired level. When enough electric current flows through the igniter, adequate heat is available for rapid ignition of the propellant. The special insulator-igniter coating burns when it reaches a high temperature, producing extra heat for extremely rapid engine ignition.
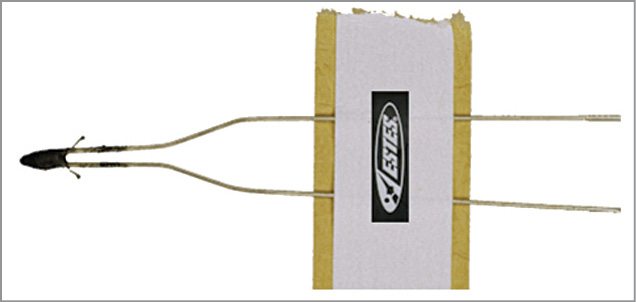
The tip of the igniter consists of a very thin wire coated with a suitable chemical compound that heats up, for example, pyrogen. The thin wire (also known as bridge wire) heats up when sufficient electricity flows through it, which causes the pyrogen to combust. This initiates the burning of the solid rocket engine propellant.
Note that, model rocket ignition calls for as little as 50mA to as much as 50A, depending on the igniter.
Model rocket launch controller
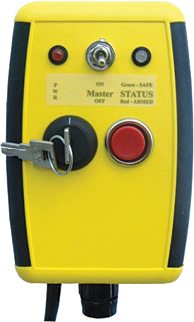
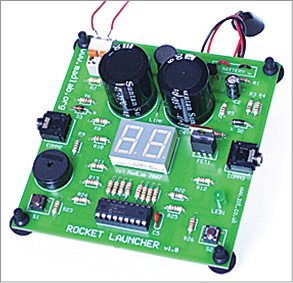
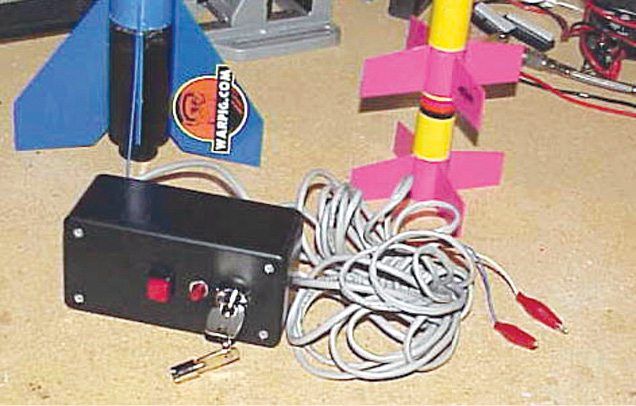
A launch controller is designed to do one thing—ignite the rocket engine, that is, to supply enough power to the igniter to fire the rocket engine. However, a launch controller should have some safety features like accidental ignition protection, igniter continuity indication, efficient energy-delivery mechanism and so on. Fig. 6 reveals that the launch controller circuitry is very simple.
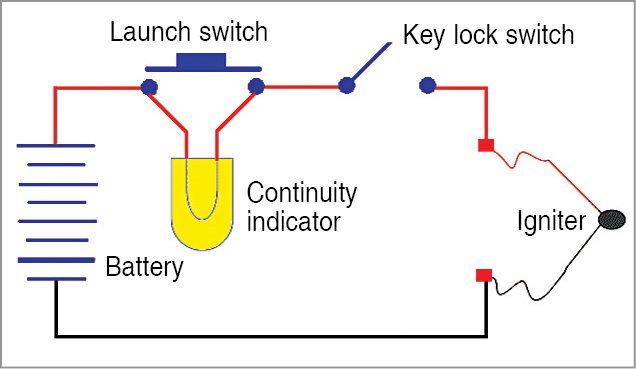
When the security key is removed from the key lock switch (arm switch), DC supply from the battery is not available to the igniter and the continuity indicator, so nothing happens. When the security key is in place, DC supply is fed to the continuity indicator through the key lock switch and the igniter.
If the igniter is connected (and in good condition), the continuity indicator illuminates. When the security key is in place, the igniter is good, and the launch switch is pressed, DC supply is extended to the igniter through the launch switch. This allows electric current to pass through the igniter to heat it up and start the rocket. Note that, because of the tricky wiring method (key lock switch in series with launch switch), ignition cannot take place just by pressing the launch switch alone.
Usually, the key lock switch is a metal peg with a tiny rubber ring. To prevent an accidental launch, the security key must be inserted into the key lock switch and held down while pressing the launch switch. The key automatically pops out when the user releases the applied pressure.
Try it yourself
Today’s model rocket launch systems provide safe and reliable means of launching model rockets from a distance. Although single-pad launch systems are very common, you can opt for multi-pad launch systems for flying many model rockets in a rapid sequence.
For do-it-yourself (DIY) hobbyists, it is easy to build their own simple (or feature-packed) model rocket launch controllers with the help of tried-and-tested circuits/DIY kits available elsewhere on the Internet. Readymade model rocket launch controller kits are also available.
Since rocket engine igniters consume many amps of current to ignite, powerful batteries and connection cables are crucial for ensuring total safety and reliablity. So always keep an eye on accessories like battery, cables and connectors you select for your model rocket launch system.
About 90 per cent of launch failures can be avoided by following these simple rules:
1. Always work with the recommended battery/power supply
2. Use sufficiently-thick wires/cables for interconnections between the battery, launch controller and igniter
3. Choose high-quality igniter alligator clips (igniter is usually connected to the launch controller using alligator clips)
4. If necessary, clean battery terminals and alligator clips before each flight
[stextbox id=”warning” caption=”Warning!”]While igniters for model rockets are quite safe, it is still a good idea to reduce any possibility of unexpected voltage potentials and stray currents through igniters. This is especially important during connection of igniters when you are physically close to the rockets.[/stextbox]
Do you like this article? You may also like other aerospace articles
T.K. Hareendran is an electronics hobbyist, freelance technical writer and circuit designer


