Every design out there started off on a piece of paper. The glasses you might be wearing, the watch you do not use to tell the time anymore, the lampshade under which you are probably reading this article, everything. Even with the advent of design software, that first step has still retained its position. But you still need a way to bring that design out into the real world.
Designers today have a whole range of software to choose from to fulfil their every need, but they pay exorbitant amounts to purchase the licences enabling them to take advantage of the latest in the field, going well beyond conventional design. We would like to introduce you to an offering that shows how to get started with the same business, but without all the heavy machinery. Your first lesson, we feel, should not be designing the electrical framework for Rio Maracena, but something as fundamental as just lighting a bulb from kilometres away.
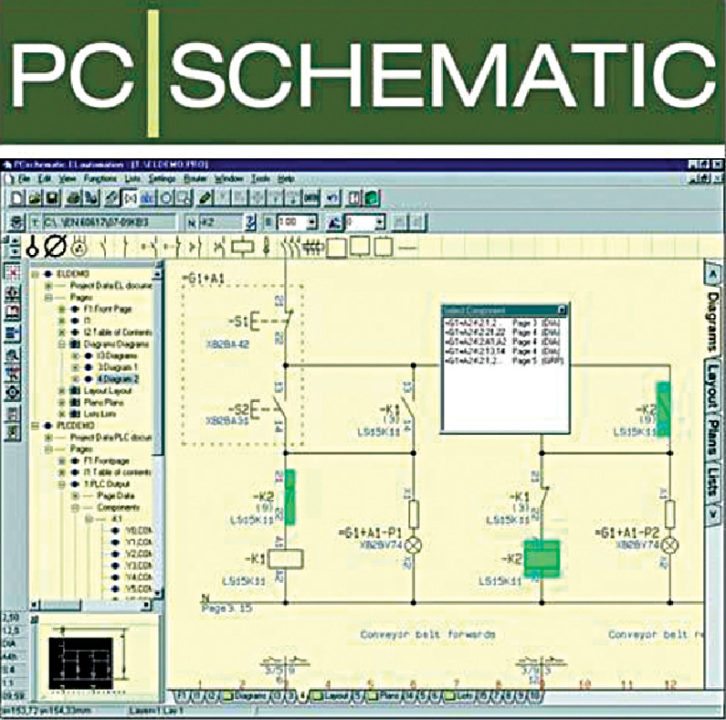
In this article, we will be taking a look at the electrical design tool Automation, the electrical CAD offering from PCSCHEMATIC. It is a free, advanced electrical CAD software for automation, installation, pneumatics as well as hydraulics. Not only is it easy on resources and complexity, it lets you maintain an overview of your designs while keeping the drawing part of the design simple.

Making the start easy

Automation is pretty easy to use, with an interface that follows the same philosophy. With a bunch of get-started videos on YouTube, and an extensive collection of articles to help you navigate the nook and crannies of this software, the problem of starting would not really be an issue.
The process of electrical system design
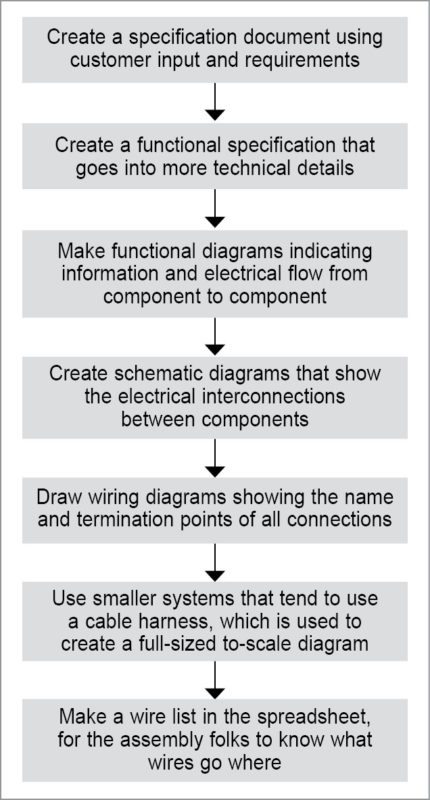
The process can be divided into seven steps, which would encompass most medium to large electrical systems. We start with a specification document, which is the specification and expectation list from the customer. A well-written document can mean that the same can be used through the entire cycle of design.
You can then create a functional specification document that goes into the more technical details of the project. This document is the basis for decisions made in this design.
Next, draw functional diagrams to indicate the next level of information; in this case, information and electrical power flow from one component to the other.

At this stage, employ schematic diagrams showing the interconnections between components, their job being to show a cursory hi-level look of the circuitry.
After this, draw wiring diagrams that show and name the termination points of each conductor. Some systems that are smaller in size can opt for a cable harness.
Last, prepare a wire list in spreadsheet or list format. This is mostly for the people performing the final assembly, so they know exactly which part goes where.
How Automation helps with design
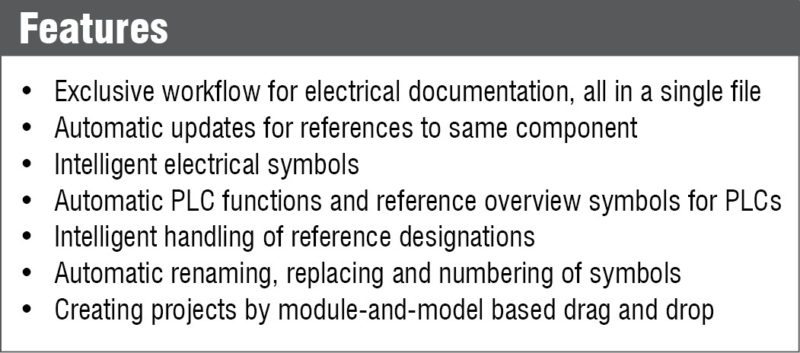
Most of the features of Automation are extremely helpful for first timers. It lets you create databases for your components. As an added benefit, many component manufacturers have created their own free electrical CAD component databases for the software. Not only are these databases full of names, descriptions and the like, these also contain electrical and mechanical symbols for individual components, thereby making it easier to generate lists.
Automation lets you implement module-and-model based drag and draw. So you can now create sub-assemblies that can be dragged into place among the bigger-level assemblies. Just this can create long documents of thousands of pages of design data created easily. More importantly, you can see the design from a larger perspective to see how everything fits into the bigger picture.
The huge team behind the software works on updates that are released every year, so you can work and comply with the latest industry standards.
Download latest version of the PCSCHEMATIC software.
Ashwin Gopinath, an engineer, is a freelance writer for EFY


Please send me as stated free pc schematic package THANK YOU.
Hi John
Please download here: http://www.pcschematic.com/en/download-menu/automation/download-free-electrical-cad-software.htm