 Normally, we keep the photographs we take in a photo album to view or show to our friends or family later. This Arduino album can display those digital photographs one by one, sequentially, on TFT LCD colour display. The digital photographs are read from the SD card containing the photographs by Arduino and then displayed on a colour TFT LCD screen.
This Arduino album project is simple as it uses mainly an Arduino Uno board and an Arduino touch LCD shield only. The photographs to be displayed are converted to 240×320-pixel size with 24-bit colour format in BMP (bitmap) files using Microsoft Paint (or similar) software and stored on a micro SD card that is normally used for cell phones.
The Arduino Uno is a widely used microcontroller board based on Atmega328P microprocessor that is used in Arduino family boards. It has 14 digital input/output pins of which six can be used as PWM outputs and six as analogue inputs, and a USB port with 16MHz quartz crystal.
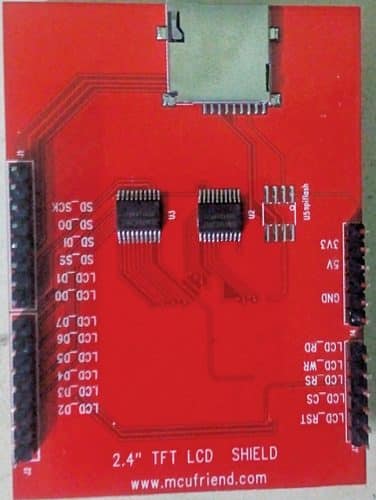
The Arduino touch LCD shield works on ILI9341 chip and has a built-in microSD card. The shield’s LCD display is sufficiently big (6cm, diagonally), bright (with four white-LED backlight), and colourful (18-bit having 262144 different shades). It has good resolution of 240×320 pixels with individual pixel control, 8-bit digital interface, plus four control lines with reset pin. The SD card has four more control pins. All the pin connections are directly compatible with Arduino Uno board, which eliminates wiring and new PCB requirement. It uses 3.3V power supply and supports both 3.3V or 5V logic levels.
Initial setup
Open the ArduinoAlbum.ino code in Arduino IDE and change the following definition values as per your requirement:
#define MAX_FILES 20
#define DISP_DELAY 500
Here MAX_FILES is the maximum number of files to be stored in the SD card and to be displayed sequentially, and DISP_DELAY is the delay (or time gap) in milliseconds for displaying each photograph.
#define ShowFileName 1
It is used to control the display of file name before showing the BMP file.
Where 0 is to hide and 1 is to show file name before showing the actual picture.
Compile and upload the code to Arduino Uno board and disconnect the USB cable.
Next, copy the required photographs (in 240×320 pixel size and 24-bit colour) in .bmp files to microSD card from your computer using SD card reader.
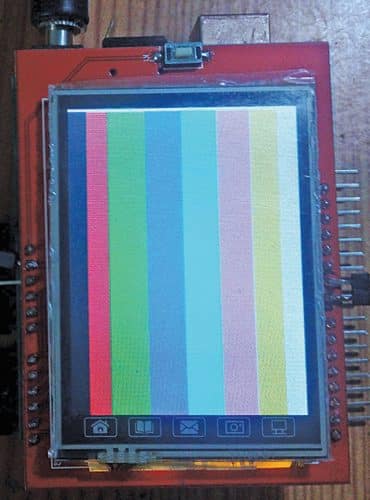
A sample Testptn.bmp test pattern file is included in this project to test all the basic colours on the display, as shown in Fig. 1.

Now disconnect the SD card reader from the computer and take out the microSD from card reader. Insert the microSD into the microSD card slot in Arduino LCD shield, as shown in Fig. 2.

Properly position the Arduino LCD shield on the Arduino Uno board, matching the 5V, 3.3V, and GND pins. Connect a 9V DC power supply to the Arduino Uno board.
The display will show a welcome message and then check the SD card to show the status.
Once the root folder is read from the SD card, the list of files stored in the SD card will be displayed on the LCD screen. Thereafter the photographs will be displayed sequentially.
(Note. The original BMP file supports colours up to 24-bit resolution, whereas LCD shield supports colours up to 18-bit resolution. So, display output may have slight mismatch with colours of original BMP file.)
Construction and testing
As all the pins of Arduino LCD shield match with those of Arduino Uno board, connections diagram is not required.
The prototype was tested successfully in EFY Lab with 8GB microSD card and 8V to 9V DC power supply connected to Arduino Uno board through DC jack.
Download Source Code: click here
Fayaz Hassan is a manager at Visakhapatnam Steel Plant, Visakhapatnam, Andhra Pradesh. His interest includes MCU projects, mechatronics and robotics


