 Humidity is very important in many works like in labs, storage rooms, or in the greenhouse and indoor plantation and we need to maintain the humidity level within a certain range.
In such a case, we need a special intelligent humidifier that maintains the humidity of the greenhouse, indoor plantation, or in labs at a specific range. Too high humidity and too low humidity both cause a problem.
So today we will design a special system that helps in maintaining the humidity in our desired range. So let’s start our project with a collection of the following components.

Bill of Material

DIY Portable Humidifier – Code
First, we need to prepare the code that continuously checks the humidity of the greenhouse or labs or places where we need to maintain the humidity and temperature and then maintain the humidity based on those humidity data.
So here we are using the HTS221 from STMicroelectronics for humidity sensing and then we use the ultrasonic humidifier to convert the water droplets to humidity and release them in place to humidity.
Here we need to install the HTS221 library so we will able to interface the sensor.
So open ARDUINO IDE and then open library manager and search HTS221 and install the library.
Now we also need to prepare the ARDUINO IDE to program the ESP8266 board. You can check this article for step-by-step instructions
Now in code first we import the library then we create the setup function with baud-rate so we can read the humidity data of the sensor if we want.
Then we need to begin the I2C interface with the HTS7221.
Next, we set the pin mode of the ESP output for which we control the humidifier.
Now we create the loop function where we will check the temperature and humidity data from the sensor every second.
Then we set the hold range for humidity under which we want to maintain the humidity. Here for the greenhouse, the humidity level should be around 50 to 80; so we create the if condition and then if the humidity goes below 8o, then the ESP set-pin for humidity is set to HIGH so the humidifier turns-On and humidify the place to maintain the humidity, and once achieved, it automatically turns off.
Now we connect the ESP to the programmer board or to FTDI, then connect GPIO 0 to GND to put ESP in programming mode, then we select the right port and board and upload the code.
Download Code
Automatic Portable Humidifier – Circuit Connection

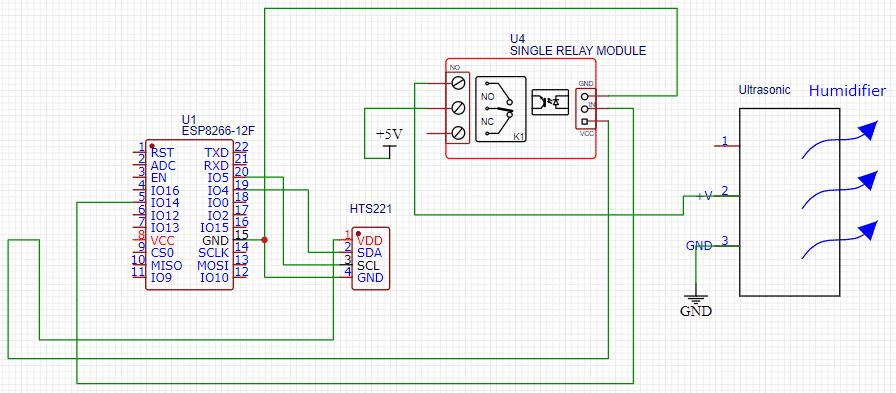
Next, we connect the ultrasonic humidifier and sensor as shown in the circuit diagram. Then we need to place the ultrasonic humidifier module on the water as in the pic below (Refer to Fig 3,4).
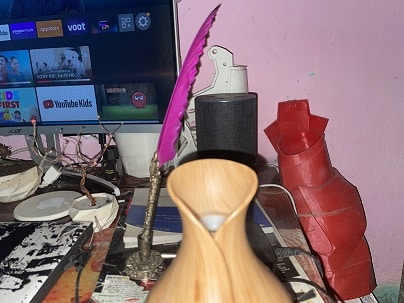
NOTE:- You can also use a fancy humidifier in the market instead of a humidifier module as I have to use the fancy pot-shaped humidifier in Fig 1.

Testing

Now power the device with a 5V power source and your smart intelligent humidity maintainer device is ready to maintain the humidity level in the lab, Greenhouse, hospital, or your home.
We also have some humidity monitoring systems that you can check:
- Humidity Indicator and Controller
- Humidity Monitoring with SMS and Email Alerts
- Humidity Monitoring using Arduino
Also if you have any doubts or face any issues while making this humidifier, please feel free to ask in the comments below.
Bonus Tip: Use our Forum to discuss your queries, doubts, suggestions, etc. with the community of experts and enthusiasts engineers.


