 Spectroscopy is the study of the interaction between light and matter. From testing whether a fruit is ripe to space exploration and determining atomic structures, this field of study is widely used.
The Near InfraRed (NIR) spectroscopy is used in milk and bio constituent analysis and in many printing and production work to find the accurate range of color. The electromagnetic spectrum range covered in NIR spectroscopy is 780-2526nm. The spectrometers are also quite expensive for this range.
Here we build a DIY spectrometer using raspberry pi that can be used for spectral analysis in real-time and can be made at an economical cost. This sensor is not only limited to the visible light range (380nm to 700 nm) but also covers the NIR spectral range.
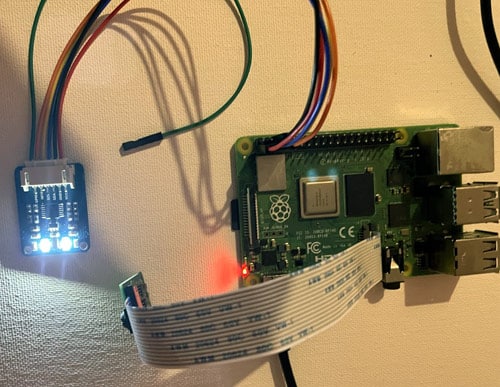
The components listed in the table are needed for DIY Raspberry Pi Spectrometer.
Bill of Materials

Raspberry Pi DIY Spectrometer Code
The Raspberry Pi board has to be able to read the sensor data, hence the first thing is to check the I2C interface. To enable the interface from the “setting”, the following command should be given in the terminal.
sudo raspi-config
The I2C interface has to be selected and enabled. Save the “settings”, before rebooting the Pi board. The status of the I2C devices must be checked whether they are open or not. The following command has to be given if the I2C is successfully enabled and the interface is working.
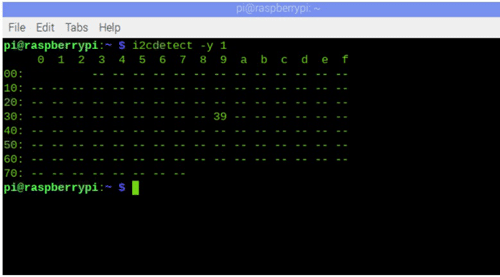
I2cdetect -y 1
The terminal scans and gives the output of all I2C devices detected. If the spectral sensor is connected to the I2C pins of the RPI board then the following output is received.
The next step is to install the library for the spectral sensor. This can be done by installing the Python module and using the following command in the terminal.
sudo pip3pip install adafruit-circuitpython-as7341
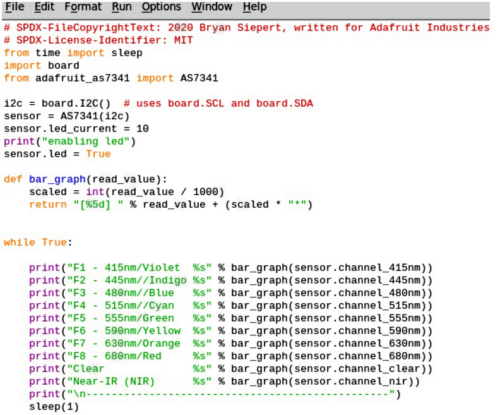
The python IDLE has to be opened for coding. The AS7341 spectral sensor has to be imported from the python module that was earlier installed.
The spectral sensor LED mode has to now be on for a detailed and accurate spectrograph. For better accuracy even in dark, the LED current has to be set to 30, so that it is neither bright nor dim.
Note that the value can be changed and the LED can also be turned off, for the desired accuracy, based on ambient light. This does not affect your spectrograph.
To check the spectral value of each wavelength of light in the visible range, the while loop is added to the program. This can also perform spectral analysis for the NIR range, making it useful for applications like testing biomolecules and constituents of liquids.
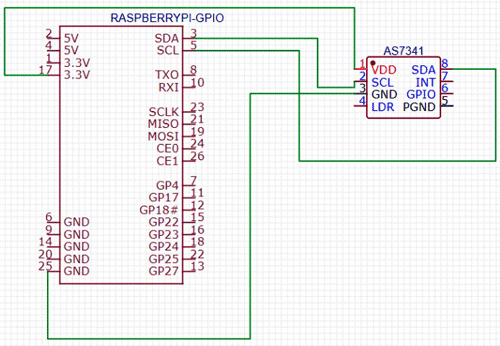
DIY Spectrometer Circuit Diagram
The AS7341 spectral sensor is connected as shown in the circuit diagram.
UV-Visible Spectrometer Working

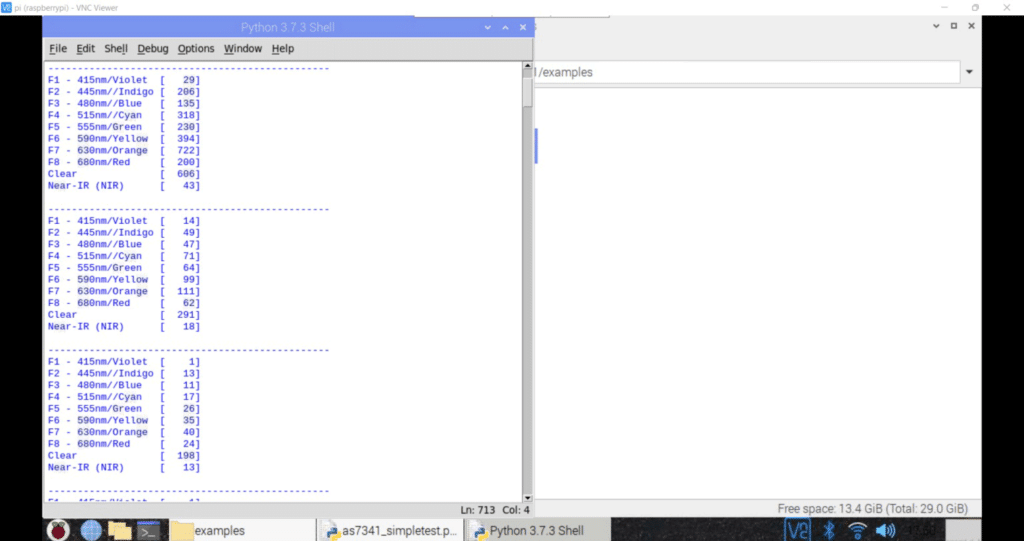
This Project can be used in the spectrography or spectral analysis of any particular product’s color and to detect colors in a painting or you can use its NOIR reading to do an analysis of the constituent of milk. The products can range from liquids to solids.
This is how you can build your own UV-Vis Spectrometer with the help of Raspberry Pi at home.
If you face any issues while making this project, please feel free to ask in the comments below.
Explore more such interesting DIY electronics projects.


