


 Here we make a business card useful by turing it into a business card flashlight, that people really do not want to throw away and use it as a piece of advertising. Essence of this project is that anyone can make it at home without any soldering, PCB and so on, as it requires none of these. The project can be extended to multiple interactive marketing media like posters. It only requires some basic materials as listed below and shown in Fig. 1:
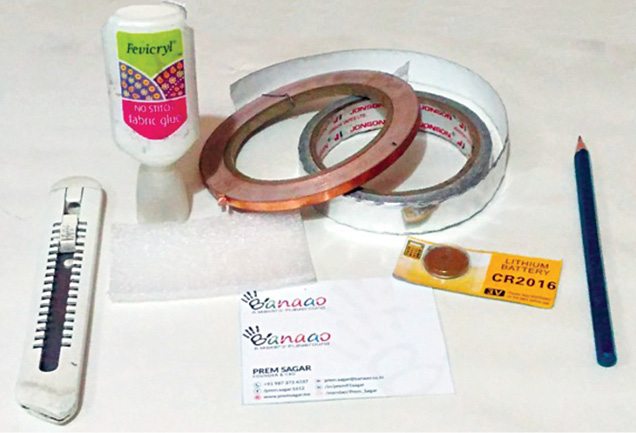
 Aluminium foil/aluminium tape/copper tape
- 3mm white LED
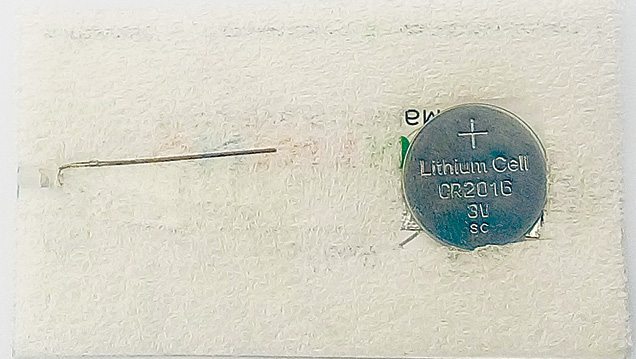
- CR2016 button-cell battery
- Piece of foam or cardboard
- Two visiting/business cards
- Sheet of paper (optional)
- Pencil
- Adhesive (like Fevicol)
Tools required:
- Scissors
- Cutter
- Vernier calipers (optional)
Construction and testing
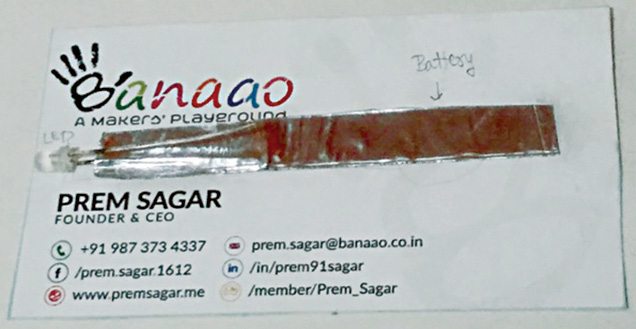
Tracing the circuit. Take a lighter-grade pencil (3H/4H) and make a rough layout or path on one of your business cards along which the circuit will be placed (Fig. 2). Circuit diagram of the business card flashlight is shown in Fig. 3. Place the tape, LED and battery on the marked areas.

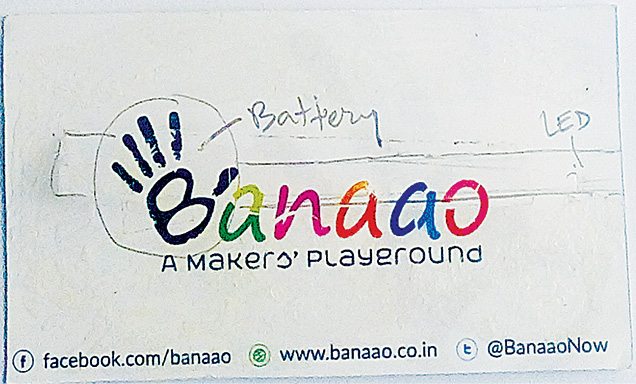

The switch (explained in subsequent steps) will be at the location of the battery. Place the switch along the visual element of your business card, signifying a look of a button. Here, I have placed it along my company logo of a hand.
Interestingly, the circuit here does not need any resistance since we are using a white LED that has a typical forward voltage of 3.2 volts with a battery that has a maximum rated voltage of 3V. Current through the battery does not exceed the rated 25mA. Also, the battery has an internal resistance of 150-ohm, which is sufficient enough; hence, no external resistance is required.

In case you plan to use a red or green LED, consider using a resistor of 100- to 150-ohm.
Cutting the cardboard/foam
The cardboard/foam is used to provide spacing between the two visiting cards. That is, the foam will be sandwiched between the two cards. It also makes a modular casing for LED and battery (Fig. 4).
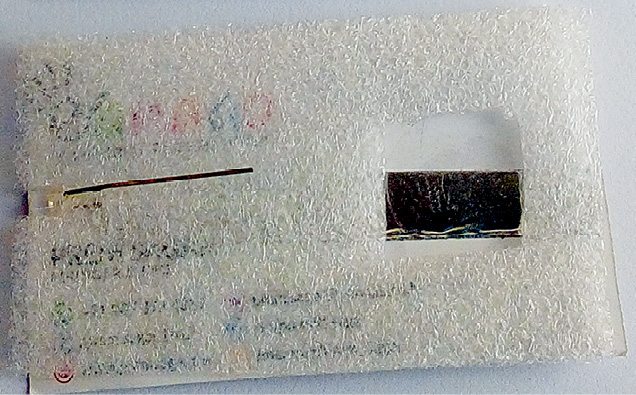
First, cut the foam/cardboard as per the dimensions of the visiting card. Then, cut small openings for placing the LED and battery. I prefer foam because it adds negligible weight, and is available in various colours.
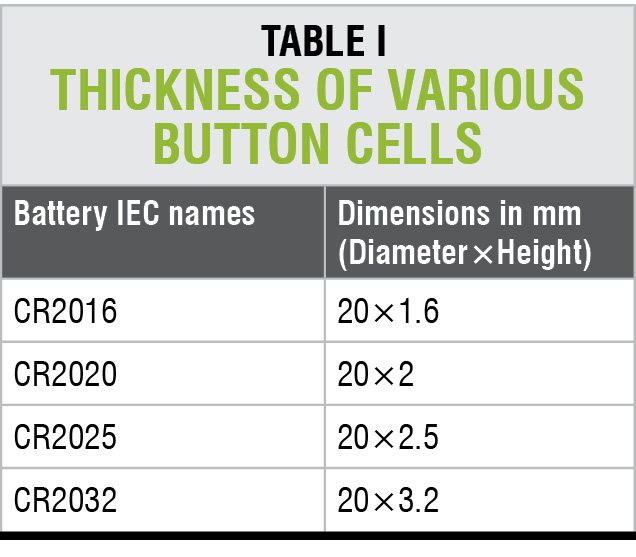
Thickness of the foam should be greater than that of battery. You may need Vernier calipers to measure that but a standard 3mm to 4mm foam will work. Table I shows the thickness of various button cells—we choose CR2016 because it has minimum thickness.
Making an aluminium tape with aluminium foil
Take a sheet of aluminium foil and give it several folds because most aluminium foils are too thin to use. The aluminium tape formed by folding aluminium foil is shown in Fig. 5.

Assembling the circuit
Pull the LED legs apart and place one leg along the pencil trace and stick on the card with the aluminium tape using adhesive (Fig. 6).
Note the correct polarity of the LED leads so as to place the battery correctly. Aluminium tape should extend till the battery (Fig. 6). Place the foam cutout over it and stick on the card using adhesive (Fig. 7).
Carefully place the second card over the LED and battery so that the hanging leg of the LED is fixed onto the backside of the second card using aluminium tape (Fig. 8). Place it in a secure manner using adhesive like Fevicol.

Press the switch marked on the card. Voila, it is up and running (Fig. 9)! When you release the switch, flashing will stop. You have successfully made one unique business card with a flashlight!


Im very excited to know about this.I will try this as my project work ,so I’m happy to join in your club
Happy making!!
Sure Rohit. Happy Tinkering !!