 Have you ever wondered if a particular cable is delivering mains power supply to your device or not? Here is a solution that helps you test cable continuity without requiring any physical contact with the bare cable. The circuit practically detects AC signal frequencies and gives an LED indication if the cable is conducting. The circuit is highly sensitive and can detect signals from the surface of the cable itself and thus no direct contact with the bare cable is necessary. The circuit can be used to test other cables, including modem, audio/video and dish antenna cables to name a few.

Circuit and working
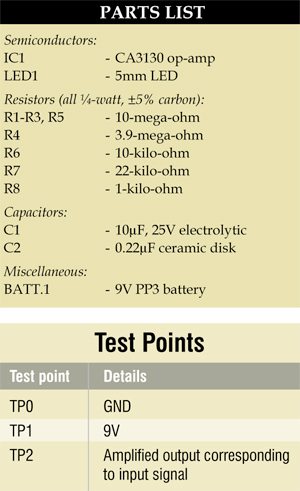
Fig. 1 shows the circuit of cable tester. The circuit is built around op-amp CA3130 (IC1). IC1 is a BiMOS operational amplifier with MOSFET inputs and CMOS output. It has PMOS transistors in the inputs for providing very high input impedance and very good speed performance. The input readily accepts even weak signals.

IC1 is wired as a non-inverting amplifier with feedback resistors R6 and R7 to set the closed-loop voltage gain. Capacitor C1 is added to provide a progressive roll-off. The non-inverting input of IC1 is biased by a combination of resistors R1 through R5. Capacitor C2 is added between the offset null (pin 1) and Strobe (pin 8) pins for phase compensation.
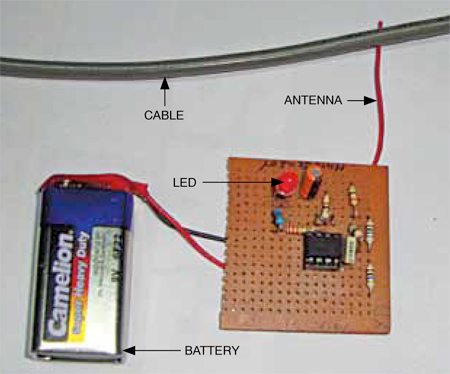
Working of the circuit is simple. Bring antenna of the circuit near the cable that you want to test. The LED will glow if the cable is conducting perfectly.
Construction and testing
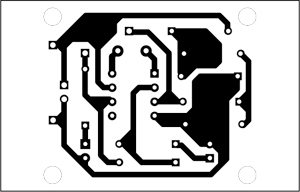
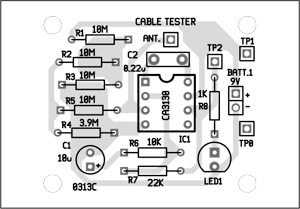
A single-side PCB for the cable tester is shown in Fig. 2 and its component layout in Fig. 3. After assembling the circuit on the PCB, enclose it in a suitable case. Antenna can be a telescopic antenna or a 10cm long wire.


Download PCB and component layout PDFs: click here
To test the circuit, check 9V at test point TP1 with respect to TP0 to verify the correct power supply to the circuit. Bring antenna of the assembled circuit near some power cable and check status of LED1.


Instead of ic transistors will also work
after put power LED direct ON even not close to AC cable