Indusboard coin is programmed like a login key for devices where the password can be stolen or seem by people in public.
In this program, the Indus board is used as a login device/key for a laptop, in which the password of laptop is programmed into the board and then by clicking the external button, the password is automatically entered and the laptop is unlocked.

| Components Required: S. no. | Components | Description | Quantity |
| 1. | Indus board coin | 3cm sized dev board. | 1 |
| 2. | A laptop | Required with open login screen where the pin/password is to entered. | 1 |
| 3. | USB type C cable | To connect the board to laptop. | 1 |
| 4. | Push button | To give command to board so that laptop unlocks. | 1 |
| 5. | Jumper wires | To connect button to board. | 2 |
Arduino Code:
 /*
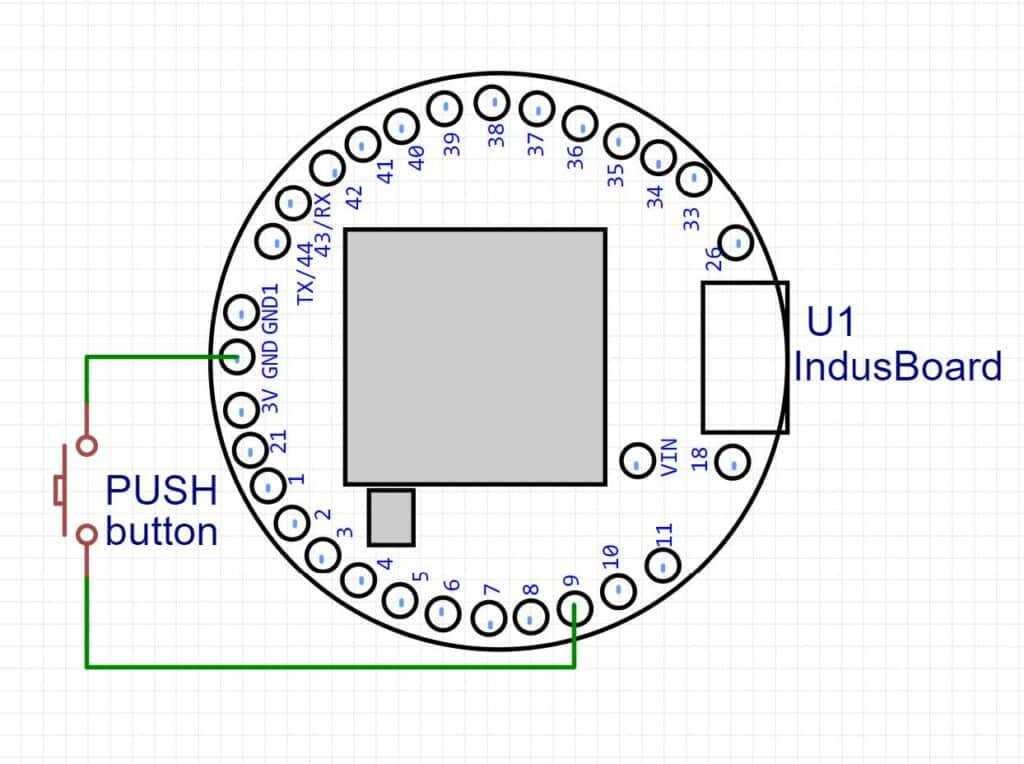
connect pin 9 of indusboard coin with a push button.
enter password in line 40.
*/
#if ARDUINO_USB_MODE
#warning This sketch should be used when USB is in OTG mode
void setup(){}
void loop(){}
#else
#include "USB.h"
#include "USBHIDKeyboard.h"
USBHIDKeyboard Keyboard;
const int loginButton = 9; // Button to trigger the login sequence
void setup() {
// initialize the button input:
pinMode(loginButton, INPUT_PULLUP);
// initialize the keyboard:
Keyboard.begin();
USB.begin();
Serial.begin(115200);
}
void loop() {
// check if the login button is pressed:
if (digitalRead(loginButton) == LOW) {
loginSequence();
delay(5000); // wait 5 seconds before allowing another login attempt
}
delay(5);
}
void loginSequence() {
// Replace "YourUsername" and "YourPassword" with your actual login credentials
// String username = "";
String password = "";
// // Type the username
// typeString(username);
// Keyboard.write(KEY_TAB); // press Tab to switch to the password field
// delay(500);
// Type the password
typeString(password);
Keyboard.write(KEY_RETURN); // press Enter to login
}
void typeString(String str) {
for (int i = 0; i < str.length(); i++) {
Keyboard.write(str[i]);
delay(100); // add a small delay between keystrokes
}
}
#endif /* ARDUINO_USB_MODE */
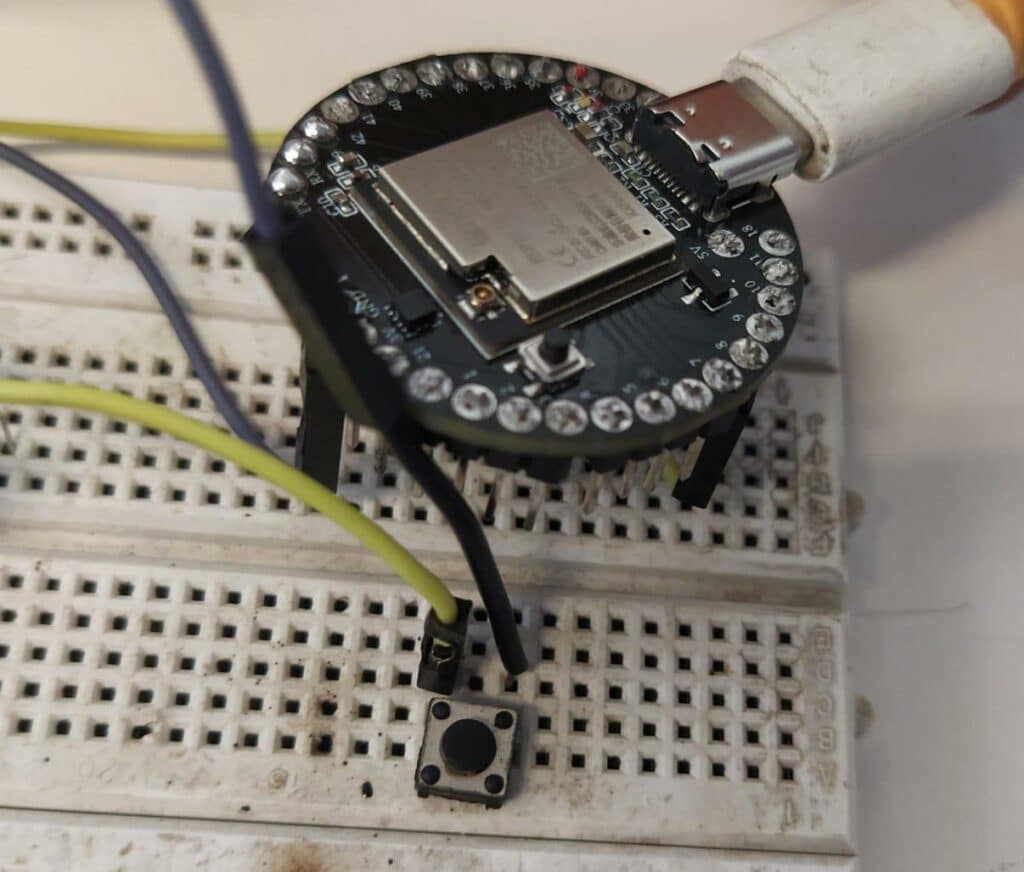
Schematic and practical implementation:

Author(s): Manjeet Vishwakarma, Abhay Verma and Satywanti Kundu are B.Tech ECE students at GJUS&T HISAR


