


A digital lock using WebSerial leverages modern microcontroller technology to create a secure and convenient access control system.
This setup typically involves an ESP32 microcontroller, which hosts a web interface accessible via a local Wi-Fi network. Users can connect to this network and enter a pre-set password through the WebSerial interface.
The microcontroller processes the input and controls a relay that activates the lock mechanism. If the correct password is entered, the relay is triggered, unlocking the door for a specified period before automatically re-locking.

This system enhances security by allowing real-time, remote access control and monitoring through a simple web interface, making it an innovative solution for modern access control needs.
Applications of the Digital Lock using Webserial
- Enhances the security of residential properties by providing remote access control and real-time monitoring of entry points.
- Used in office buildings to manage employee access, ensuring that only authorized personnel can enter certain areas.
- Used in smart locker systems for parcel delivery and storage, enabling users to securely access their parcels using a web interface.
- Allows hotel staff to remotely control and monitor room access, improving guest security and operational efficiency and many more.
Bill of Materials (BoM)
| Components | Description | Quantity |
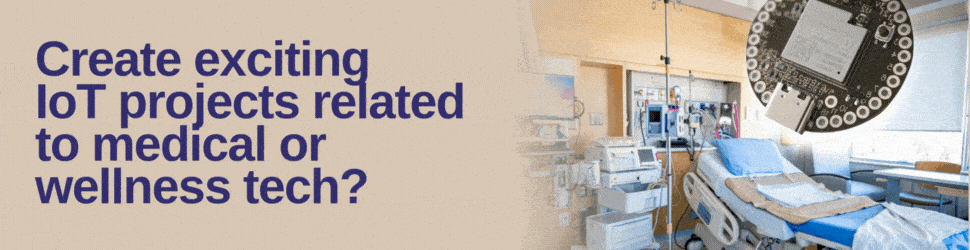
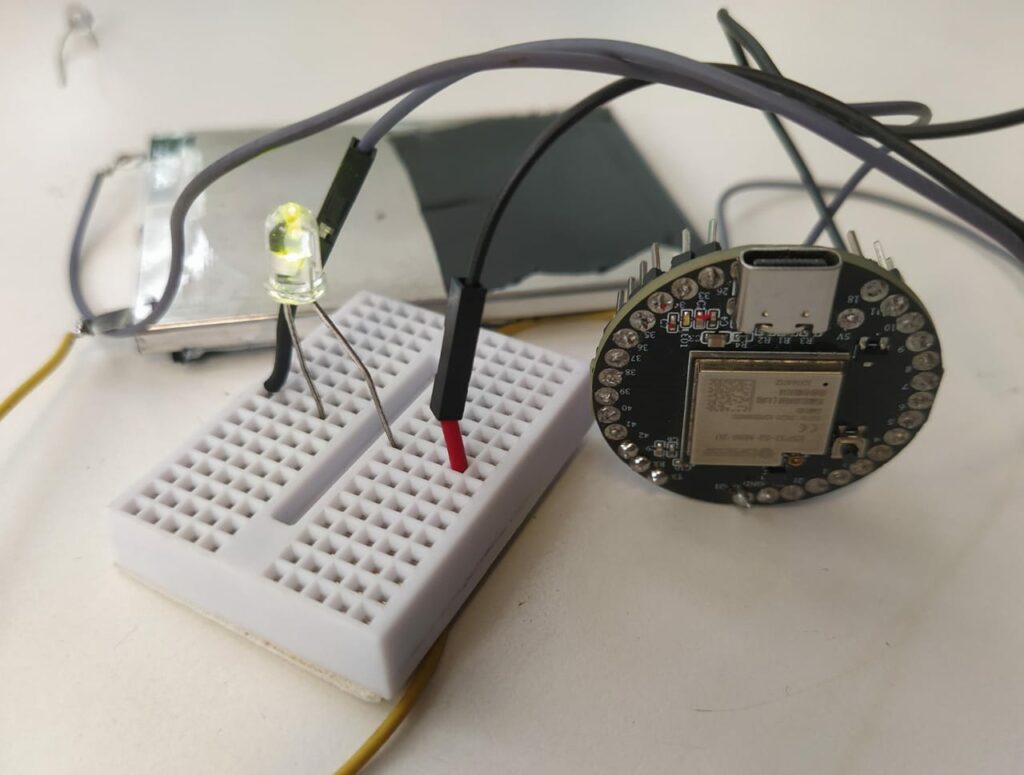
| IndusBoard | 3cm sized dev board | 1 |
| LED | 5mm LED | 1 |
| Breadboard | 3.5 cm x 4.5 cm breadboard | 1 |
| Wires | Jumper wires | 4 |
| Battery | 3V Battery | 1 |
Code for Digital Lock Using Web Serial
#include <Arduino.h>
#if defined(ESP8266)
#include <ESP8266WiFi.h>
#include <ESPAsyncTCP.h>
#elif defined(ESP32)
#include <WiFi.h>
#include <AsyncTCP.h>
#endif
#include <ESPAsyncWebServer.h>
#include <WebSerial.h>
AsyncWebServer server(80);
const char* ssid = "ESP Wifi"; // Your WiFi AP SSID
const char* password = "12345678"; // Your WiFi Password
// Password
String presetPassword = "1234"; // Pre-set password
String inputPassword = ""; // User input password
bool accessGranted = false;
unsigned long unlockTime = 0;
const unsigned long unlockDuration = 5000; // 5 seconds
/* Message callback of WebSerial */
void recvMsg(uint8_t *data, size_t len){
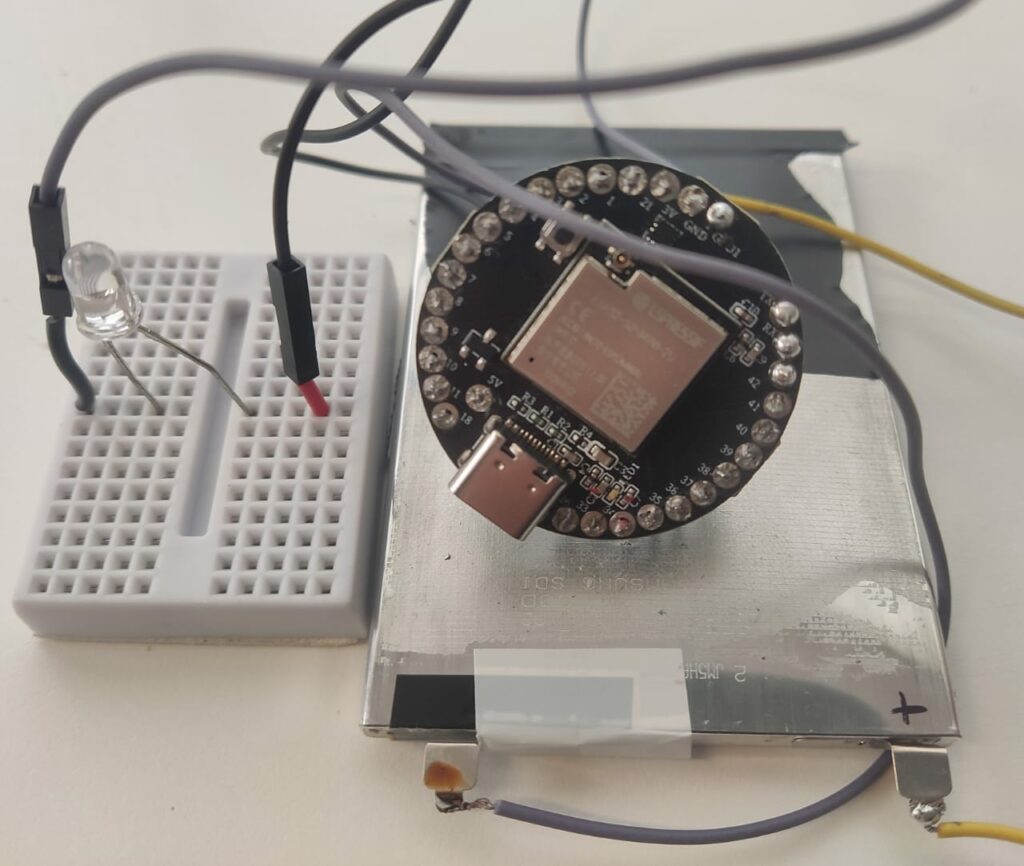
WebSerial.println("Received Data...");
String d = "";
for(int i=0; i < len; i++){
d += char(data[i]);
}
WebSerial.println(d);
// Append the received data to the input password
inputPassword += d;
// If 4 digits have been entered
if (inputPassword.length() == 4) {
// Check if the input password matches the pre-set password
if (inputPassword == presetPassword) {
WebSerial.println("Access Granted");
// Unlock the door (activate the relay)
digitalWrite(5, HIGH);
accessGranted = true;
unlockTime = millis();
} else {
WebSerial.println("Access Denied");
}
// Clear the input password for the next attempt
inputPassword = "";
// digitalWrite(5, LOW);
// Prompt the user to enter the password again
WebSerial.println("Enter the 4-digit password:");
}
}
void setup() {
Serial.begin(115200);
// Set relay pin as output
pinMode(5, OUTPUT); // Use GPIO 5 for example, change if needed
// Initially turn off the relay (lock the door)
digitalWrite(5, LOW);
WiFi.softAP(ssid, password);
IPAddress IP = WiFi.softAPIP();
Serial.print("AP IP address: ");
Serial.println(IP);
// WebSerial is accessible at "<IP Address>/webserial" in browser
WebSerial.begin(&server);
/* Attach Message Callback */
WebSerial.msgCallback(recvMsg);
server.begin();
// Prompt the user to enter the password
WebSerial.println("Enter the 4-digit password using the web interface:");
}
void loop() {
if (accessGranted && (millis() - unlockTime >= unlockDuration)) {
// Turn off the relay (lock the door) after 5 seconds
digitalWrite(5, LOW);
accessGranted = false;
}
// Do nothing here as WebSerial handles the incoming data
WebSerial.print(F("IP address: "));
WebSerial.println(WiFi.localIP());
WebSerial.printf("Millis=%lu\n", millis());
WebSerial.printf("Free heap=[%u]\n", ESP.getFreeHeap());
delay(1000);
}Connection

Testing
Now we connect the board with the USB and upload the code in the indus board and check output after giving command on web serial. To connect indus board with web serial type (192.168.4.1/webserial) in web browser. Then we can give command 1234 which is password for the access. If the password is correct, then it shows “Access Granted” and open the door also LED starts glowing. Then if the password is incorrect, it shows “Access Denied” and the door will not open.


Author(s): Manjeet Vishwakarma, Abhay Verma and Satywanti Kundu are B.Tech ECE students at GJUS&T HISAR

