 Electronic voting machines (EVMs) are used to conduct elections in India. These machines provide straightforward and effortless features to voters to cast their votes in favour of candidates of their choice. When a voter presses a button adjacent to the name of the candidate, a beeping sound is made by the electronic voting machine, confirming successful casting of vote, and the vote count of that particular candidate increases by one.
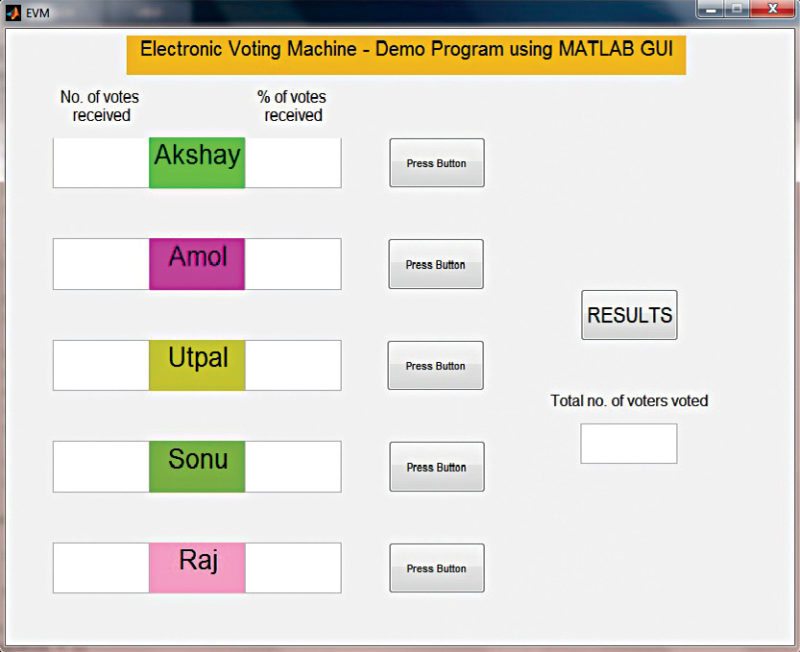
In this project, a demo software program using MATLAB based graphical user interface (GUI) to demonstrate the working of an EVM is presented. A screenshot of the EVM using MATLAB GUI is shown in Fig. 1.

Software Program
Five candidates are considered in this demo program. The GUI application program has been developed in R2014a version of MATLAB.
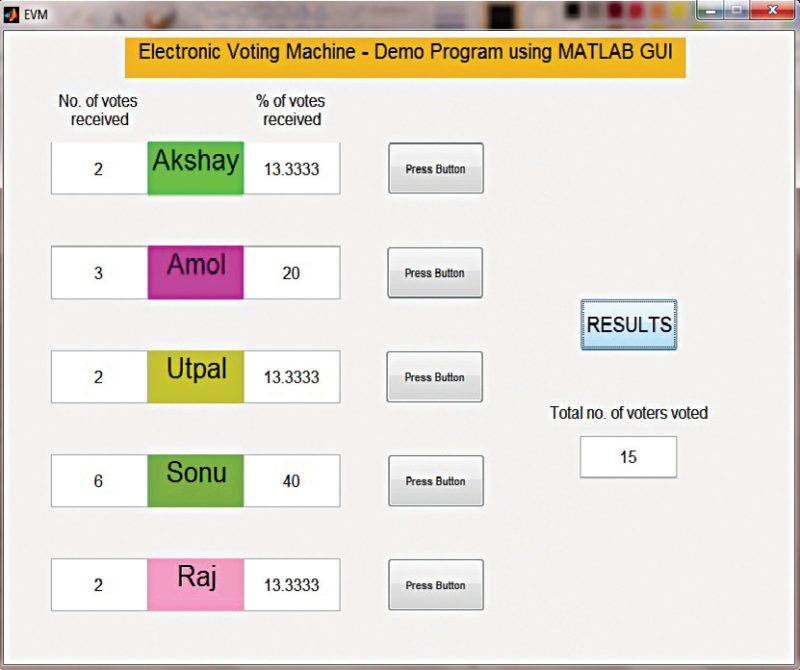
On running MATLAB program (EVM.m), when you select the button marked ‘Press Button’ adjacent to the name of the candidate in the GUI, a beep is heard, confirming successful casting of vote. Selection of the pushbutton executes a callback function in MATLAB, and the candidate’s vote count is incremented by one in the program. At the end of the voting process, the following information can be obtained by selecting ‘RESULTS’ on the GUI:
1. Total number of votes received by a candidate
2. Percentage of votes received by a candidate
3. Total number of voters who have cast their votes
A typical example of the program output screenshot is shown in Fig. 2.

Although this article presents a simulation of the working of an electronic voting machine, you can build a MATLAB GUI based EVM in hardware like Arduino board. The following pointers might be beneficial:
1. Use pushbutton switches to cast the vote and check results. These pushbuttons can be connected as inputs to the digital input/output pins of the Arduino Uno board.
2. Use Arduino Uno and Legacy MATLAB and Simulink Support for Arduino software package to set up the communication between the Arduino and MATLAB. The procedure to install the package is discussed in detail in ‘Controlling a Robotic Car Through MATLAB GUI’ DIY article. Arduino can send the status of the pushbuttons to MATLAB. Modify the GUI program to perform the tasks as demonstrated by the simulation.
Download source code


can I have documentation of this please
my mail id is [email protected]
can I have documentation of this please
my mail id is [email protected]
Can you send me this documentation to my e-mail
[email protected]
Thanks
Hi Kim, you can take a printout or save as PDF directly from the website.