 This article covers the designing of an FM receiver using GNU Radio software and RTL-SDR hardware on Ubuntu operating system (OS). With advancements in software-defined radio (SDR), more supports are available for SDR hardware to be used with computers. GNU Radio is a free software and provides signal processing capabilities. You can design the FM receiver using SDR with added features and functionalities, which are not available in basic radio receivers.
To design the FM receiver, you need RTL-SDR dongle (Fig. 1) with RTL chip, computer and GNU Radio live disk. GNU Radio Companion (GRC) is a block-based software design platform that makes it easy to work with radio systems by using only a block-like interface.
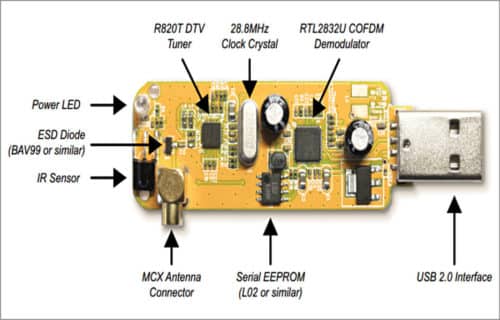
RTL-SDR dongle provides raw data to GNU Radio. All signal processing is performed using reconfigurable software. That is, GNU Radio is used for implementing the receiver by selecting signal processing blocks, which process the incoming signal from RTL-SDR dongle to demodulate FM signal and to get audio output from the computer speakers.
GNU Radio live disk
GNU Radio live disk provides options for quick and easy testing and experimentation with GNU Radio. The best part is that you do not need to change the settings in the system or the main OS. Drivers and support packages for RTL-SDR are preinstalled in GNU Radio disk, so it is convenient to work with the USB dongle with GNU Radio Companion.
A list of pre-installed SDR hardware drivers in GNU Radio live disk are given below.
1. Ettus Research UHD
2. Great Scott Gadgets HackRF products
3. Nuand BladeRF products
4. osmoSDR RTL-SDR driver
5. AirSpy
Various software are available for using the FM receiver in Windows OS, but these do not provide options for research work as available in GNU Radio. Windows-based GNU Radio is available, but it requires manual driver installation for hardware.
The live disk image based on Ubuntu with GNU Radio Companion can be downloaded from this link.

QR code for the website is given in Fig. 2. Once the file is downloaded, you can easily create a DVD with GNU Radio Boot Support using any DVD burning software. During testing, Etcher software was used for burning the live disk image bootable DVD.
Working on GNU Radio
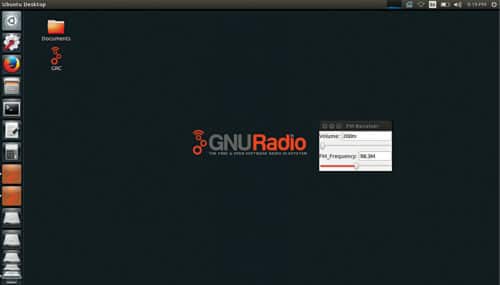
Boot using CD/DVD drive or USB drive as per your bootable media. The process will take around five minutes to complete the initial setup. Now, use GNU Radio for signal processing applications. GNU Radio icon will appear on the desktop, as shown in Fig. 3.
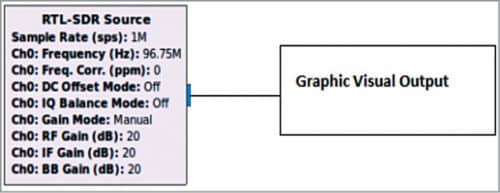
Test RTL-SDR support in GNU Radio live disk environment. Check proper working of RTL-SDR dongle with the system. For that, add RTL-SDR block from the library of tool box in GNU Radio, and a waterfall block or scope block (steps for designing are given in the next section). Then, provide centre frequency in RTL-SDR block. Insert the dongle in your computer and run the flowgraph (or program) in GNU Radio. Test flow chart is shown in Fig. 4.
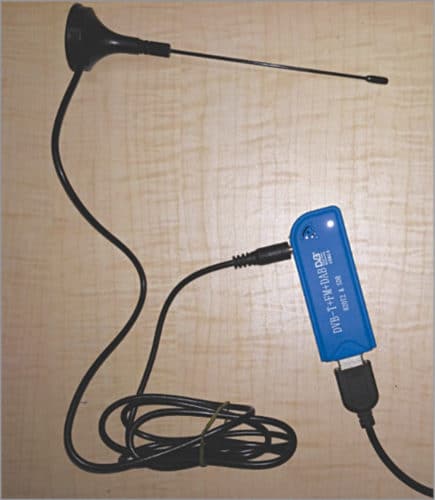
The antenna is a standard antenna provided with RTL-SDR dongle with a magnetic base, as shown in Fig. 5. It provides acceptable FM reception in frequency range of 88MHz to 108MHz. Place the antenna at a proper place. If you place it close to the chargers, cellphones or electric sockets, some disturbances may be detected while testing the receiver.
Steps for designing FM receiver in GNU Radio
Generate, execute and kill are three important tools in GNU Radio software. The program flowgraph consists of various blocks.
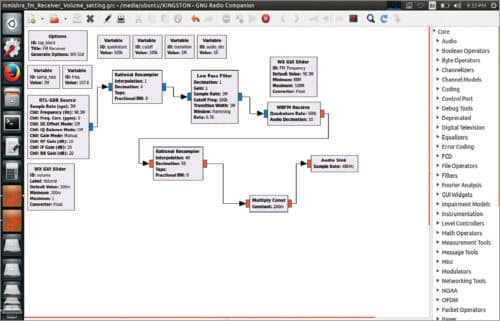
RTL-SDR block as signal source
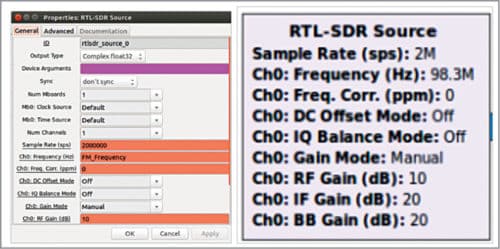
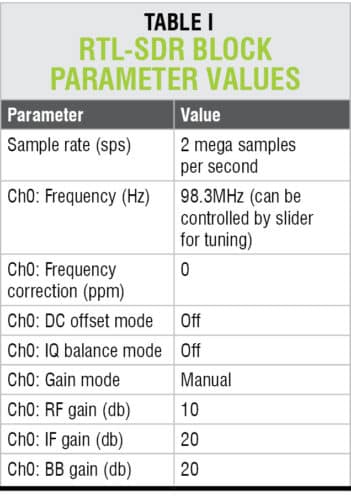
Add RTL-SDR source from the tool library in GNU Radio Companion (GRC). It is available on the right side of the window. Then, change the parameters of the block by double clicking it as shown in Table I.
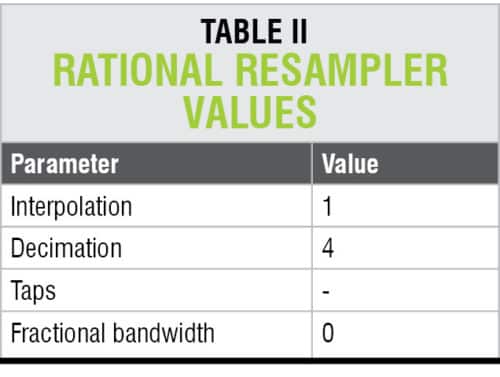
Rational resampler block
This block when added to the design provides signal changes and makes it suitable to provide as input to further blocks. Rational resampler block settings are shown in Fig. 7, and its parameters are given in Table II.

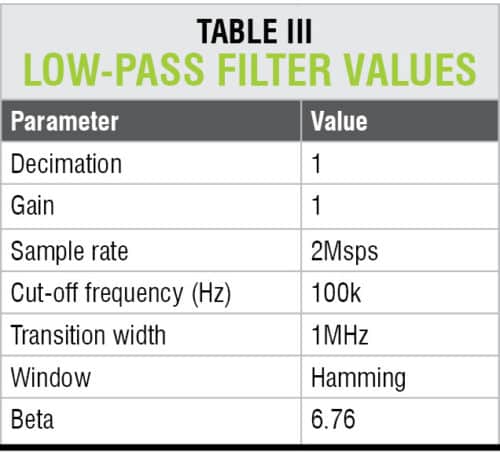
Low-pass filter block
Low-pass filter block is added after setting rational resampler block. Values of various parameters for a low-pass filter are given in Table III.

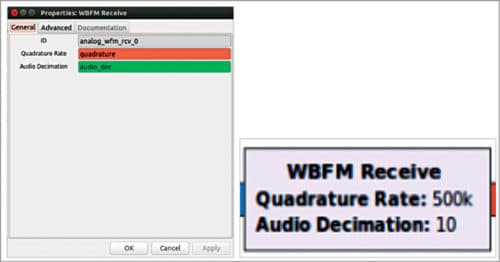
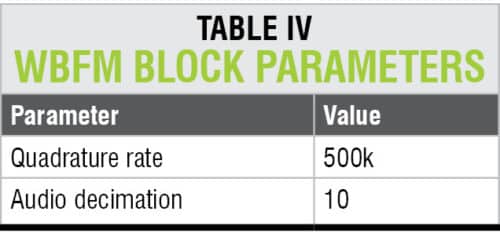
WBFM receive block
This block is placed to extract demodulated signal from incoming signal. Parameters and values are given in Table IV.
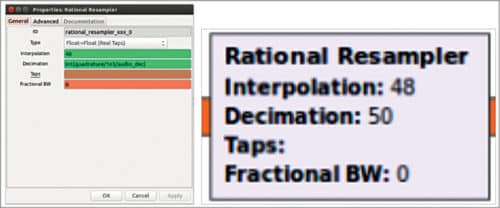
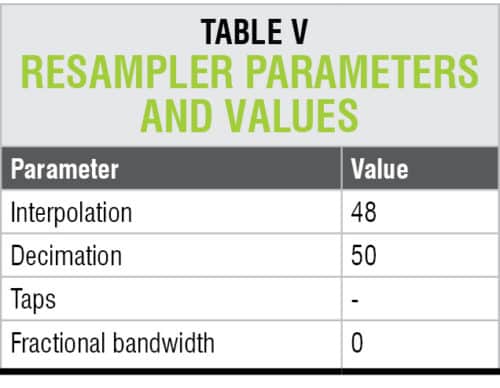
Rational resampler after WBFM receive block
This block provides functionality of changing the signal to make it suitable for audio output block. Values are given in Table V.
Multiply constant block
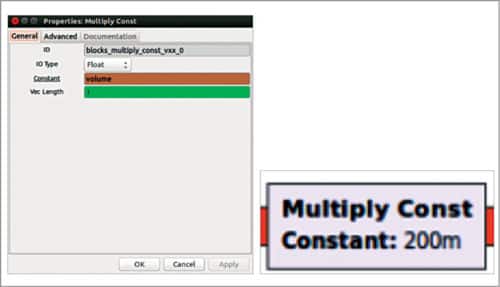
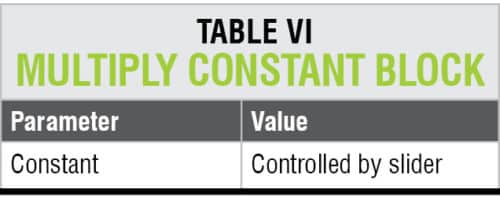
This block is used for controlling the audio volume using GUI of FM receiver implemented using GNU Radio. Details of multiply constant block are given in Table VI.
Audio sink block
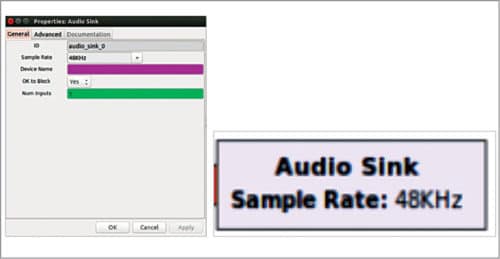
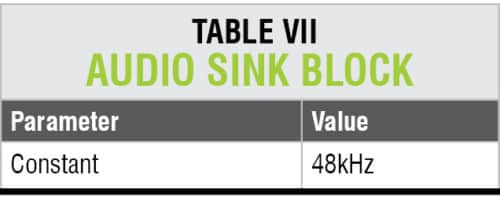
This block provides audio output signal at the computer speakers. Details of audio sink block are shown in Fig. 12 and also listed in Table VII.
Run implemented receiver using GNU Radio
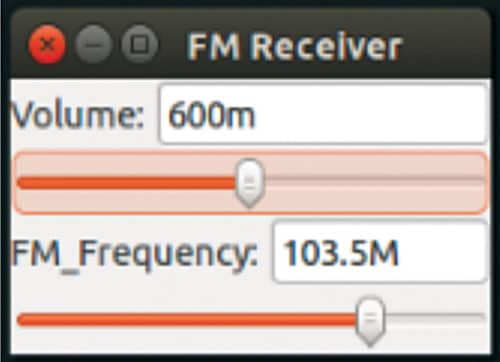
The receiver is designed using two sliders for controlling frequency and volume. Complete GRC code (FM_Receiver_gnu.grc) is shown in Fig. 13, and FM receiver window is shown in Fig. 14. Frequency range supported is 88MHz to 108MHz. The slider can set the frequency between 88MHz and 108MHz, with 0.1MHz step size. When the slider is used to control a value in runtime, give variable name as the slider identifying value in parameter of the particular block.
Download Source Folder
Madhuram Mishra is pursuing ME (digital communication) from NITTTR, Bhopal. He has keen interest in circuit design and Arduino boards.


This worked like a charm. Only the fifth radio receiver that I’ve tried, but it’s the first I’ve been able to get working. For anyone trying to figure out radio station you’ve got in the area, it’s worth hooking up a QT Gui sink to the raw output of your antenna. That way you can look at the frequency demodulation and see where you’ve got spikes.