 Sorting fruit one-by-one using hands is one of the most tiring jobs. It requires lots of effort and manpower and consumes lots of time as well. In modern times, the industries are adopting automation and smart machines to make their work easier and efficient and fruit sorting using openCV on raspberry pi can do this.
So, we have tried to include automation by making a smart fruit sorting machine. The OpenCV Fruit Sorting system uses image processing and TensorFlow modules to detect the fruit, identify its category and then label the name to that fruit. Suppose a farmer has collected heaps of fruits such as banana, apple, orange etc from his garden and wants to sort them. Then, the machine will detect the different fruits and sort them as per our choice. It can also count the number of fruits that have been sorted.
In this project, we are making an orange sorting machine for which we will require a Raspberry Pi camera. Using TensorFlow and OpenCV, we will try to detect the orange. A servo motor connected to Raspberry Pi will then sort the orange and move it into a basket.
So let’s collect the following components for our project.
Bill Of Material

Prerequisites
Assuming you have already installed the latest Raspbian OS and Python environment into your Raspberry Pi board, open the Linux terminal and then install the required modules and libraries using the following syntax.
sudo apt-get update
sudo apt-get upgrade
sudo nano /etc/dphys-swapfile
Then change the line CONF_SWAPSIZE=100 to CONF_SWAPSIZE=1024
sudo /etc/init.d/dphys-swapfile stop
sudo /etc/init.d/dphys-swapfile start
sudo pip3 install opencv
sudo pip3 install numpy
wget https://bootstrap.pypa.io/get-pip.py
pip3 install dlib
pip3 install tensorflow
After the installation you can now proceed with the cloning of TF modules, examples and files using the following command:
git clone https://github.com/tensorflow/tensorflow.git
Coding
Now go to the directory where you have downloaded the TensorFlow folder and then open the object_detection folder.
tensorflow1/models/research/object_detection
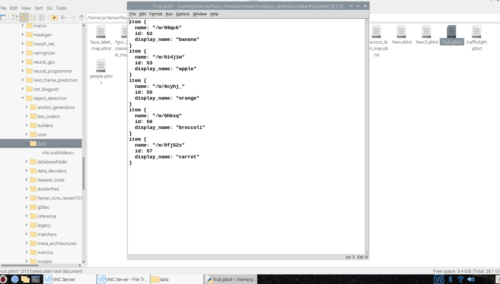
Now open the data folder and create a file named fruit.pbtxt. Here, make a list of the fruits to be detected. (Refer Fig 1.)
Go back to the Object_detection folder and then create a new file named fruitshort.py. Do make some changes in the code and understand it.
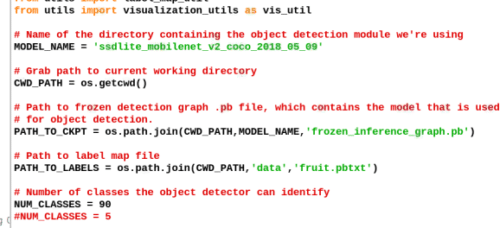
First of all, we will import the required libraries in the code. Here we are using the following set of libraries and Tensor modules. (Refer Fig 2.)
- os
- cv2
- Numpy
- PiCamera
- tensorflow
- argparse
- sys
- datetime
- gpiozero import Servo
- Time
Next part of the code consists of the path of Tensorflow object detection model and the path of object detection label model. Here we change the object detection label file with our fruit.pbtxt that we had previously created. (Refer Fig 2).
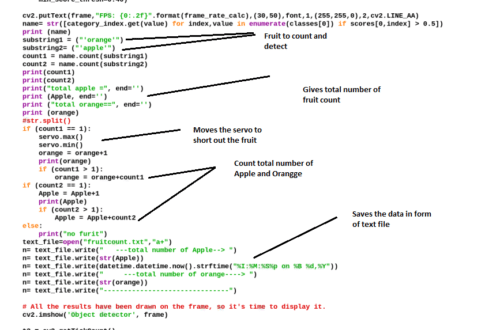
In the next part of the code, we have created a name variable that stores the output results of the object detected by the camera. After that, we have two more string variables named substring1 and substring2 where we set the name of fruits to be sorted out. Then we will count the substring name in the output result of the detected object so that we get the exact number of fruits as detected by the camera.
Next, an if() condition checks whether the number of oranges detected is greater than 1. If yes, then it will move the servo shaft to separate that fruit from the others and also count that fruit number.
In the next piece of code, we will save the data of the total count of fruits, with a timestamp in a text file.
Connection
Now connect the components as shown in circuit diagram below.

Testing
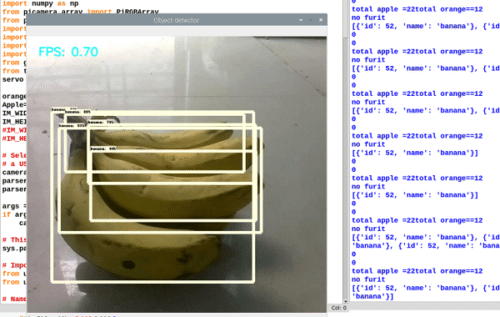
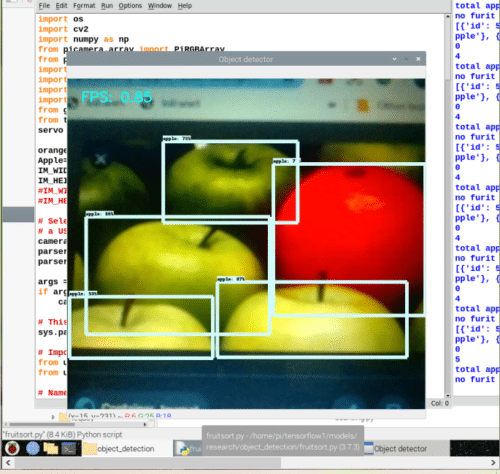
Power the Raspberry Pi and then run the Python code that we have created. After that, put the camera near the fruits that are placed on a moving conveyor belt. When a fruit named orange is detected, then the servo will move to drop it in a basket and keep it separated from other fruits. You can see the total number of fruits detected as they are counted in the Python terminal. It will also save the total number of fruits detected in the text file with a timestamp in the database.

Download Source code


