


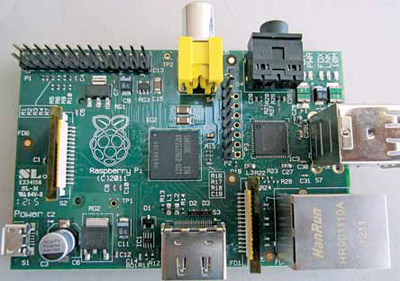
SEPTEMBER 2012: The Raspberry Pi (Fig. 1) is powered by a BCM2835 system-on-chip from Broadcom that contains an ARM processor (running at 700 MHz) and a powerful graphics processing unit capable of 3D operations. The peripherals include two USB master ports, 10/100 Ethernet, HDMI and composite video outputs, and an SD card slot (more details available at www.raspberrypi.org/faqs). System memory is 256 MB of RAM. A few general-purpose input/output (GPIO) pins are available for low-level interfacing with the external electronic circuitry.
There are two models of the device. Model A has 256MB RAM, one USB port and no Ethernet (network connection). Model B has 256MB RAM, two USB ports and an Ethernet port. Only Model B is currently in production.
Things you need to get started
The Raspberry Pi is a complete system—connect a USB keyboard/mouse and a DVI/HDMI monitor to it and you are ready to go! The Linux operating system kernel and the root file system have to be present on the SD card.

Note that the device does not support VGA monitors—you have to use a monitor with DVI/HDMI inputs. In case you have a monitor that accepts DVI inputs, you need an HDMI-to-DVI converter cable. An old TV set can also be used as a display by connecting it to the composite video output of the Raspberry Pi.
A standard micro USB mobile charger (capable of handling at least 700 mA of current) can be used to supply power to the board.

Preparing the SD card using a GNU/Linux system
The easiest way to get started with the Raspberry Pi is to use an SD card to store the file system image. The Raspberry Pi website (www.raspberrypi.org/downloads) provides pre-built images for both Debian GNU/Linux and Arch Linux. I prefer Arch because of its simplicity and the ease with which you can keep packages updated.
Download the Arch Linux image and unzip it using the following command:
unzip archlinuxarm-13-06-2012.zip
The Arch Linux image files are continuously updated. So the name of the file that you have downloaded might be different from what you see above.
You will now see a directory called ‘archlinuxarm-13-06-2012.’ Change into this directory, verify the checksum of the file with ‘img’ extension resent in the directory and write it to your SD card using ‘dd’ command:
cd archlinuxarm-13-06-2012
sha1sum -c archlinuxarm-13-06-2012.
img.sha1
dd if=archlinuxarm-13-06-2012.img
of=/dev/sdb bs=1M
I am assuming that your SD card is detected as a device ‘/dev/sdb’ on the GNU/Linux system you are using to write the image file.
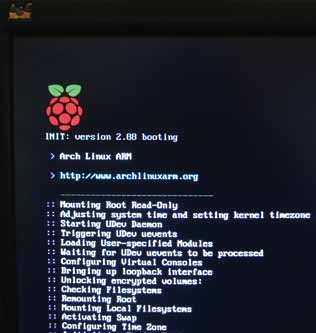
You can now connect the keyboard, mouse and monitor (and optionally the network cable) to the Raspberry Pi, insert the SD card into its slot and power on the board. You should see boot messages scrolling by on the screen (Fig. 2). You will be finally presented with a login prompt. Login with user name ‘root’ and password ‘root’.
Detailed instructions for SD card setup are available on the following Raspberry Pi wiki page: http://elinux.org/RPi_Easy_SD_Card_Setup
Setting up networking on the Raspberry Pi
If the Ethernet cable is plugged in, and if you have a DHCP server active on your network, your Raspberry Pi’s network interface will automatically configure at boot up. You can verify this by pinging a well-known host:
ping google.com
Because of some reason, the network interface on my Raspberry was not being configured automatically. I had to execute the following commands to get things ready:
mii-tool -A 10baseT-FD eth0
dhcpcd eth0
Performing an Arch Linux system update
The packages in an Arch Linux distribution get updated continuously—you can always bring the system up-to-date by executing the following command:
pacman -Syu
‘pacman’ is the Arch Linux package installer (similar to ‘apt’ on Debian/Ubuntu). It is recommended that you perform this step and reboot the Raspberry Pi.
Setting up X Windows
Setting up a basic graphical user interface (with X Windows) is simple. Just use pacman to install some packages:
pacman -S xorg-server xorg-apps xorg-xinit xorg-twm xterm xf86-video-fbdev
You can run X by typing ‘startx’ at the command prompt.
Installing Python
We will use Python to write our demo app; let’s install it using ‘pacman’:
pacman -S python2
You may additionally install package ‘python2-pyserial’ if you plan to do some serial communication.
Let’s write a ‘blinking LED’ program!
WARNING: Interfacing electronic circuits to the Raspberry Pi might damage the board if not done correctly.
