


For this project, we would be constructing a ChatGPT Terminal completely hands-free – taking questions & replying with answers fully in a hands-free way!
While Pi-zero is a full-fledged computer, ESP32, Arduino UNO & Mega, or Maixduino are mere MCUs.
Therefore, they will certainly be many times inferior to Pi-zero. But if you compare the form factor, number of GPIOs, speed and cost, Pi-zero 2W is super competitive!

It can do all that the other MCUs can do except onboard an analog-to-digital converter. For an analog-to-digital converter, we have to use an additional [ADC] chip [like MCP3008] with Raspberry Pi.
Pi Zero is available for as low as INR:1600 at many stores, while Arduino Mega also costs a similar price! I can say if the Arduino fever is over now then the small computer cum MCU-like boards like Pi Zero, Orange Pi, Nano Pi, and Banana Pi are on the rise now.

Also Check Voice-Enabled ChatGPT Terminal with ESP32 and Google TTS
Sound Output on Pi Zero
There is no sound output on the Pi-Zero board. To have sound output, one has to connect an HDMI device [in other words a TV] to Pi-Zero, and the sound will come out in a normal way.
There are HDMI-to-AV output devices that can be used to separate the video and audio output. After that, you have to attach an amplifier to reproduce the weak audio signal to a loudspeaker.
However, there is another easier way, which is shown in the schematic. Any two of the PWM GPIO pins [12,13,18,19] can be used to force audio output by adding just one line in /boot/config.txt file. dtoverlay=audremap,pins_18_13. The audio is taken out using a small filter arrangement followed by a 2-watt PAM8403 amplifier.
Schematic of Audio Output
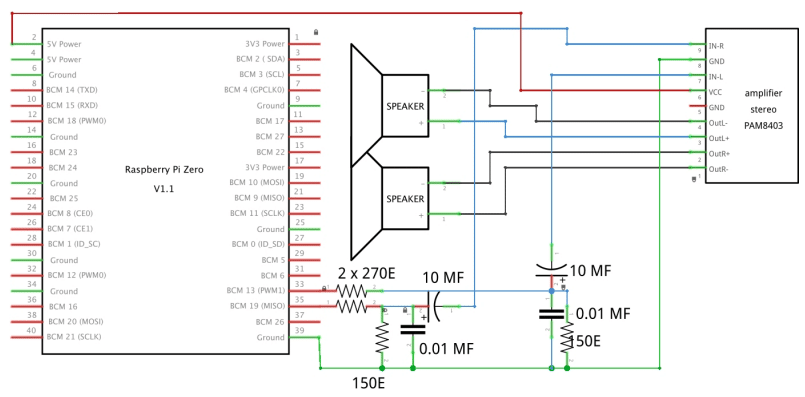
The amplifier is rated for 5 volts, but it works on 3.3 volts with a small speaker
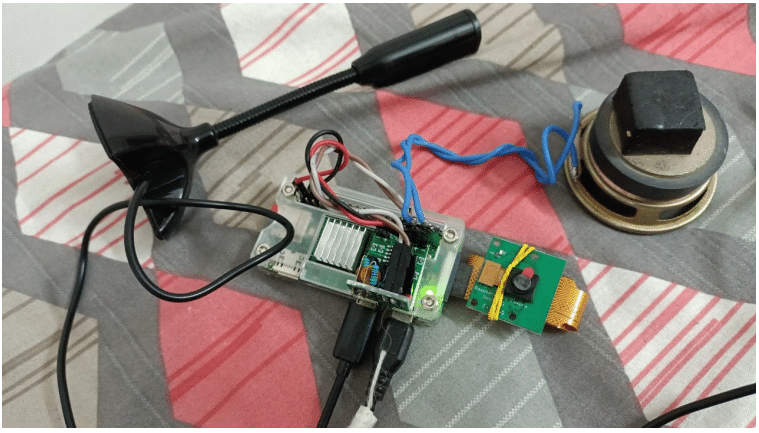
Required Components
- Raspberry Pi Zero 2W – INR:1600
- PAM8403 Amplifier – INR:50
- 4OHM Speakers [02 nos] – INR:120
- USB microphone – INR:170
- OTG cable for attaching a normal USB microphone

Pi Zero has only one micro USB port for external connections. To connect a normal USB, we need an OTG cable whose one side is a male micro USB and the other is a normal female USB so that you can insert the USB microphone.
Sequence of Operations
This is a completely hands-free operation. Our instructions will be provided by audio message, and the answers will be audio again! There will be a push button. Once you press it, the device will ask you to answer the question.
Once you complete the question within 10 seconds, the device will seek your confirmation through a yes or no audio response.
If NO, it will ask you to start all over again. If yes, ChatGPT will be asked to provide the answer. Once it receives the answer, it will speak it out for you. After the sequence, it will wait for a button press! The loop goes endless!
The button press is made bounce-free to avoid multiple running of the same code.
Project code: Before you start this project, you need to get your ChatGPT API key, which is available for free from openai.com.
Please register your email address and then get the API key, which needs to be inserted in the api-key variable in the vi_chatgpt.py code.
button_listener.py This is a button press code, which monitors a GPIO button [17 here, you can change it]. Once the button is pressed, it will start a shell program
– vi_chatgpt.sh.
vi_chatgpt.sh This code will start the main code – vi_chatgpt.py. This code is to be made executable by issuing a command like this.
$> chmod +x vi_chatgpt.sh
vi_chatgpt.py Main project code which when finished, will release control to button_listener.py again to monitor the next button press event
Autostart on boot: To make the code fire up on every boot of Pi-zero, first ensure that the Pi zero logs automatically into console mode [or graphics mode]. You need not attach a monitor for that. You can ssh to your Pi Zero. Then, in the home folder [/home/bera/], there is a .profile file; open that file using nano.
$> nano /home/bera/.profile. At the end of that file, attach this line. Save it and close it. python /home/bera/button_listener.py & Next time you reboot, the program will start automatically and will wait for the button press event!
Software
You may need to install these first:
$> pip install open
$> pip install speech_recognition
$> pip install subprocess
Also, you have to ensure that SSH is turned on in your Raspberry Pi configuration and that the Internet is available in your network.
Surprisingly, it has been found that the USB microphone is very sensitive to catching sound from the other corner of the room amidst a split AC indoor unit is on. The ceiling fan is to be avoided or can be run at the slowest speed
Aftermath
It is even possible to replace the ‘button press’ event with a fixed audio command like ‘Daisy start’ or ‘Daichi start’ etc., but it makes the Pi-zero operation distinctively slow, but sure it will work better in Pi-4 or Pi-5. Help has been sought & obtained during the making of this project from openai.com
Download Source Code

