


Program ATmega328P, ATmega328, Attiny 13A, 44, 45, ATMega8A-PU and ATMega8L-PU chips using Arduino Mega 2560 board as a AVR programmer. Arduino Mega 2560 board is based on the ATMega 2560 chip.
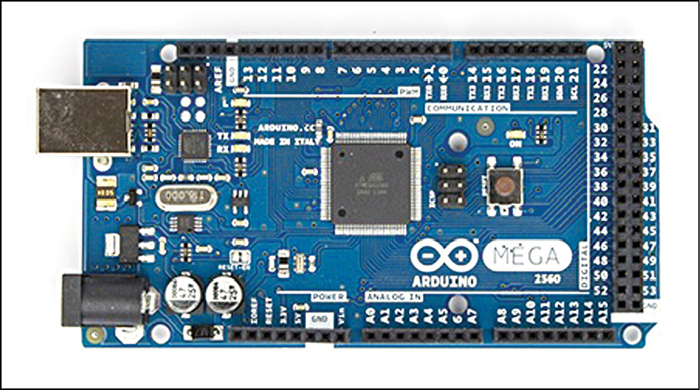
For my project I need two Arduino boards, but I have only one Arduino Mega 2560 board (refer Fig. 1). I can either buy an Arduino Uno board (that costs approx. Rs. 1400 in India) or I can make an Arduino board using a fresh ATmega328/ATmega328P chip.
Suppose you have an Arduino board that is built on ATmega328P or ATMega8A-PU chip and, due to some reasons, the chip has gone bad (like in my case). You can buy another chip from the market for approx. Rs. 140, replace the old chip and then try to upload some Arduino sketches.
Wow! Nothing happens and the board behaves like a dead rock! That’s right! Because you have inserted a raw chip that does not have an Arduino boot loader preloaded.
There are a number of AVR programmers available in the market for uploading the codes into chips, but most of these work with hex files or assembly-level programming languages, which I hate to work with.

I kept exploring the Internet, looking for someone who might be able to program a raw microcontroller using Arduino Uno as an in-system programmer. But success with bigger microcontrollers like ATMega2560 chip is hardly known. After trying and tweaking, this is what I finally got, and it is just wonderful. It is possible to make Arduino as an AVR programmer as described in this article.
I can now program ATmega328P, ATmega328, Attiny 13A, 44, 45, ATMega8A-PU and ATMega8L-PU chips using my Arduino Mega 2560 board as a programmer. Arduino Mega 2560 board is based on the ATMega 2560 chip.
Basic requirement for making Arduino
First, transfer the Arduino boot loader onto a raw factory-cut chip, which requires nearly 512 bytes of space. Once that is done, upload the Arduino sketch onto the remaining space of the chip to do the bull work. But, these two steps are not that simple. You need relevant software and hardware set-up as described here.
Software
Relevant codes are: avr_isp.ino, avrdude.conf and boards.txt.
Download source code:click here
You also need Arduino IDE. Arduino IDE version 1.0 is the most stable version that I use on my Ubuntu laptop. It is assumed that you too have one of the stable Arduino IDEs installed and working perfectly on your PC. You can find the boot loader code under hardware/Arduino folder.
Hardware
You need Arduino Mega 2560 board, a fresh ATmega328 or ATmega328P chip, 16MHz quartz crystal, two 22pF ceramic capacitors, one 1µF, 16V electrolyte capacitor, an LED and optional push-to-on switch for the reset button (not shown here). The circuit connection details are shown in Fig. 2. 5V at CON1 is not required during programming.
The quartz crystal of 4MHz/ 8MHz/16MHz can be used, but it is optional. Note that, once a chip is programmed with a 16MHz crystal, you cannot re-program it back to 8MHz internal oscillator. If no quartz is used, then 22pF capacitors are not required.
Make your Arduino as AVR programmer
First, connect your Arduino Mega 2560 board to your PC, start Arduino IDE and upload avr_isp.ino file onto your Mega 2560 board. Once this is uploaded, your Mega 2560 board is ready for acting as a programmer.
Loading boot loader into ATmega328P
Now, it is time to look at the chip that you have purchased. If it is ATmega328P, then it can be programmed very easily because it has a common signature, which has been taken care of in Arduino IDE.
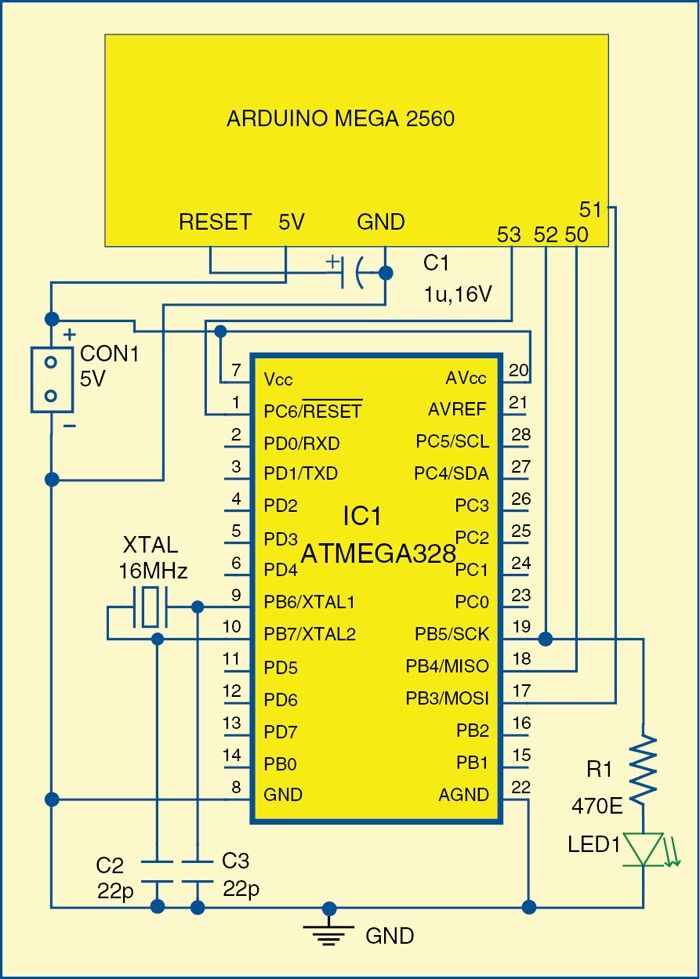
Just make the connections as shown in Fig. 2 and select the board as ATmega328 (on a breadboard with 8MHz internal clock) or Arduino Uno if you connect 16MHz quartz crystal. Then, put the capacitor between the reset pin and ground pin of Arduino Mega 2560 board (now call it the AVR programmer board). The capacitor prevents the programmer board from self re-setting, while uploading the boot loader code into the target board. Open Arduino IDE, go to Tools → Board (select your board). Next, go to Tools → Burn Boot loader.
Now, lights on the programmer board start blinking. If you have put LED on pin 19 of the target board, this too will start blinking, and after some time everything will stop. The boot loader has now been burnt into the new ATmega328P chip.
Loading boot loader into ATmega328
If the chip that you have purchased is ATmega328 (without a P), it makes all the difference. The programmer window will say that the chip signature is different—that is no reason to worry.
ATmega328 chip has an onboard 8MHz internal oscillator. That means, in absence of a quartz crystal oscillator, the chip can still be programmed and work at 8MHz speed. Unfortunately, this is not visible in the boards section, unless boards.txt file of Arduino is changed to make so. Replace /usr/share/arduino/hardware/arduino/boards.txt file with the new boards.txt file that you have downloaded.
Close Arduino IDE, if it is open and then restart Arduino IDE. Now, go to Tools → Board and select ATmega328 (on a breadboard with 8MHz internal clock) or Arduino Uno.
Go to /usr/share/arduino/hardware/tools/ and replace avrdude.conf file with the new avrdude.conf file that you have just downloaded.
Keep a back-up of the old file as it will be required again while programming the original chips. In fact, we are just making fool of the IDE software now by telling it to program the same ATmega328P (original) chip with only a different ‘signature’ line.
Alternatively, you can manually open avrdude.conf file, search for the block starting with ATMEGA328P and under it find the signature line signature=0x1e 0x95 0x0F;. Replace this line with the new signature signature=0x1e 0x95 0x14; #modified by Bera for ATmega328.
Avrdude.conf is a very big file. The first time I used it, I did it at a wrong location under a similar ATMega description and signature line, and the result was frustrating for me. Therefore, I recommend that you simply replace the file with the new one and it will work for all versions of IDEs.
Now, close the IDE if it was opened and then reopen Arduino IDE. Repeat the process of burning the boot loader as mentioned above. To be on the safe side, remove capacitor C1 before uploading avr_isp.ino onto Arduino Mega 2560 board. Now, put back the capacitor again, select the board (Arduino Uno) and burn the boot loader into ATmega328 chip. It should work now.
Remember, capacitor C1 should always be connected on the programmer board while programming the target chip, else it will give errors. Once the boot loader is successfully loaded, you can use this as a new Arduino board.
What next? All the fun is awaited! Find Blink program from the examples in Arduino IDE, open it and compile it. The Blink program is listed below.
void setup() {
pinMode(13, OUTPUT); // The LED
connected to pin no 19
}
void loop() {
digitalWrite(13, HIGH); // set the LED
on pin no 19
delay(1000); // wait for a second
digitalWrite(13, LOW); // set the LED
off on pin no 19
delay(1000); // wait for a second
}
To upload the above code into ATmega328, go to File → Upload Using Programmer. (Remember this is not a common upload program. You are going to upload it using Arduino as a programmer.)
All LEDs on the programmer and the LED connected on pin 19 will start blinking for some time and then everything will stop. The LED connected to pin 19 is the LED connected to digital pin 13, which will start blinking now to show that you have successfully burnt the chip with Blink program.
Now, the code is uploaded into the target chip through Mega 2560 board. The LED at pin 19 will blink at the rate defined in the code. Now, you may disconnect Mega 2560 board from ATmega328 circuit and connect 5V supply at CON1.
This ATmega328 board can also be interfaced with sensors, LCD modules, 433MHz transmitter and receiver modules, rotary encoders, joy sticks and servos. So, it may be assumed that it is a normal board and will work like other Arduino boards.
The author is an avid user of open source software. Professionally, he is a thermal power expert and works as an additional general manager at NTPC Limited

How to interface arduino mega with MATLAB