 This circuit uses power bank and DC-DC booster module not only for charging mobile devices but also to provide 1.2V to 37V DC power supply. The compact circuit can even be used during AC mains power failure.
Circuit and working
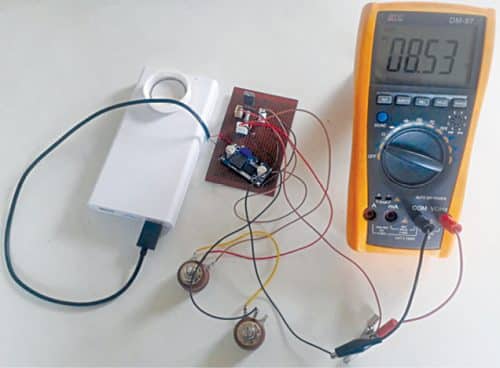
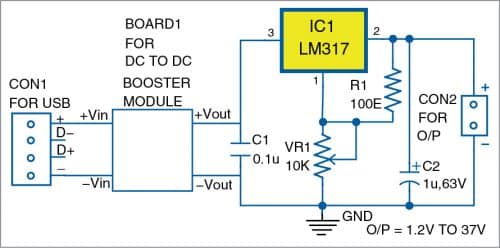
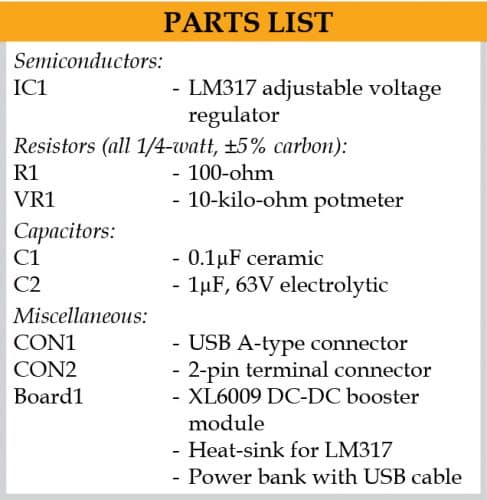
While the author’s prototype is shown in Fig. 1, circuit diagram of the power supply is shown in Fig. 2. It comprises a power bank (not shown in Fig. 2), a DC-DC booster module (Board1), 3-terminal positive linear voltage regulator LM317 (IC1), 10-kilo-ohm potmeter (VR1), and a few other components.


The power bank is a portable charger commonly used for recharging mobile phones, smart speakers, wearables, etc. Here it is used as a DC power supply like a battery.
The XL6009 DC-DC booster/converter has a wide range of input and output voltages. It is built around an N-channel MOSFET with switching frequency at 400kHz (fixed) and efficiency of 94%.
Power bank’s output is connected to input of the DC-DC converter (Board1) module, whose output is adjusted to 40V by varying its inbuilt pot. The output voltage of IC1 can be varied from 1.2V to 37V linearly through 10-kilo-ohm pot VR1 at rated current of 1A.
Construction and testing
An actual-size PCB layout for the power bank based linear regulated DC power supply is shown in Fig. 3 and its components layout in Fig. 4. After assembling the circuit on the PCB, connect the 5V supply across CON1.


Download PCB and Component Layout PDFs: click here
This circuit can also be assembled on a small breadboard or veroboard. Connect any power bank with 5V output to CON1 connector. Place a DC voltmeter’s probes across +Vout and -Vout terminals of Board1. Vary the module’s inbuilt pot to read 40V DC in voltmeter. Next, remove the probes from Board1 and place them across connector CON2. Now, vary VR1 slowly. You should be able to vary the voltage from 1.2V to 37V. If so, your circuit is ready to use.

Vinay Kumar K. is working as an instructor in EEE department, NIE Institute of Technology, Mysuru, Karnataka


PCB and Component Layout PDFs link not found, can you provide another link please, thankyou.
Have shared the file via email.