 Necessity is the mother of invention, and that’s how I could find a smart solution for controlling my webcam from a remote location where distance is no limit. This article describes the technique to control the webcam connected to a Raspberry Pi’s general-purpose input/output (GPIOs) pins from a remote machine’s web browser.
Once I am 800km away from my present location, I may not be able to come back easily for making minor adjustments to the webcam. The system has to run continuously with a webcam connected to it and reliability is of utmost importance. Linux and PHP are reliable tools to achieve my goal. For more than ten years now, I have been using various clones of Linux as my preferred operating system. PHP is a good tool for networking and so I chose my favorite PHP and the smartest solution came in no time.
GPIOs can be manipulated at the raw shell commands level, and PHP can execute shell command almost silently without any ripple on the outside.
The system detail
The Raspberry Pi (Raspi) board streams a live image through a port forwarding it to a remote IP address. The webcam sits on the shaft of a stepper motor, which is being run by the same Raspberry Pi. The prototype is shown in Fig. 1.
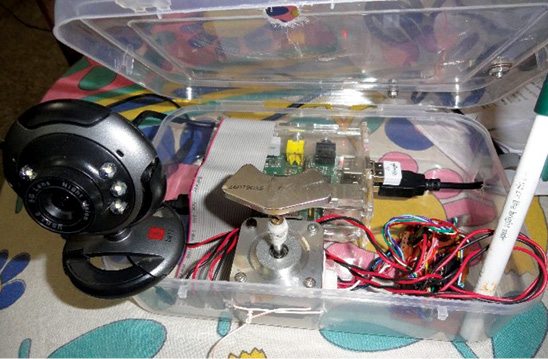
The webcam can turn clockwise or anticlockwise, depending upon the remote instructions issued by me. It can even be made to move continuously (150 degrees) from one side to the other and back. This can be done while I am in Howrah and the Raspi webcam is sitting on my attic in Vindhyanagar, which is about 800km away.
The PHP codes in Raspberry Pi’s machine control the webcam smoothly. If there is a sudden power failure, the Raspi will go down but once power comes back, everything will be restored. The camstepper.php program runs at crontab level and restarts at every booting. You can open and edit the camstepper.php using nano editor by typing the following command on the terminal:
$ sudo nano camstepper.php
$sudo su
#crontab -e // this will open the crontab
for su.
Add the following line at the bottom; it will start the task at every reboot:
@reboot php -f /var/www/camstepper.php
& //
Remote control of GPIOs
Ensure that you have apache2 with php5 installed in your Linux system. If not, you can install it as given below:
$sudo apt-get install apache2
$sudo apt-get install php5 php5-imap
Drop class.phpmailer.php in your document root directory as this file is used for sending email by PHP. The file is available for download from the link. The imap file is required if you want to install all the features of the webcam. Also, you have to install WiringPi in your system.
Now, let us see the beauty and power of PHP to manipulate the GPIOs of a Raspi board. For controlling the GPIOs—putting them off or on—we will be using the WiringPi shell commands (gpio) in PHP. For installing the WiringPi, the link.
Once the WiringPi is installed, you can control the GPIOs by simple command line controls, which we will do in PHP using shell_exec command—so simple and it does so flawlessly in PHP.
The remote machine is the client machine. It can be an Android phone or any computer, but it should be connected to the same network which has the Raspi connected to a webcam. The remote machine should have a browser to open the page to access Raspi’s GPIO. The browser should be capable of displaying frames.
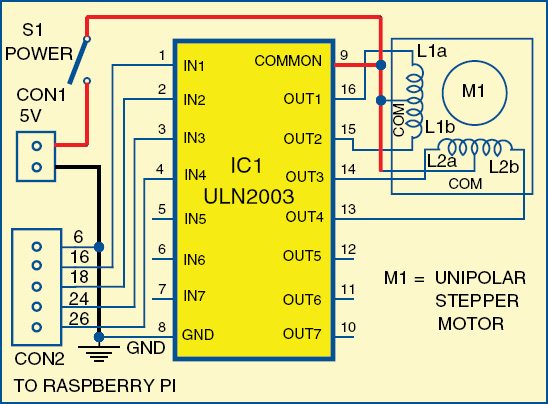
The circuit for stepper motor connections
The circuit diagram for controlling the unipolar stepper motor is shown in Fig. 2. The camstepper.php program will control the stepper motor. The unipolar stepper has five or six wires—the middle or common wires are joined together and connected to +5V supply. The remaining four wires are connected to pins 13, 14, 15 and 16 of ULN2003.
For a 5V bipolar stepper, connect it directly to the GPIOs, bypassing the ULN2003. That way it produces less but good enough torque for a tiny webcam. However, for better torque, it is to be connected through a ULN2003.
If you study the camstepper.php program, you would find that the entire pan of the webcam is controlled by just two GPIOs. These two GPIOs are GPIO-18 and GPIO-21 (physical pins 12 and 13). Any other GPIO can also be considered. The two GPIOs have the following states:
0 0 —– No motion
1 0 —– Clockwise motion of webcam
0 1 —– Anti-clockwise motion of webcam
1 1 —– Oscillating motion of webcam.
The gpio.php code given below shows how to achieve the same:

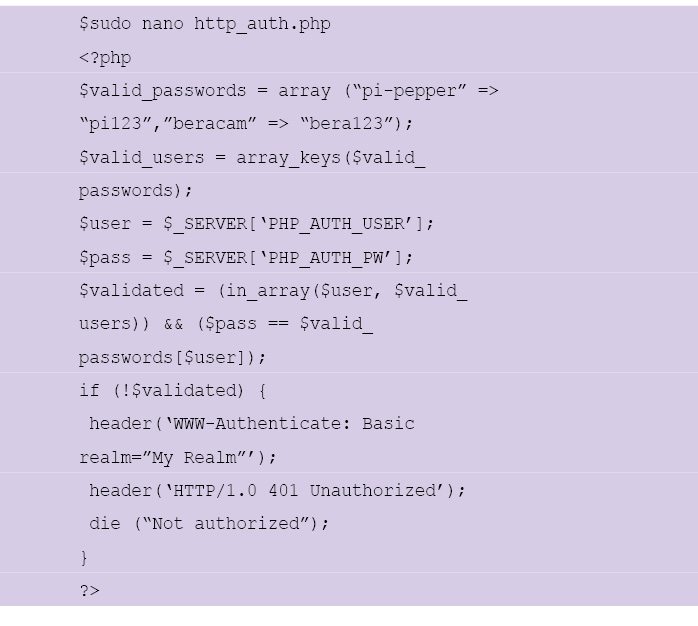
At the top, we included an http_auth.php program only to safeguard against getting the webcam manipulated by every Tom, Dick and Harry. It is a login-password program.
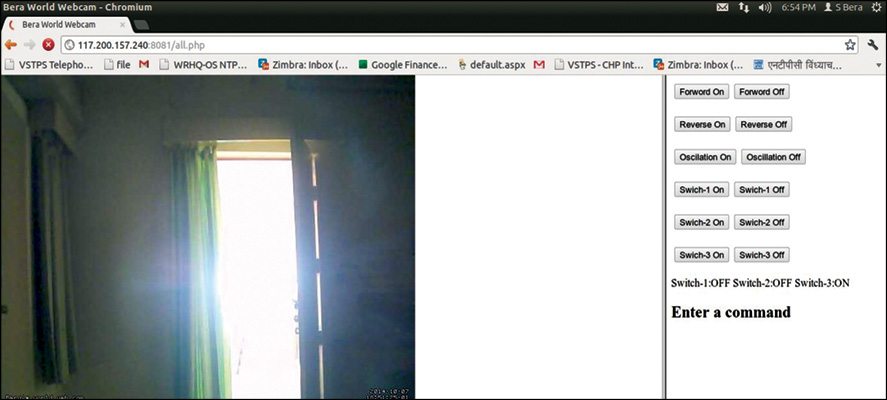
Type the IP address of the Raspi from the remote computer to access the webcam.
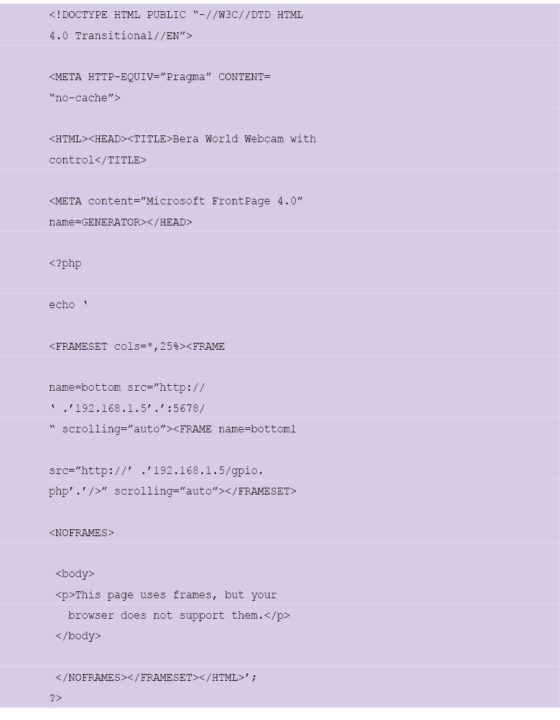
Ideally, I have to open two browser windows: one for viewing the image being captured by the webcam and the other for controlling the stepper motor. In the Intranet where the IP address is fixed, both windows can be clubbed on one page as shown in Fig. 3. But, on the Internet wherein the port forwarding IP address is dynamic, putting them on one page is difficult. May be you can find a different way to achieve it.
I have clubbed http://192.168.1.5: 5678 and http://192.168.1.5/gpio.php in a single all.php file to get a single window.
Put the all.php file in /var/www or the documentserver root directory of Raspi. Note that the IP address will be different in your system. You need to change the IP address in all.php code accordingly.
Download source code: click here
The code for all.php is listed below:
The author is an avid user of open source software. Professionally, he is a thermal power expert working as an additional general manager at NTPC Ltd


