


 “Ting-Ting-Ting” – We are all familiar with that sound of school bell which rang before morning assembly, lunch break and at the end of the day. These bells are often operated manually. There are some electronic bells available out there in the market but their setup is quite expensive. So, let’s make a low-cost prototype of a modern automatic bell.

Bill Of Materials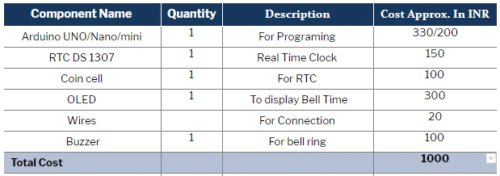
Prerequisites
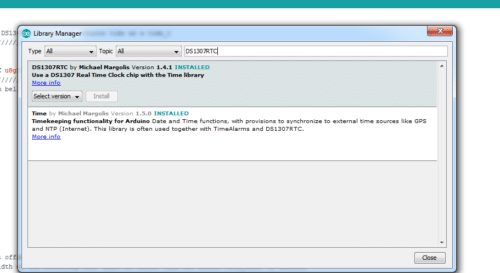
Make sure to install the following library types required for coding in Arduino
- TimeLib
- DS1307RTC
- U8g2lib
To do so, go to Sketch in the main menu ? Include Library ? Manage Library. Enter the above library types in the search bar and download them. (See Fig.1)
Coding
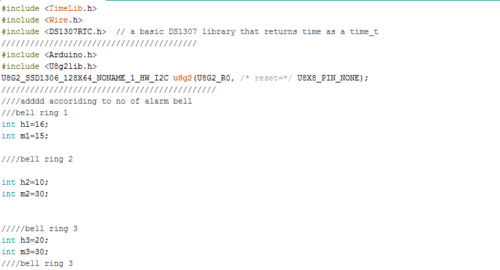
Initialize the required libraries and variables with the required time duration of the bell. (See Fig.2)
Then create a setup function for debugging serial port baud rate. Also, setup the OLED and RTC module for I2C communication. (See Fig. 3)

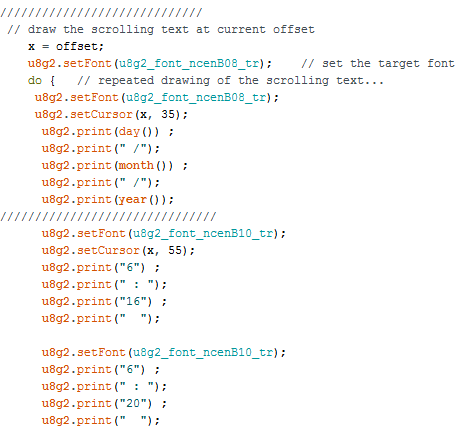
Next, we create a loop function for viewing date, time and day on the OLED display. (See Fig. 4)
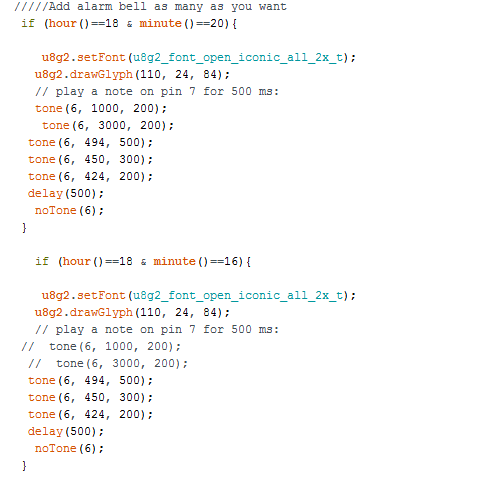
Now, create an ’if’ condition to check the date and time for the bell to ring. (See Fig. 5)
Connection
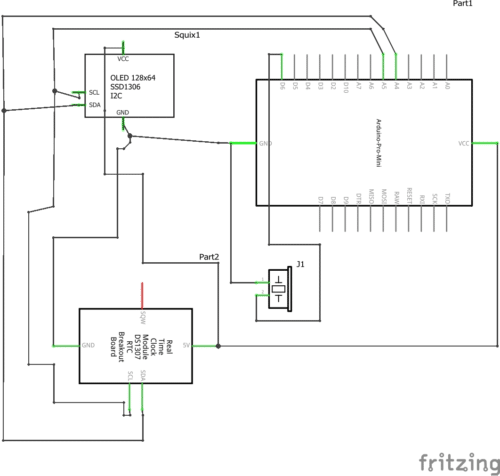
| Arduino PIN | Components PIN |
| GND | OLed and RTC GND |
| 5V | VCC of OLED and RTC |
| SCL A5 | SCL |
| SDA A4 | SDA |
| PIN 6 |
|
| GND |
|
Testing
Ensure to cross check each connection. Any mistake will fry your costly board. After confirming that everything’s correct, power the Arduino Uno board with either USB or by using 5-12V battery. The OLED will start displaying time and other information. The buzzer will then automatically ring as per the time set for the bell.
Download Source Code
Nice project
Thanks, You vcan check out our other project also
nice project. how do I get the full project?
This article describe every thing and code is included in the page to download
my project is not run. I think the is in the code
What problem are you facing.