 Traditional switches are outdated now. These switches have mechanical moving parts that get damaged on continuous use.
Many old switchboards are getting replaced by modern touch switches that not only enhance the look of our homes but are easier and safer to use. These modern touch switches have extra functions and, as no moving parts are involved, these last longer than the traditional ones. Despite these advantages, touch switches are quite expensive.
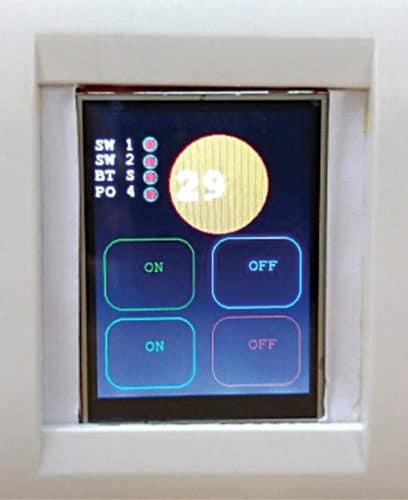
This smart touch panel project will turn out to be much cheaper than the panels available in the market. The panel can be used to control electrical appliances either through Arduino based touch switchboard or wirelessly through an Android app. Arduino based touch switchboard can also display room temperature on the smart touch panel screen (refer Fig. 1).

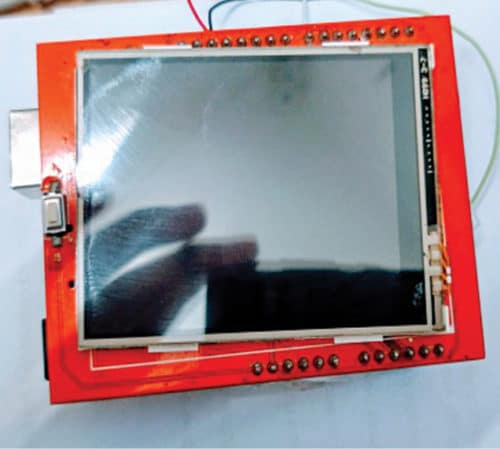
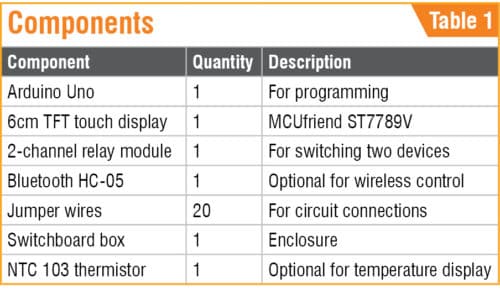
Now, let’s collect the components listed in Table 1 to start the project. TFT touch display shield (6cm) used in this project is shown in Fig. 2.
Setting Arduino library
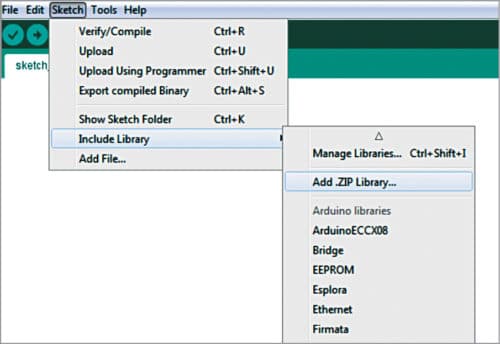
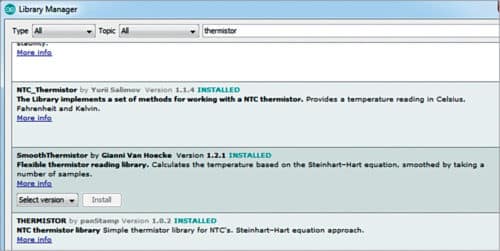
First of all, install the required libraries in Arduino IDE. For this, go to the Sketch menu and click on Manage libraries option (Fig. 3). Then search the library name and click on the install button. The libraries needed for this project are Adafruit GFX, TouchScreen, and NTC thermistor. Install them, as shown in Fig. 4, Fig. 5, and Fig. 6. Every touchscreen has its own library. Here, we have used MCUFriend 6cm TFT LCD Library ST7789V.


Coding
After installing the required libraries, let’s start Arduino coding.
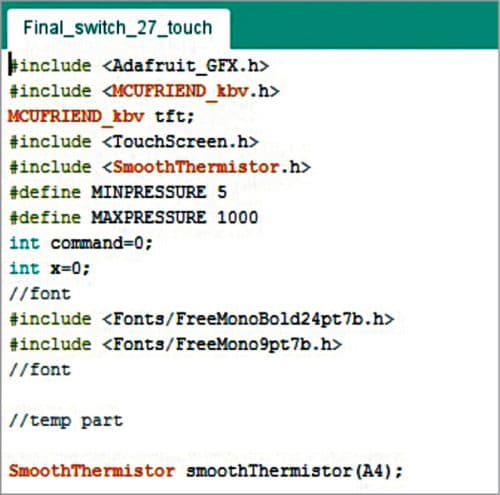
In the first part of the code, initialise the required libraries, as shown in Fig. 7.
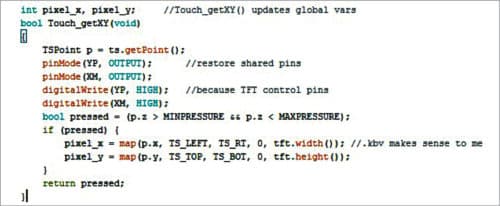
Create a function to get the point of touch on the LCD screen in X and Y coordinates (Fig. 8).
Next, add codes for colours that we are going to use in the display (refer Fig. 9).

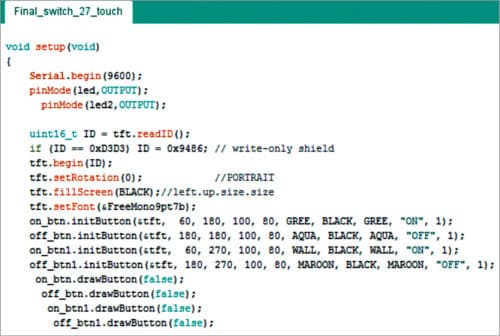
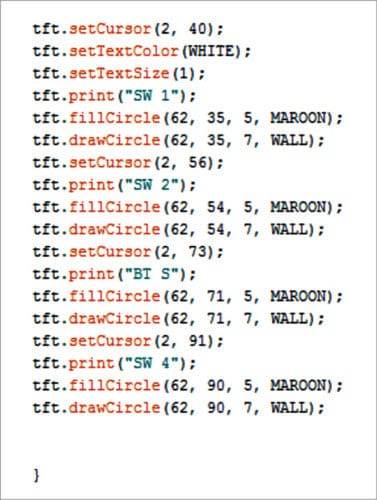
Then create a setup function where we will add codes to show buttons and all other elements on display (refer Figs. 10 and 11).
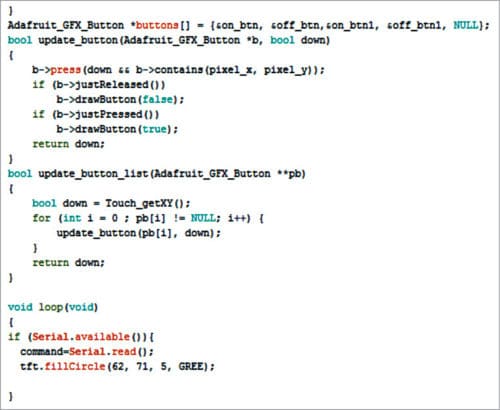
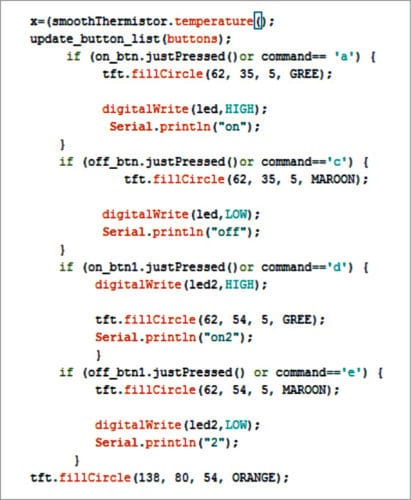
We need to create another function to check the state of buttons and assign their tasks.
For example, if we touch a button, the assigned task changes the state of the relay to either on or off (refer Figs. 12 and 13).
We are done with the coding part. Save the code as touch_switch.ino. Compile it and upload the code into the Arduino Uno board. The next step is app development.
Android app development
App development is done on the MIT App Inventor. First, you need to have a valid Google email account. Next, open the link https://appinventor.mit.edu to start the MIT App Inventor project. You will find two tabs—Designer and Blocks on the top right side of the screen.
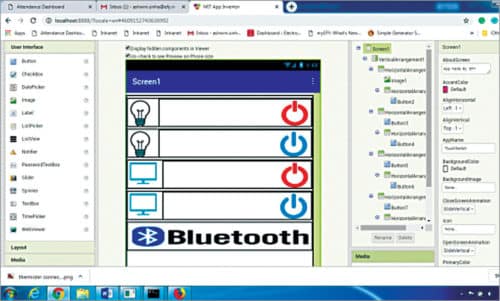
Open the Designer section, create a layout for the app, and then add the following components—four buttons, a list picker, and a Bluetooth client, as shown in Fig. 14.
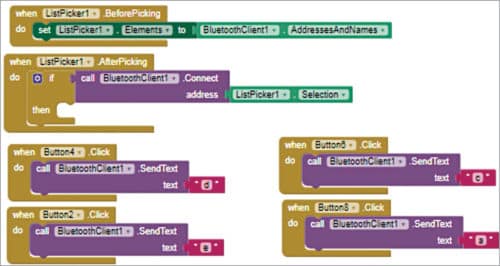
Next, open the Blocks section in MIT App Inventor. Pick and place the code blocks, as shown in Fig. 15. Save the project as TouchSwitch.apk and install this .apk file on your Android phone.
Connections
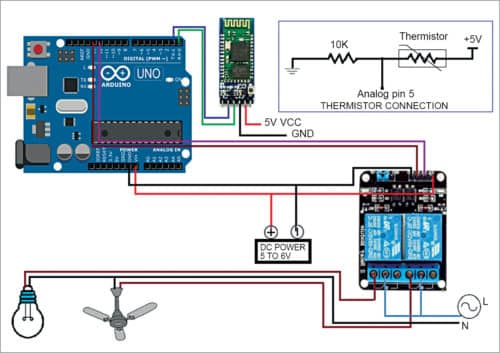
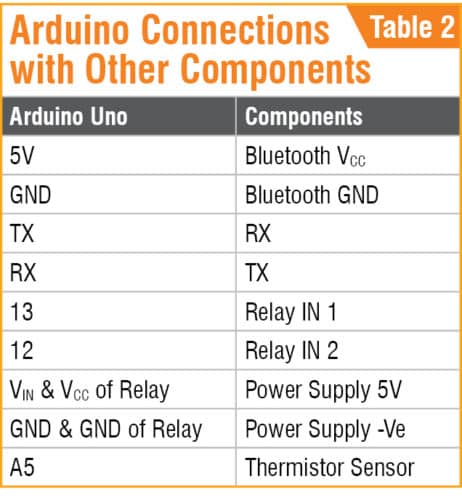
Now, we need to connect the components and fit all the components and relay modules in a switch box or enclosure. The circuit diagram is shown in Fig. 16. The connection details between Arduino and other components are shown in Table 2.
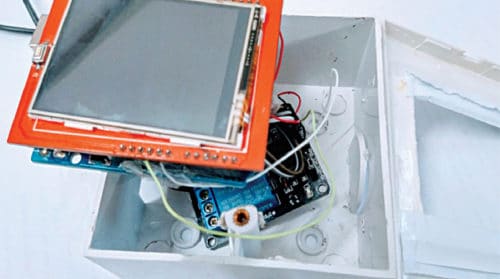
After connections are done, mount the TFT touch display shield on the Arduino Uno board. Then enclose all the components, including the Arduino board, TFT touch display shield, and relay module in a suitable plastic box, as shown in Fig. 17. Place TFT touch display carefully in the enclosure, as shown in Fig. 18. The final touch control panel on Android for wireless control is shown in Fig. 19.

Congratulations! Your smart touch switchboard is ready to use.
Testing
Check each connection carefully as one wrong connection might result in an electrical short circuit. When you are sure that all the connections are correct, power on Arduino and relay module with 5V DC, and then plug AC appliances connected to the relay for switching.
When you touch the off button on the touch panel (refer Fig. 1), the relay turns off the electrical appliance connected to it. When you touch the on button, it will switch on the electrical appliance connected to it.
This project is designed to control two electrical appliances. First two control buttons (on and off) in the first row of the touch panel shown in Fig. 1 are for the first appliance and control buttons in the next row are for second appliance.
Next, control the electrical appliances through the Android app (refer Fig. 19). Open the TouchSwitch app and click on the Bluetooth icon button to connect your mobile phone with Bluetooth HC-05. Then click on the on/off button in the app to control electrical appliances wirelessly.
Download Source Code
This project was first published online on 15 April 2020 and was published in EFY August 2020 print issue. You can read the full article here.


