
Introducing Our Implantable RFID Chip that will help revolutionize Animal and Human Identification. Implantable Electronics is the new trend nowadays so why not try some innovative DIYs.
Imagine keeping tabs on animals in zoos, prisons, pet homes, and animal parks without constant human monitoring. We all know how challenging it is to tell these creatures apart – they often look similar.
Even fancy AI struggles due to their similar features. But that’s where our game-changing solution comes into play.
Meet our implantable tracking system, a tiny chip that can be placed inside animals or even humans. This chip works like magic to track, identify, and collect crucial data. We’re talking about information like their age, health, species, and where they’re from.
POC Video Tutorial In English
POC Video Tutorial In Hindi
This intelligent system is like an animal’s digital ID card, making it perfect for significant areas like national parks and zoos.
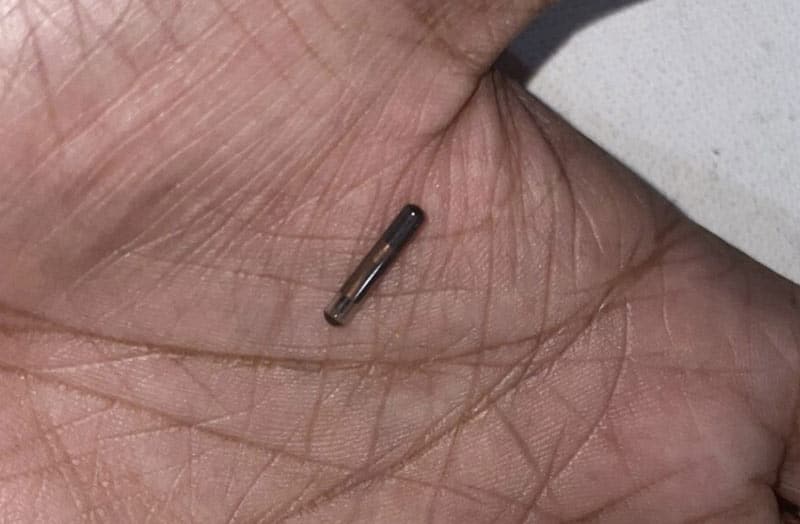
We’ve made it super easy too. Our implant uses a special chip that can be put inside animals or humans. Then, with our nifty device, you can read the chip’s info and keep all the data in one place – whether that’s on your computer or up in the cloud.
And guess what? Even if an animal gets out of its usual spot, we’ve got it covered. Our clever reader device can still pick up the chip’s signal from a distance.
Also Check: Interesting RFID-based Projects
Join us on this exciting journey as we put together the bits and pieces needed for this project. We’re about to change the game when it comes to tracking animals and humans. Get ready for a new era of identification that’s simpler, smarter, and less invasive.

Bill of Materials
| Components | Quantity | Description | Price Approx – in INR |
| Implantable RFID Capsule | 1 | 125kHz | 600 |
| RDM 6300 | 1 | 125kHz Serial RFID Reader | 400 |
| Raspberry PI Zero / 4 | 1 | SBC | 5000 |
| Jumper Wire | 10 | Female – Female | 30 |
| 5V/ 2A Dc Adapter | 1 | For powering | 100 |
| Total | 6130 |
When it comes to tracking, not all microchip implants are created equal. There’s a variety out there, each with its own unique features. In our case, we’ve harnessed the power of a 125kHz RFID implantable device to make waves in the world of animal and human identification.
Picture this: a tiny, powerful chip that’s designed to be embedded within animals or humans. This 125kHz RFID device is the secret sauce behind our tracking system. It’s like a digital fingerprint for every individual, holding key details like age, health, species, and origin.
Now, here’s the cool part – reading and identifying these chips isn’t rocket science. While some setups might use a Raspberry Pi (RPI) for the task, we’re all about keeping things flexible.
You can achieve the same results using something as familiar as a laptop with Python and a USB connection. It’s all about making the technology work for you in the most convenient way possible.
Also Read: RFID Technology Complete Overview
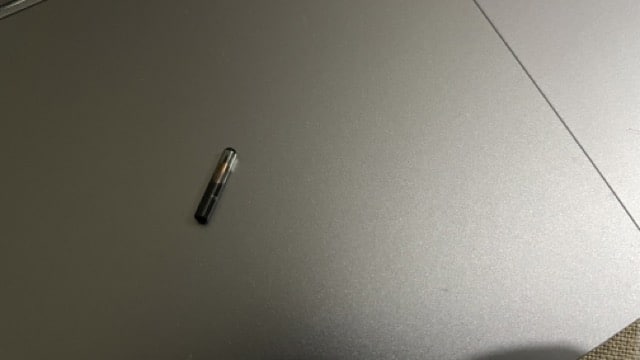
Implanting RFID Chip Inside:

If you’re learning about microchip implants, you don’t have to actually put them inside creatures. You can focus on coding and how the chips work. But if you want to test the implants, you can use animals like rats, snakes, or fish – they’re good for practice.
Now, if you’re serious about using these implants in the real world to track animals and keep an eye on their health, that’s a bigger deal. Imagine being able to check on animals and collect info about them automatically.
Whether you’re into coding, testing, or making a difference, microchip implants open up exciting possibilities where tech meets nature. Get ready for a journey that’s both fascinating and meaningful.
For those who want to try implants, there’s a helpful video tutorial. Keep in mind, though, that this involves dealing with living things, so talking to doctors and animal experts is really important. We want to make sure animals stay safe and healthy.
Coding
After implanting the chip inside the body, the next step involves setting up the reader device. This device scans the implanted RFID and cross-references its data with the database. If the data is new, it prompts us to assign a unique name to the animal.
For this process, we require a specific library to work with the RDM6300 RFID reader. To get started, open the terminal and run the following command to install the necessary libraries.
sudo pip3 install pyserial
sudo pip3 install rdm6300
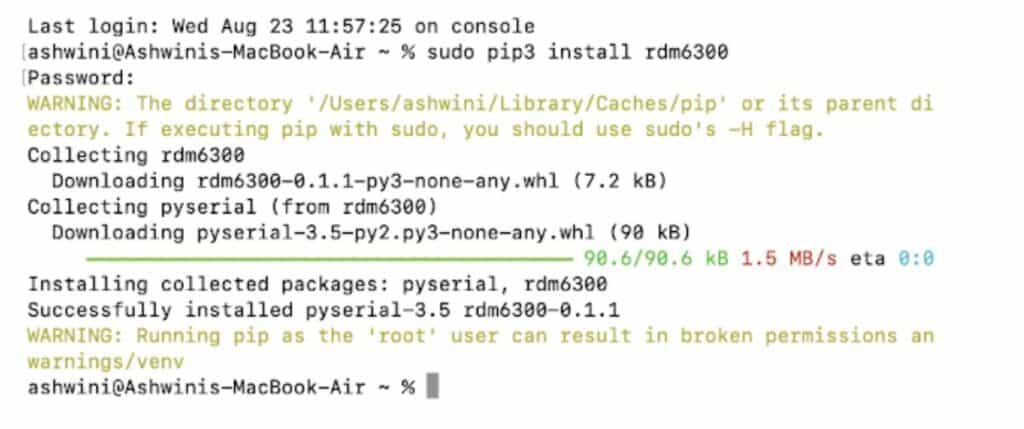
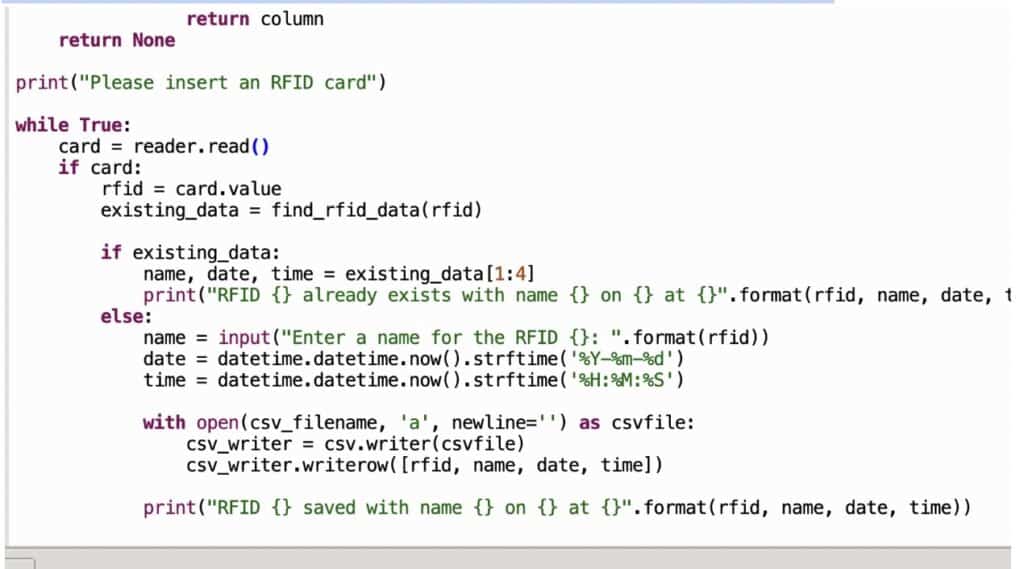
Following the setup, we can proceed to develop the code responsible for reading the RFID and attempting to retrieve the corresponding unique animal name from the database. Here’s the step-by-step breakdown of the code creation:
- Start by importing the required library.
- Set the serial port name for the RFID reader.
- Develop a function that scans the CSV or sheet file to locate the RFID number detected.
- Retrieve the stored animal name linked to that RFID number in the database, facilitating animal identification (see Figure 6 for reference).
With this code, the process of identifying animals using RFID becomes seamless and practical. This integration between technology and data allows us to accurately connect RFID readings to specific animal names, enhancing our tracking and identification system.
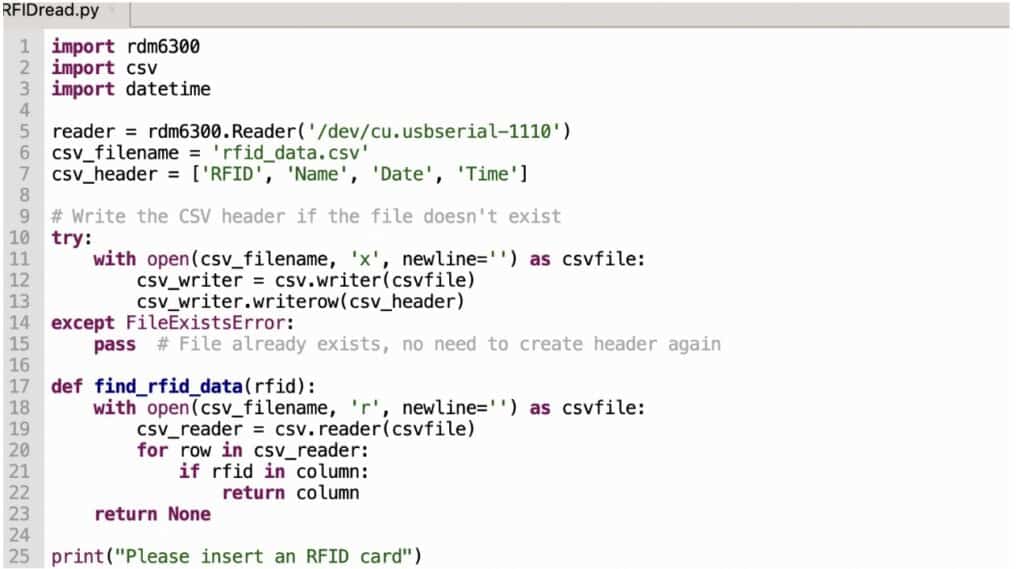
Moving forward, we can establish a while loop to implement the RFID checking process. Here’s how we do it:
- Inside the loop, continuously monitor for RFID scans.
- When an RFID is scanned, extract its unique code.
- Check if the extracted RFID code is already present in the database.
- If the data exists, display the animal’s name associated with that RFID.
- If the data is not found, prompt the user to provide a name for the animal.
- Save this new animal name and RFID data in a CSV file.
This loop ensures that each time an RFID is scanned, the system smartly identifies the corresponding animal’s name, or if it’s a new RFID, prompts the user to provide a name and saves it for future reference. This seamless process guarantees efficient and accurate animal identification in our tracking system.
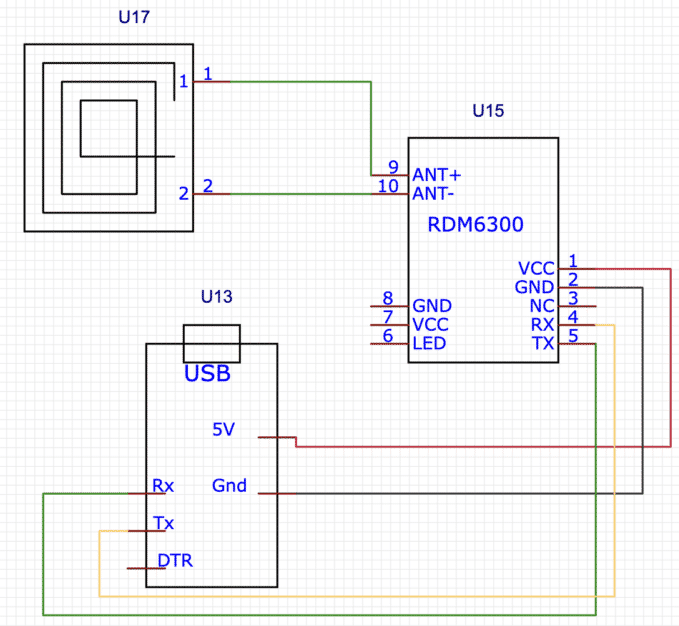
Implantable RFID Chip – Circuit Connection
Now we need to connect the components according to the following circuit diagram.
Testing
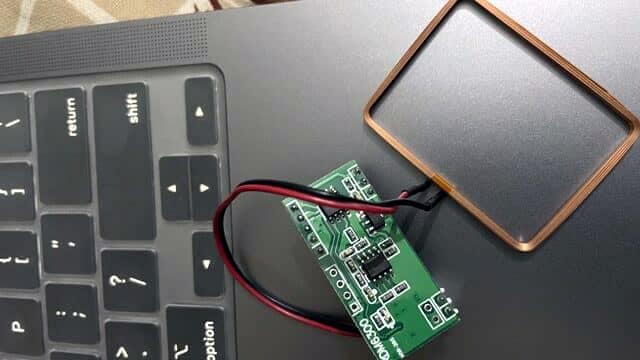
Now, it’s time to establish the physical connection. Connect the FTDI (USB-to-Serial adapter) to the RDM6300 RFID reader and then link it to your laptop. With this setup in place, execute the Python code we’ve developed.
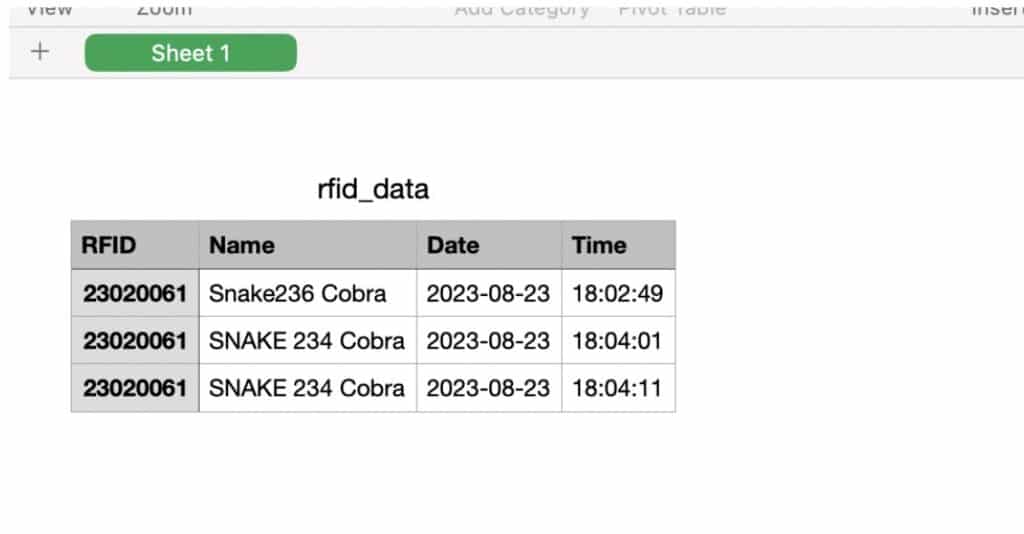
When you scan an animal like a snake or a rat – whatever creature you’ve implanted the RFID chip into – the system will perform the following actions:
- It scans the RFID chip’s code.
- It checks the database to see if the RFID code is already registered.
- If it’s a new RFID code, the system prompts you to input a unique name for the animal.
- The name you provide is then saved in the database.
- If the system recognizes the RFID code as already registered, it displays the specific identification name associated with that animal.
With this procedure, you’re effectively using the RFID technology to track and identify animals. It’s an interactive process that combines physical scanning, database lookup, and user input to ensure accurate and comprehensive animal tracking.


Note:- This is our first part of Implantable electronics. We will carry this project to the next version of IOT data tracking, Storing the data inside the body and then the real-time position raking system using implantable electronics soon, so keep checking electronics For You.


Sir,
Thank you for the useful and interesting project.
In the article instead of 125KHz, it is mentioned as 125Hz everywhere.
Thnaks for pointing out. Its updated. However the the chip and reader you can change and select according to your choice of range.