


The incandescent lamp provided inside the refrigerators glows whenever we open the door. It suffers from several disadvantages like:
1. Being a single light source, located in the upper corner, light does not spread uniformly. Only upper shelves get good light and the lower shelves are in darkness because of the shadows of food items kept.
2. Ironically, the lamp generates heat in the space which we are trying to cool, thus making the compressor work for longer duration.
3. During power outages, there is no illumination inside the fridge, when it is most needed.
The above problems could be overcome by using a distributed array of LEDs with battery back-up, which provides shadowless light and cool operation.

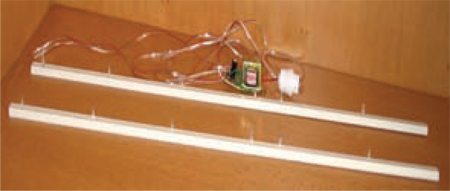
Two columns of six white LEDs in each row (2×6 array of white LEDs) are made using white PVC channels. The length of the channel equals the height of the cooling compartment of the fridge. The LEDs are placed such that each shelf has two LEDs located at the top corner. These channels are placed in the left- and right-hand corners inside the fridge as shown in Fig. 1.
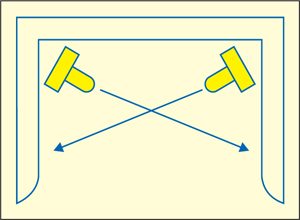
The circuit wiring can be placed behind the shelf or in place of the bulb-holder. The channels should be oriented as shown in Fig. 2, so light from the LEDs does not directly enter the eyes of the user.

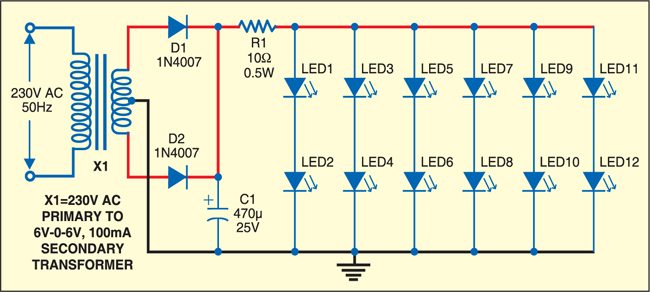
The power supply for LEDs is designed as shown in Fig. 3. The circuit shown in Fig. 3 works off mains power only and the circuit shown in Fig. 4 works off both mains as well as battery power when mains fail. The operating forward voltage of white LED is 3.5 volts. At this voltage, about 15mA current flows through each branch of the LED circuit. The total voltage requirement is approximately 7 volts. The full-wave rectifier gives about 8 volts. Current-limiting series resistor R1 drops the voltage by approximately 1 volt. This provides uniform distribution of the current in each branch of the circuit to ensure uniform illumination. If you do not get matched LEDs, use a 63ohm resistor in each of the six branches. In that case, R1 can be removed.
Assemble the power supply circuit shown in Fig. 3 such that it fits in the space provided for the lamp. When power fails, it becomes necessary to minimise the time for which the door is kept open. For areas where power failures are frequent, the battery-operated circuit for illumination of the fridge (shown in Fig. 4) can be used. The battery (6V, 4.5Ah sealed lead-acid) is kept on a trickle charge continuously. The LEDs are powered by the battery, which is connected through the door-operated switch. (In this case, we need to disconnect the original wiring of the door-operated switch. You may need the help of an expert technician to do it.)
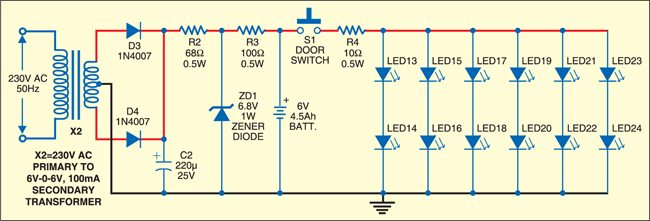
Zener diode ZD1 does not allow the battery voltage to go above 6.8V. Thus, switching to LED lighting also reduces power consumption of the fridge besides improving the inside illumination. It looks more elegant and is shadow-free. Cooling efficiency of the fridge improves as the heat generated by LEDs is lower than by the normal incandescent lamp provided inside the fridge and therefore the compressor is required to run for shorter time duration.
