 We designed a DIY Lightning Protection device using Arduino Nano, Relay, and an AS3935 sensor that can help you protect electronic devices against thunder-lightning.
Due to lightning, most of the time our electronic devices and home appliances got damaged. The high voltage and current associated with lightning can cause severe damage if proper precautions are not taken.
Here are a few reasons electronic devices can be damaged by lightning:
Direct Strike: If a lightning bolt directly strikes a building or a power line connected to the building, the high voltage surge can enter the electrical system and damage connected devices. This is more likely to occur if the building lacks proper grounding or surge protection measures.
Power Surges: Lightning strikes nearby can induce power surges in the electrical grid. These surges can travel through power lines and damage electronic devices connected to them. Surges can enter devices through power outlets, telephones, cable TV, or network connections.
Electromagnetic Interference: The electromagnetic fields generated by lightning can induce strong currents in nearby conductors, including wires and circuits of electronic devices. These induced currents can disrupt normal operation and damage sensitive components.
To protect electronic devices from lightning-related damage, today we are going to make a smart device that detects the lightning nearby and it automatically cuts off the power, and isolates it electronically with main power line inputs.
Here, the relay is used to optically couple the working circuit and electronically isolate the AC circuit and brakes the circuit when the lightning is nearby.
The AS3935 Lightning Sensor is capable of detecting lightning and providing information about the distance and intensity of the lightning, all while eliminating the interference caused by electric arcs and noise.
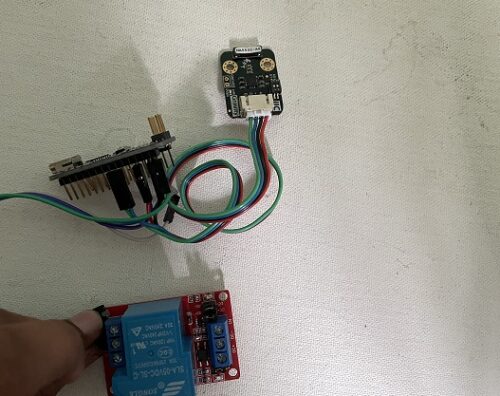
Components Required
| Components | Quantity | Description | Price Approx INR |
| AS3935 sensor | 1 | Lightning sensor | 1000 |
| Arduino Nano | 1 | For programming | 400 |
| Relay module | 1 | 5v SPST | 50 |
| Jumper wire | 10 | Female-Female | 50 |
| Total | 1500 |
Lightning Protection Device – Coding
First, we need to install the library for interfacing the sensor; so open the Arduino library manager, search for the Df robot lightning sensor, and install the library.
Now include the library in the code then set the pins and other configurations in the code.
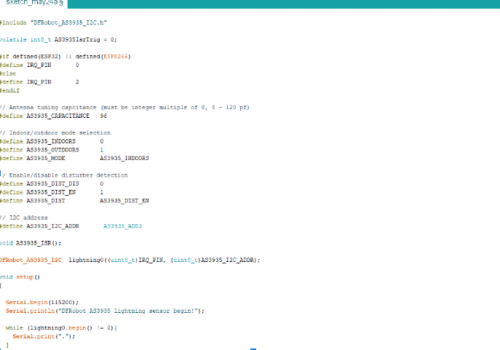
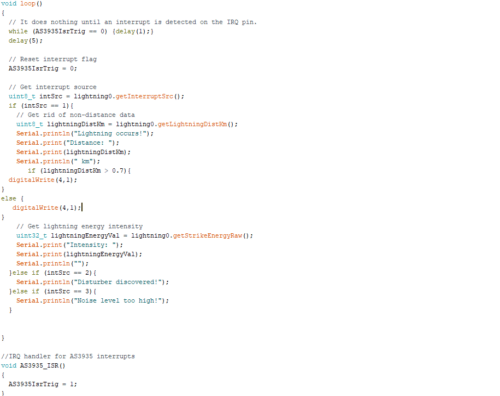
Now create the loop and then check the sensor data and get the lightning energy and the lightning distance. Now create the if condition to turn off the relay and power of the home when the lightning is nearby. you can set any value that you think the lightning is nearby and can cause damage. Here I have used the 0.7 km so if the lightning is around 0.7 km away from home it turns off the power to save the appliances.
Recommended: Mini projects for Engineers
Lightning Protection Device – Circuit Diagram
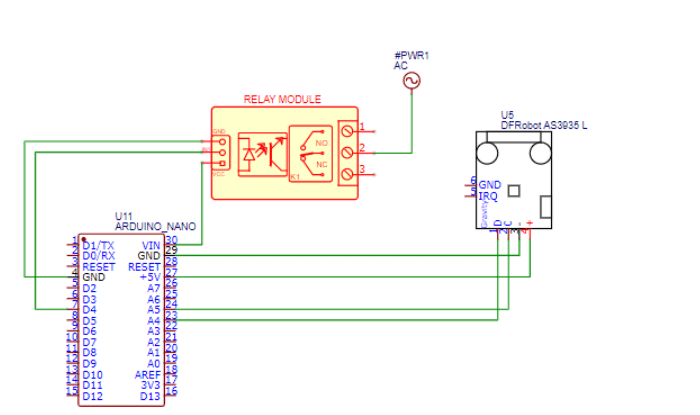
Now connect the component according to the circuit diagram given below. Here we connected Arduino Nano, Relay, and an AS3935 sensor together.
Testing
Now connect the components and then connect the Appliance to the relay of the NC pin. Then power the Arduino and replay with 5V. Now when lightning occurs near the house, it automatically brakes the circuit to protect the appliance from the lightning strike.
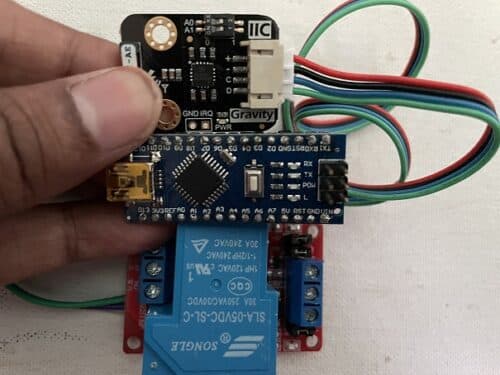
This is how you can build your own lightning protection device. You can also check the high/low voltage protection circuit.
If you face any issues while making this project, please feel free to ask in the comments below for any technical discussion.
You can download the complete code from the link given below.


Sir,
Thank you for the useful and protective circuit for the expensive appliance and gadgets.
For 700m or 0.7km, how much time will it take to disconnect the equipment safely? As per datasheet the Operation time is 15ms while Release time is 10ms for the relay mentioned in the project.