


Controlling two DC motors using Web Serial involves setting up an ESP8266 or ESP32 microcontroller with motor drivers and a web server. The microcontroller serves web pages and handles commands sent via Web Serial from a browser. Motor control is achieved through functions that interpret commands like “forward”, “backward”, and “stop”.
Each motor requires dedicated GPIO pins for direction control (using H-Bridge motor drivers) and PWM pins for speed control. The system ensures robust power management to handle motor currents and maintains communication integrity between the microcontroller and web browser for real-time control and monitoring.
Application
This setup enables remote operation and automation of DC motors, making it suitable for robotics, home automation, and industrial applications where precise motor control via a web interface is beneficial.

Bill of Materials (BoM)
| Components | Description | Quantity |
| Esp32 | Dev kit V1 | 1 |
| Motor Driver | L293D | 1 |
| Motor | 9V Dc Motor | 2 |
| Battery | 9V | 1 |
| Zumper Wire | As required |
Code for Enabling Remote Operation and Automation of DC Motors
#include <Arduino.h>
#if defined(ESP8266)

#include <ESP8266WiFi.h>
#include <ESPAsyncTCP.h>
#elif defined(ESP32)
#include <WiFi.h>
#include <AsyncTCP.h>
#endif
#include <ESPAsyncWebServer.h>
#include <WebSerial.h>
AsyncWebServer server(80);
const char* ssid = “Webserial”; // Your WiFi AP SSID
const char* password = “lkjhgfdsa2”; // Your WiFi Password
// Define motor control pins
const int motorPin1 = 4; // IN1
const int motorPin2 = 5; // IN2
const int enablePin = 27; // Enable pin (PWM)
const int motorPin3 = 14; // IN3
const int motorPin4 = 12; // IN4
const int enablePin2 = 13; // Enable pin for second motor (PWM)
// Message callback of WebSerial
void recvMsg(uint8_t *data, size_t len) {
WebSerial.println(“Received Data…”);
String command = “”;
for (int i = 0; i < len; i++) {
command += char(data[i]);
}
WebSerial.println(command);
processCommand(command);
}
void processCommand(String command) {
if (command == “F”) {
moveForward();
} else if (command == “B”) {
moveBackward();
} else if (command == “S”) {
stopMotor();
} else {
WebSerial.println(“Unknown command”);
}
}
void moveForward() {
digitalWrite(motorPin1, HIGH);
digitalWrite(motorPin2, LOW);
analogWrite(enablePin, 255); // Set speed to maximum
digitalWrite(motorPin3, HIGH);
digitalWrite(motorPin4, LOW);
analogWrite(enablePin2, 255); // Set speed to maximum
WebSerial.println(“Motors moving forward”);
}
void moveBackward() {
digitalWrite(motorPin1, LOW);
digitalWrite(motorPin2, HIGH);
analogWrite(enablePin, 255); // Set speed to maximum
digitalWrite(motorPin3, LOW);
digitalWrite(motorPin4, HIGH);
analogWrite(enablePin2, 255); // Set speed to maximum
WebSerial.println(“Motors moving backward”);
}
void stopMotor() {
digitalWrite(motorPin1, LOW);
digitalWrite(motorPin2, LOW);
analogWrite(enablePin, 0); // Stop the first motor
digitalWrite(motorPin3, LOW);
digitalWrite(motorPin4, LOW);
analogWrite(enablePin2, 0); // Stop the second motor
WebSerial.println(“Motors stopped”);
}
void setup() {
Serial.begin(115200);
// Initialize motor control pins
pinMode(motorPin1, OUTPUT);
pinMode(motorPin2, OUTPUT);
pinMode(enablePin, OUTPUT);
pinMode(motorPin3, OUTPUT);
pinMode(motorPin4, OUTPUT);
pinMode(enablePin2, OUTPUT);
// Initialize WiFi AP
WiFi.softAP(ssid, password);
IPAddress IP = WiFi.softAPIP();
Serial.print(“AP IP address: “);
Serial.println(IP);
// Initialize WebSerial
WebSerial.begin(&server);
WebSerial.msgCallback(recvMsg);
server.begin();
}
void loop() {
delay(2000);
WebSerial.print(F(“IP address: “));
WebSerial.println(WiFi.localIP());
WebSerial.printf(“Millis=%lu\n”, millis());
WebSerial.printf(“Free heap=[%u]\n”, ESP.getFreeHeap());
}
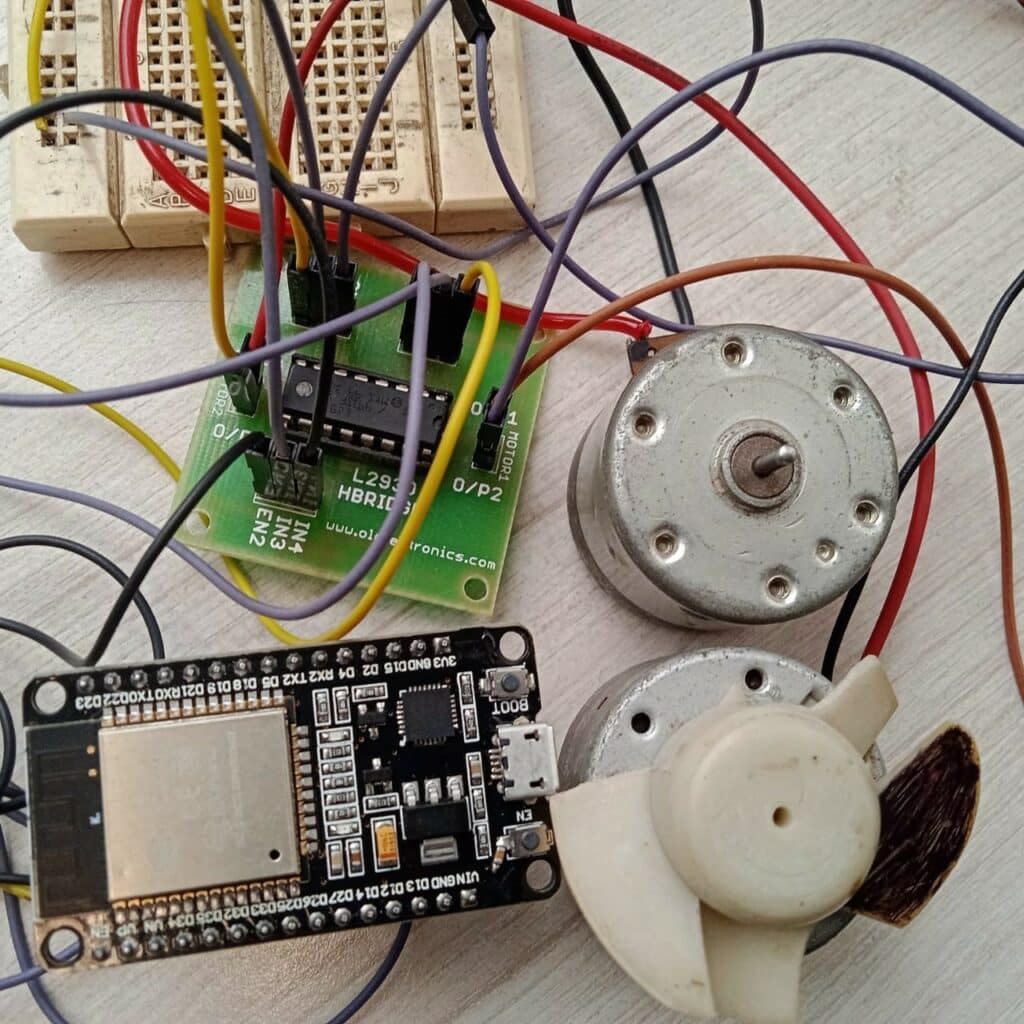
Connection for Motor Controller Using Webserial

Testing
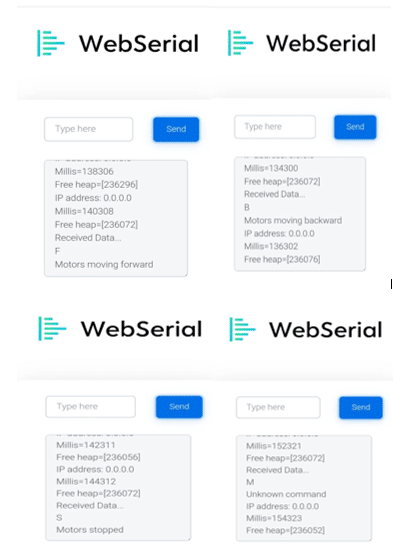
Connect all the components as per the given connections and then connect the ESP32 to your computer using a USB cable. Upload the code and connect your phone wifi with webserial then open a web browser on your mobile or laptop. Type (192.168.4.1/webserial) and enter the commands in the webserial interface.
Use the following commands:
- “F” to move forward
- “B” to move backward
- “S” to stop the motors
Author(s): Manjeet Vishwakarma, Abhay Verma and Satywanti Kundu are B.Tech ECE students at GJUS&T HISAR