
This Homemade Mini Fridge can work with any power bank and without using harmful CFC gases.
Have you heard of a compact fridge that can be taken anywhere? Yes, we made one! This DIY project demonstrates how to create a 5V portable freezer that is ideal for travel. It’s all about transporting heat from one location to another, just like a typical refrigerator.
Check the Working Video Below:
A freezer or refrigerator all work in the same way: they transfer heat from one space to another while keeping the two spaces thermally isolated. So, while one part cools, the other heats up, acting like a radiator and emitting heat into the surrounding environment.
This 5V portable freezer employs the same concept, but with a thermoelectric generator that transfers heat from one side to the other. This generator can generate power from heat differences or simply transfer heat, keeping your belongings cool on the go!
Also Check: Fridge Temperature and Humidity Indicator
While out on picnics or outdoor activities, having a cold drink is what everyone wishes for especially on a hot day, and hence we wish to have some cold storage or a mini fridge.
Since these are only found in luxury cars and vanity vans, and apart from being expensive, CFC gas is quite dangerous to our environment, especially the ozone layer. https://www.youtube.com/embed/daKgK_PMk5w
This freezer does not use a CFC gas system that causes harm. Also, it is portable and can operate even with less power. It can run on our phone’s power bank and battery. We can attach it to any car or bus to enjoy chilled drinks, ice cream, etc. on ours.
The freezer is portable and can be carried in a travel bag and set against the car dashboard. It works on a 5V-1.5A power source, like a power bank/battery/solar panel.
Bill of Material
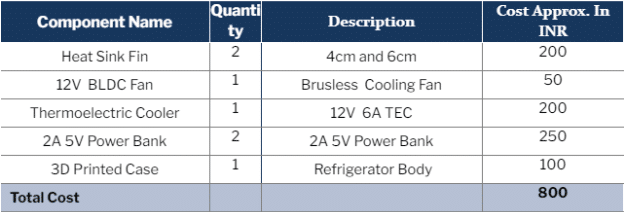
Want to create your own Power Bank? Watch the complete video tutorial for Constructing a Power bank.
Designing Mini Fridge
The body of the freezer has to be thermally isolated as much as possible, hence that is designed first. Thermal isolation is much needed since any freezer works on the heat transfer principle, where heat is transferred from one system to another, making a part of the system much colder.
Since the heat is pumped to another system, it makes the temperature of the recipient increase, so if the thermal isolation is not good, heat continues to enter the system and it becomes hard to maintain the temperature inside the freezer.
Here we use the PLA 3D printed design of the freezer case and isolate it with thermal isolating material like Polystyrene/thermal isolator spray and paint.
For the body of the freezer, one side of the box is kept open while the other 3 are closed. The open side is for inserting the heatsink and thermoelectric cooler module.


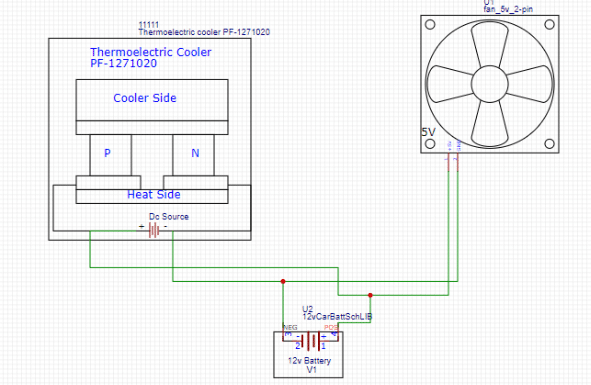
Mini Refrigerator Circuit Connections
The components are connected according to the circuit diagram. The red wire is connected as a +ve wire of the thermoelectric cooler and fan with a 12V power source (battery). The -ve wire is connected to the -ve terminal of the battery and to the -ve wire of the thermoelectric cooler and 12V fan.
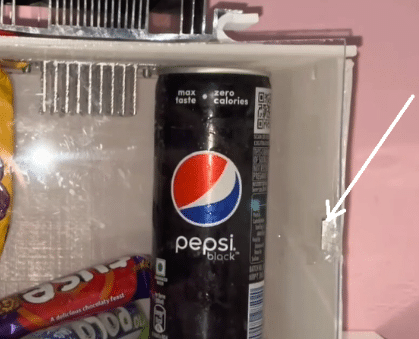
The next step is to fix the 3D-printed parts and cover the edges with thermal insulator spray foam. Then the door of the freezer is added. A same-size transparent acrylic sheet is cut out and then fixed, such that using a magnetic-based lock system, we can use the door for opening and closing. Magnets are also fixed, on the door and fridge on the body as in Fig 6.
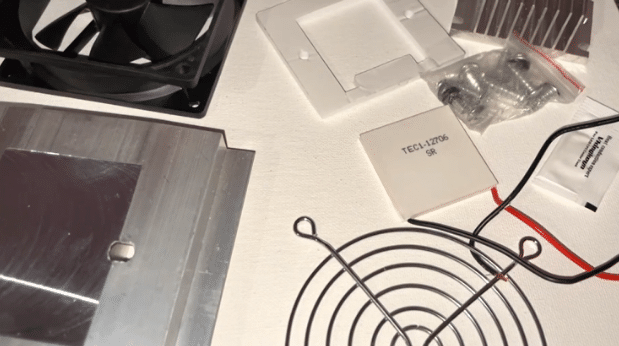
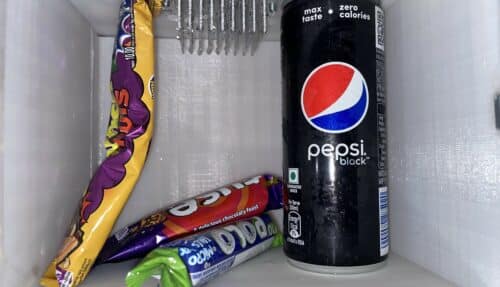
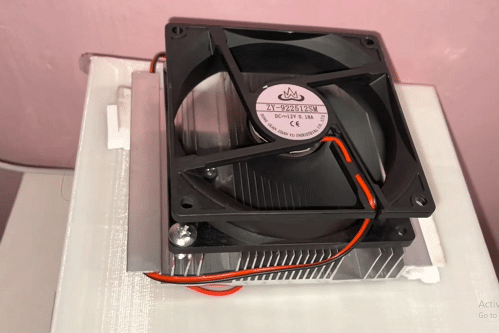
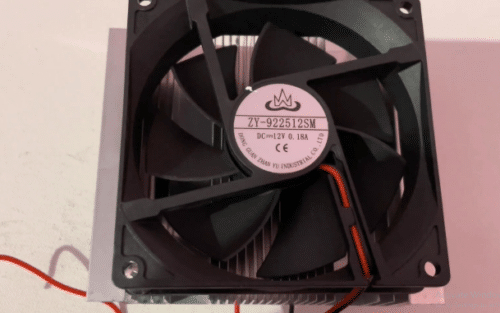
The heatsink and fan are fixed, after which the thermal paste is added and sandwiched between the thermoelectric cooler module and the heatsinks. The fan is added next to the top of the big heat sink fan as shown in the figures below. (Refer to Fig. 8, 9, 10, 11).
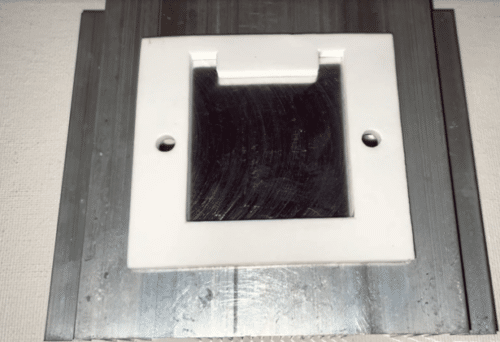
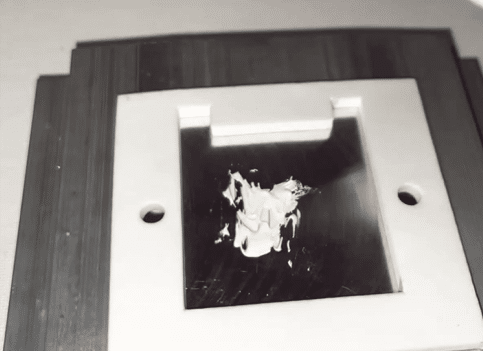
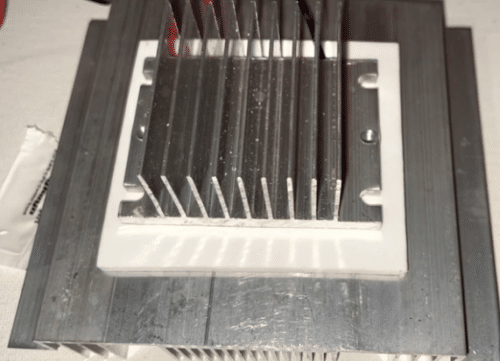
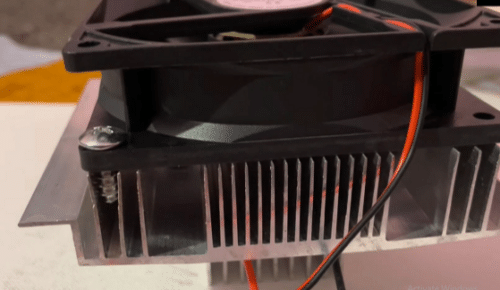
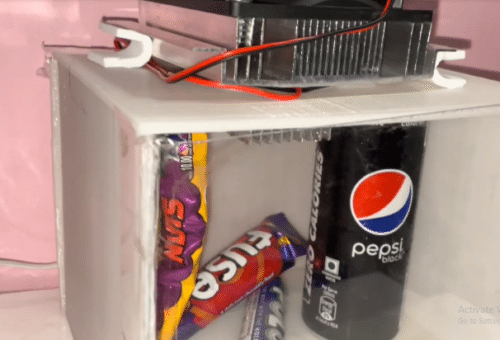
Now the heatsink fan is fixed on the top of the refrigerator while inserting the smaller heat sink inside the refrigerator case. Warm the cut part of the refrigerator body and keep the fan exposed on the other side of the refrigerator. (Refer to Fig. 12, 13, 14, 15).

Also Check: Mini Fridge with Peltier Modules
Testing Portable Mini Fridge
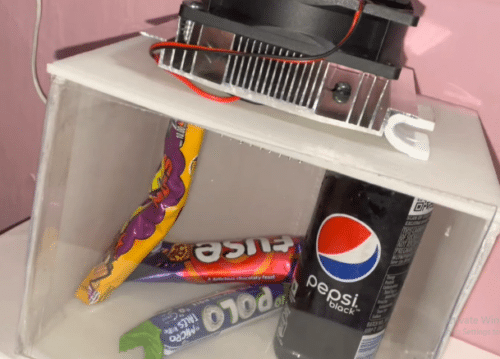
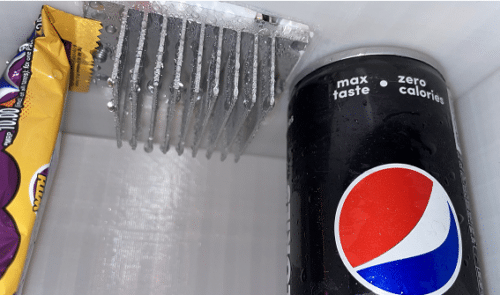
Now power the freezer, which means the fan and thermoelectric cooler will now wait for a few minutes. The heat is now transferred from the inside of the freezer to the outside, making the inside cooler. After 15 minutes the freezer temperature goes down to around 0 degrees Centigrade, making it ready to use.
Your portable freezer is now ready to use and chilled water, ice, beer, and cool drinks can be stored. It can also be carried around anywhere you go, be it for picnics, outings, hiking or can be fixed in the car.
Key Advantages and Benefits
- Versatility:
The portable mini fridge is ideal for a range of situations, including picnics, camping vacations, and outdoor gatherings, guaranteeing you have cold refreshments wherever you go.
- Eco-friendly design:
This small fridge promotes environmental principles by eliminating CFC emissions and employing energy-efficient components.
- Compact and lightweight:
The design is geared for portability, allowing it to fit neatly into a backpack or car compartment.
- User-Friendly Operations:
With its simple assembly and low power consumption, this freezer is accessible to anybody interested in DIY projects.
- Temperature Control:
Consider adding a digital thermometer to monitor inside temperatures, which would improve usability and allow for more precise cooling.


