 Expensive and high-end restaurants implement smart digital food ordering systems that allow us to directly order food and drinks. We can even customize and give instructions using the smart touch display system. Once your order is prepared, you can even monitor the live status and time it takes to prepare the dish on the screen at your table.
But this whole digital ordering system costs way much.
Hence, today we will design an online food ordering system at a very affordable cost. Our system also records and saves the database of items ordered from each table, allowing you to analyze the data to determine which type of dish is most preferred.
This saves a lot of time for customers and restaurants, and they don’t have to wait long for the waiter to take their order. It also saves on expenditures made by restaurants and assists the waiters as well.

Bill of Materials

Note:- For the receiver of the order you need Bluetooth HC05.
DIY Food Ordering System – Code
First, we need to install the Raspberry Pi with the latest Raspbian OS and then install the required python modules, you can install them using a Linux terminal using the following command-
sudo pip install Qtpy
sudo pip install guizero
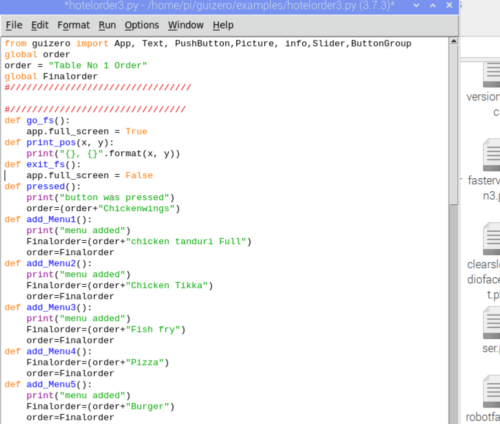
Now create the GUI code. Use the GUIzero python modules to make the GUI for the food ordering system. Import the Python modules like Guizero to develop the picture buttons for menu items further.
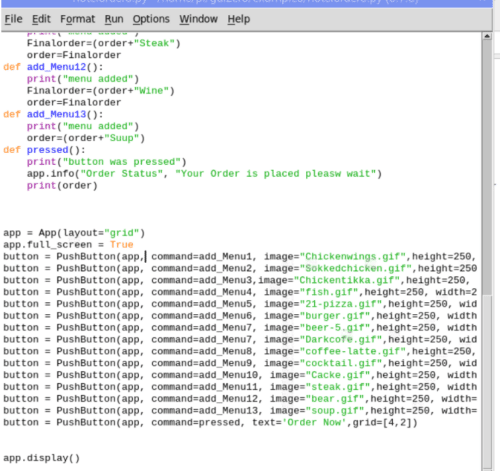
Now create a function for picture buttons to add the menu item selected to the order added to the string list.
Hereafter, by tapping on each item picture for ordering, the string gets added to the previous string.
So we have added picture buttons for all the menu items. Now set the size of the picture to display so that when we tap on the picture, the function is called.
Here, we also set the layout as a grid, and for each picture button for the menu item, we set its position in the grid.


Download Source CODE

Food Ordering System Project – Connections
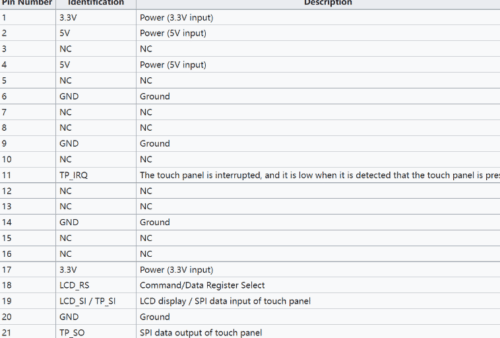
Now connect the touch display with the Raspberry PI according to the following pins. If you are using an HDMI touch display, then connect the Raspberry Pi HDMI to the HDMI touch display and then connect its touch input to the Raspberry Pi USB port.

Testing
Now power the Raspberry Pi with a 5V/2A adapter and then run the code. You will see the list of dishes to order. Tap on the dishes you want to order and then touch the order button. It will show your order has been sent. Please wait for the message until the order is received by the receiver Raspberry Pi that is available to the restaurant managers and waiters.
Previously we have also built the Restaurant menu ordering system, you can check that too.
If you face any issues while making it on your own, please feel free to ask in the comments below.
Or you can use our Forum to connect with the community of electronics experts.


