


An Arduino IDE project using the Indusboard can send sensor data over Web Serial to a web browser, allowing real-time monitoring and analysis.
By creating a web page with the Web Serial API, it can establish a serial connection to the Indus board, which collects data from various sensors (e.g. temperature, humidity, light). The web page receives and displays this sensor data dynamically, providing a user-friendly interface for visualizing environmental conditions or other sensor readings.
This setup is ideal for applications requiring remote sensor monitoring, data logging, and interactive data visualization, making it useful for smart home systems, environmental monitoring, and educational projects.

Applications of sensor data sending over web serial:
- Real-time tracking of environmental conditions in smart home systems and agricultural setups.
- Collecting and storing sensor data for analysis in research and industrial applications.
- Monitoring air quality, temperature, and other parameters to ensure safe and healthy living or working environments
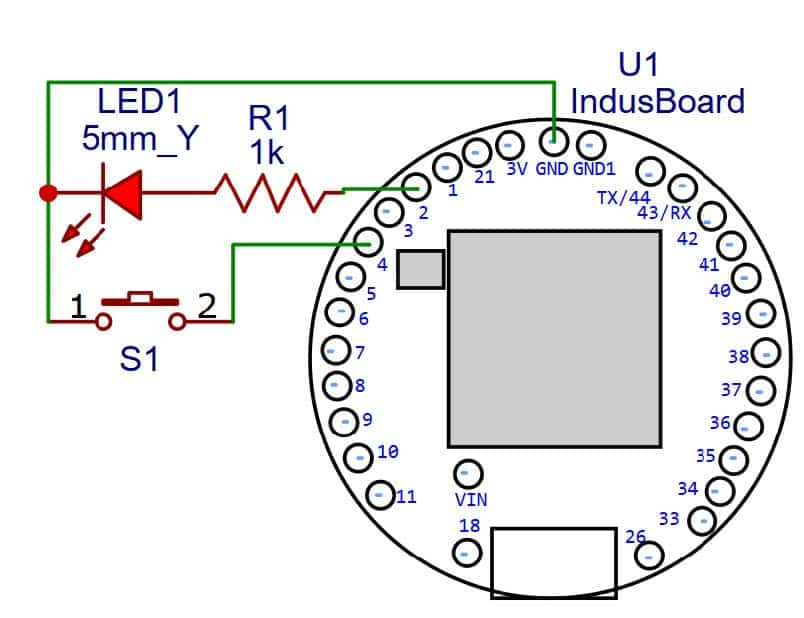
Bill of Materials (BoM)
| Components | Description | Quantity |
| IndusBoard | 3cm sized dev board | 1 |
| LED | 5mm LED | 1 |
| Resistor | 1k ohm resistor | 1 |
| Switch | Pushbutton-2 Pin | 1 |
Coding
#include <Arduino.h>
#if defined(ESP8266)
#include <ESP8266WiFi.h>
#include <ESPAsyncTCP.h>
#elif defined(ESP32)
#include <WiFi.h>
#include <AsyncTCP.h>
#endif
#include <ESPAsyncWebServer.h>
#include <WebSerial.h>
AsyncWebServer server(80);
const char* ssid = "ESP Wifi"; // Your WiFi AP SSID
const char* password = "12345678"; // Your WiFi Password
const int ledpin = 2;
const int sensorpin = 4;
/* Message callback of WebSerial */
void recvMsg(uint8_t *data, size_t len){
WebSerial.println("Received Data...");
String d = "";
for(int i=0; i < len; i++){
d += char(data[i]);
}
WebSerial.println(d);
//control LED based on received message
if (d == "ON") {
digitalWrite(ledpin, HIGH);
WebSerial.println("LED is ON");
}
else if (d == "OFF") {
digitalWrite(ledpin, LOW);
WebSerial.println("LED is OFF");
}
else {
WebSerial.println("Unknown command");
}
}
void setup() {
Serial.begin(115200);
pinMode(ledpin, OUTPUT);
pinMode(sensorpin, INPUT_PULLUP);
WiFi.softAP(ssid, password);
IPAddress IP = WiFi.softAPIP();
Serial.print("AP IP address: ");
Serial.println(IP);
// WebSerial is accessible at "<IP Address>/webserial" in browser
WebSerial.begin(&server);
/* Attach Message Callback */
WebSerial.msgCallback(recvMsg);
server.begin();
}
void loop() {
delay(2000);
int val = digitalRead(sensorpin);
WebSerial.print(F("IP address: "));
WebSerial.println(WiFi.localIP());
WebSerial.printf("Millis=%lu\n", millis());
WebSerial.printf("Free heap=[%u]\n", ESP.getFreeHeap());
WebSerial.printf("val1=[%d\n",val);
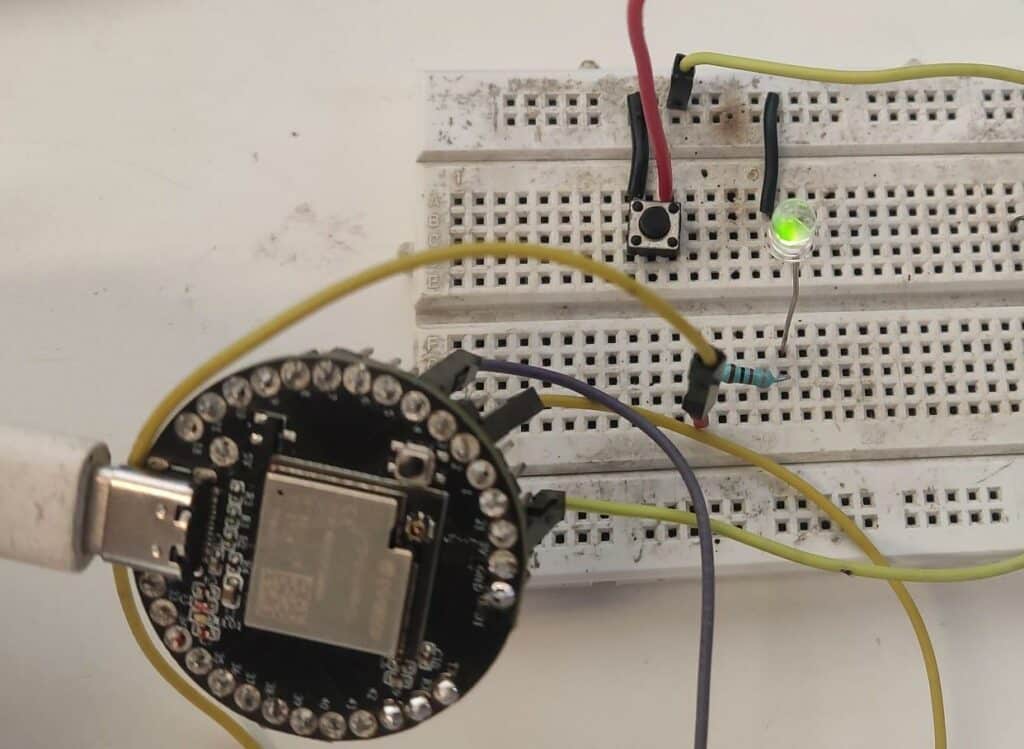
}Connection
Testing
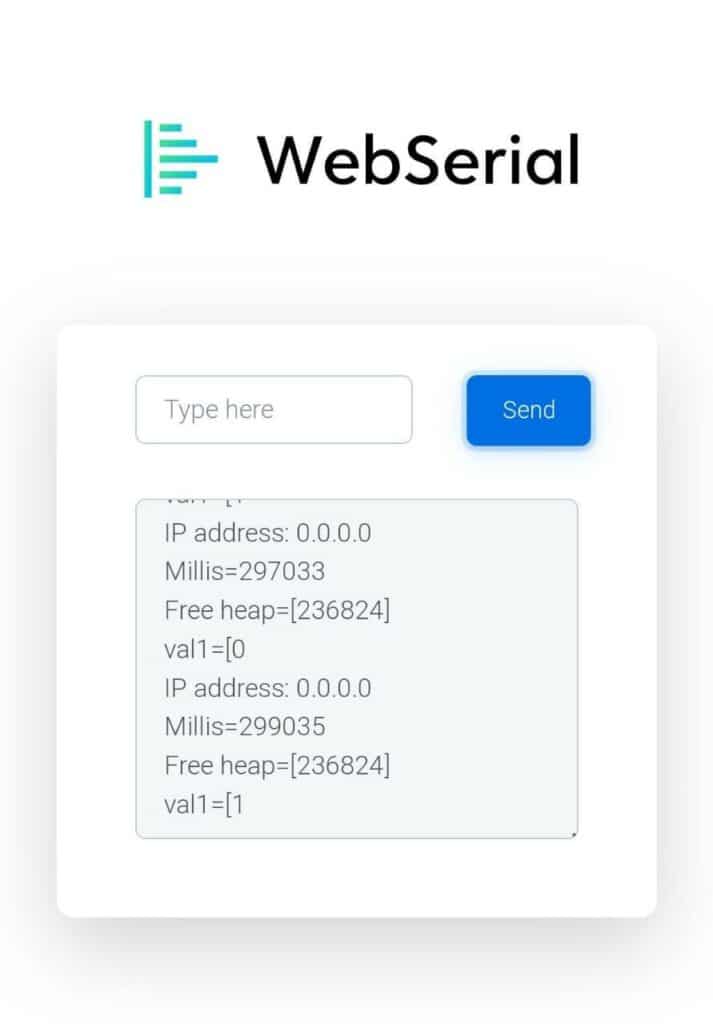
Now we connect the board with the USB and upload the code in the indusboard and check output after giving command on web serial. To connect indusboard with web serial type (192.168.4.1/webserial) in web browser.

Then we can press the button on breadboard, then at web serial, we get the value 1 which shows that the sensor we connect is working. If we release the button then we get the value 0 at web serial.
Author(s): Manjeet Vishwakarma, Abhay Verma and Satywanti Kundu are B.Tech ECE students at GJUS&T HISAR

