


 This project describes the steps to get started with Qt software on Raspberry Pi operating system. Qt is a platform-independent application that can run on all desktop and mobile operating systems (OSes), in addition to most embedded OSes—including Linux Embedded, Windows Embedded, QNX, vxWorks and Integrity—with one technology and one codebase. When developed, the application can run across multiple platforms at near-native performance. Thus, Qt saves a lot of development time and, hence, minimises time-to-market.
Qt is well-documented and has extensive API functionality, high-end graphics and integrated development tools. It has all that is needed to make the creation of embedded applications easy.
Hardware required for building an embedded application on Qt is as follows:

- Raspberry Pi 3 board
- Touchscreen or computer monitor
- USB keyboard and mouse
- Memory card (16GB or 8GB)
- Power adaptor (5V, 2A)
Preparing Raspberry Pi for Qt framework
Download Raspbian OS from the Internet, and install it on the SD card (NOOBS is recommended).
Internet connectivity is required for Raspberry Pi. Open the terminal on Raspberry Pi by pressing ctrl+alt+t simultaneously on the keyboard. Then, check GCC compiler. If it is not available, install it using the following command:
$ Sudo apt-get install gcc
Use the following commands to install Qt Creator:
$ sudo apt-get update
sudo apt-get upgrade
sudo apt-get install qt4-dev-tools
sudo apt-get install qtcreator
sudo apt-get install git-core
sudo apt-get install subversion
After successful execution of these steps, Qt Creator will be added to the programming list on Raspberry Pi OS on the desktop.
Setting up Qt platform on Raspbian OS
When running Qt Creator for the first time, configure the following settings:
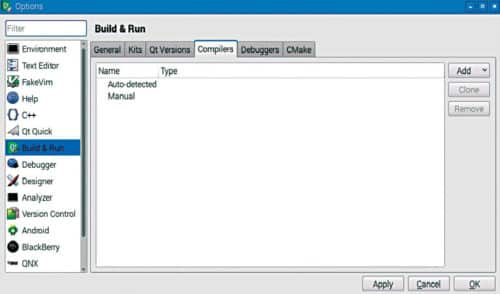
- Go to Tools>Options>Build & Run>Compilers. Compilers window is shown in Fig. 1.
- Click on Add>GCC. Set the path to usr/bin/arm- linux-gnueabihf-gcc-4.9, as shown in Fig. 2. Then, click on Apply to save changes.
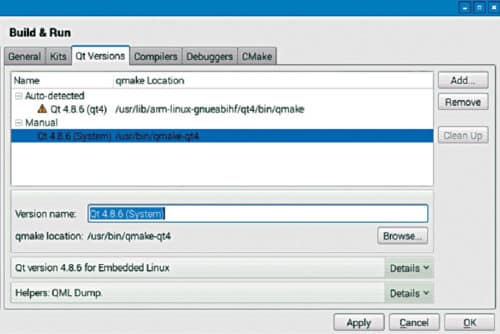
- Go to Qt Versions>Add>Browse (usr/bin/qmake-qt4) and select the latest version, as shown in Fig. 3. Click on Apply.
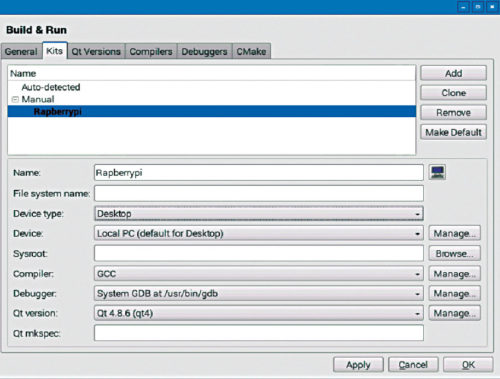
- Go to Kits>Add. Set Device Name as Raspberry Pi (or any other name of your choice). Select Device Type as Desktop, and Device as Local PC, as shown in Fig. 4. Click on Apply.

Project development with Qt
You are now ready to begin with the first project. The steps are as follows:
- Click on New Project.
- Select Applications>Qt Widgets Application>Choose…, as shown in Fig. 5.
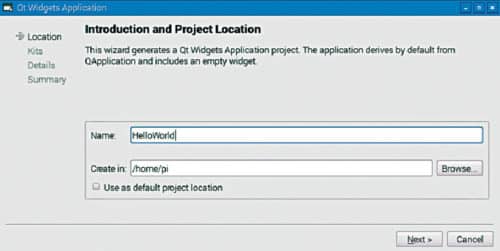
- Type in the name of your project (HelloWorld) and choose the destination folder where you wish to save your project, as shown in Fig. 6.
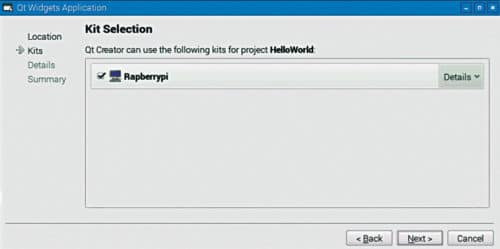
- Select the kit as Raspberry Pi (or the name that you chose in Fig. 4 above for your kit) and click on Next, as shown in Fig. 7.
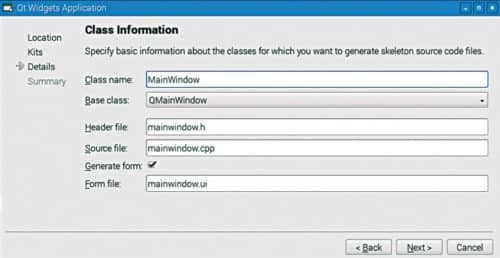
- Continue with default names (MainWindow class, mainwindow.h, mainwindow.cpp) in the class information sub-window, as shown in Fig. 8. Click on Next.
- All files to be added in the project should be listed here. Click on Finish.
A new project called HelloWorld will be created. Project Explorer will show all relevant project files, as shown in Fig. 9. - Click on Build>Build Project. The console window should show no errors if the kit is correctly configured.
- Click on Build>Run. MainWindow form will be displayed, as shown in Fig. 10.
- When you click on main.cpp, the default screen will appear.
- Add the following code to main.cpp to display ‘Hello World’ on the main window form as shown in Fig. 11.


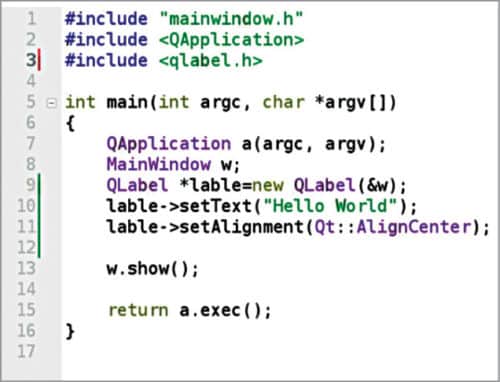
#include
Qlable *lable=new Qlabel (&w);
lable->setText(“Hello World”);
lable->setAlignment(Qt::AlignCenter);
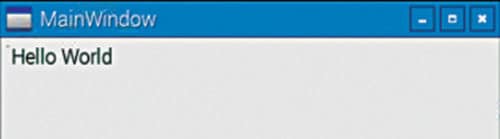
11. Click on Build>Run. The form with ‘Hello World’ on the screen will be displayed, as shown in Fig. 12.
Harwinder Singh and Harsimranjit Kaur are project engineers at C-DAC Mohali, Punjab

Excellent job explaining all the details. This is the first time I’ve been able to get a proper working Qt on my Raspian system, and all thanks to following your directions.
It inspired me to extrapolate from your description, and I managed to get another system working (eventually) with Qt5, and kinds of extra features.
Thank you for a job well done.
Thank You for your valuable feedback.