
This article describes how you can design a smart robot that can recognise your face and of other regular visitors. If the robot recognises correctly, it will greet and call out the name.
The project can be used for security purposes through live streaming video using a camera along with this system.
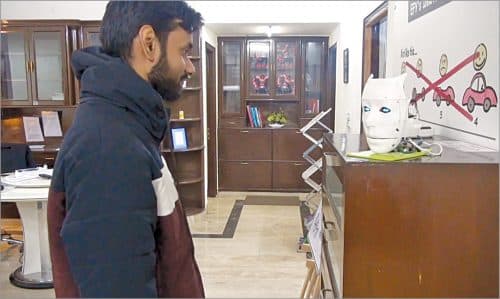
The author’s prototype being used for testing is shown in Fig. 1.
You can use any face mask, including the Tahta robot mask available in the market. This project uses an InMoov robot open source face mask, as shown in Fig. 2.

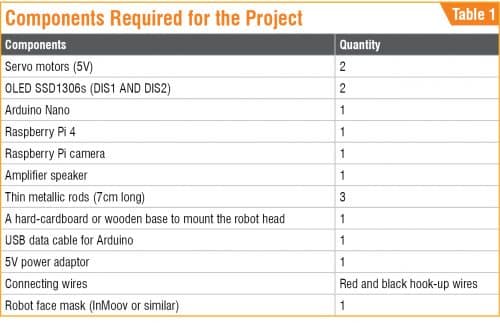
The components required for this project are listed in Table 1.
Assembling the robot face
Assembling steps may vary depending on the shape and size of the robot’s head. For testing, we used the InMoov robot head created using a 3D printer. You can even 3D print your own face and use it as a robot head, or get a 3D-printed robot head from thingiverse.com.
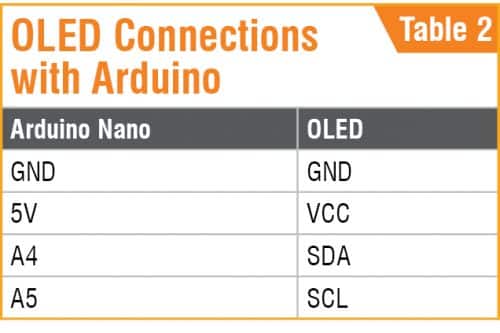
Two OLED display modules (DIS1 and DIS2) are used as the robot’s eyes. Solder both the display modules and make proper connections. Make sure to securely screw the OLED displays onto the eyepiece of the robot head, as shown in Fig. 3. OLED connections with Arduino are listed in Table 2.

Next, mount the Raspberry Pi camera (connected to the Raspberry Pi board) carefully near the OLED displays. Attach a servo motor near the mouth of the robot head. This will allow the robot’s jawline to open and close (refer Fig. 4).

Robot head support
Firmly fix the second servo motor on a cardboard or wooden base with the help of screws or hot glue. This will provide up and down movement to the robot head.
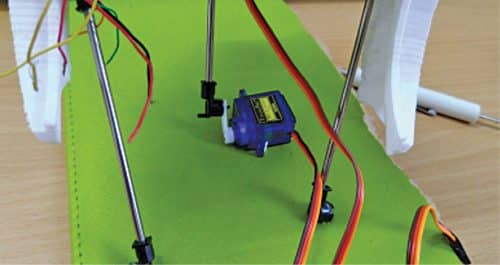
To make a sturdy support, attach three thin metallic rods near the second servo motor, like a camera’s tripod. Attach one end of one of the metallic rods to the shaft of the second servo motor and the remaining two rods to the head of the robot, as shown in Figs 5 and 6.
(Note. In the shown project, servo motors were used as support; jaw and head movement was not implemented.)

The final robot head with eyes using two OLED display modules will look like the one in Fig. 7.

Coding
Coding has two parts: Coding for the robot’s eyes using Arduino and coding for face recognition using Raspberry Pi.
Coding for robot’s eyes. Before beginning with the Arduino code (smartface_recog.ino), go to the Library Manager of Arduino IDE and install the following libraries:
- Adafruit GFX
- SSD1306 OLED
Add the above Arduino libraries into the code using the ‘include’ function and then insert the bitmap hexadecimal code for the eyes, as shown in Fig. 8.
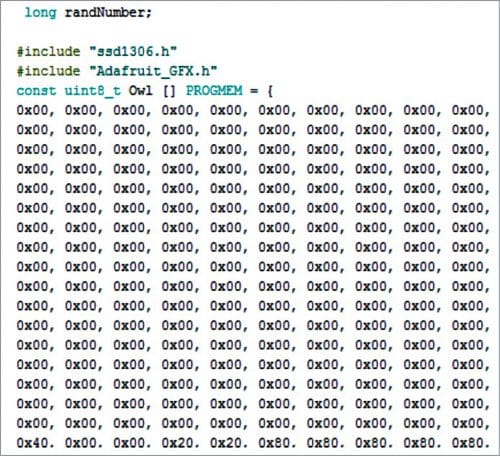
Next, create a loop function to call the bitmap codes to preview these on the OLED display. To make the eyes more interactive and lively, use a random ( ) function generator (refer Fig. 9).

Coding for face recognition. Raspberry Pi is used to recognise the person in front of the robot (known or unknown). Install the following libraries in Raspberry Pi for the Python3 environment:
- Numpy
- Scipy
- Open cv
- Cv2
- Face recognition
- Espeak
- Matplot
- Keras
To install these libraries, follow the library installation instructions available in the documentation folder of each library.
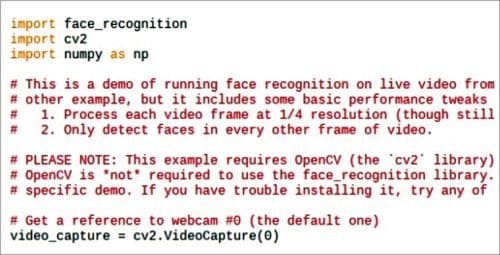
Import three modules in the Python code: face recognition, cv2, and numpy, as shown in Fig. 10. Create different arrays for recognising faces and names. Make sure to include the image file names of all known persons (who you want to be recognised) in the code and store them in a folder for correct face recognition (refer Fig. 11).

In the next part of the code, the program matches the face that has been captured by the camera with the array of known faces. If the face matches, the code will run the ‘espeak.synth ( )’ synthesiser function to call out the person’s name through the speaker connected to the Raspberry Pi. The code with ‘espeak.synth ( )’ function is shown in Fig. 12.

Connection with speaker and camera
To get audio output through Raspberry Pi, connect TRRS (Aux) audio output of Raspberry Pi to TRRS(Aux) of any speaker with an amplifier. Connect the Raspberry Pi camera module to the camera port present in the Raspberry Pi board.
Now power on the Arduino Nano board connected with the OLED displays via 5V pin of Raspberry Pi. Your face recognition robot is ready to work.
Also Check: Unveiling Our Open-Source Facial Expression Recognition Technology
Testing procedure
After hardware connections and software setup are completed, reboot your Raspberry Pi.
Open the face recognition script (FaceRecoginitionv1.py) from the Raspberry Pi terminal and run it. You should be able to see the robot’s eye movements through the OLED displays.
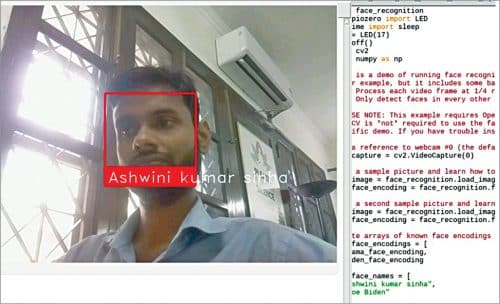
If you go in front of the camera, the robot will recognise your face. It will call out your name and also display your name on the computer screen, as shown in Fig. 13. If your name is not included in the code, it will display ‘unknown’ on the screen.
Download Source Code
Ashwini Kumar Sinha is an electronics hobbyist and tech journalist at EFYi
This is the print version of the project which was published in EFY Magazine November 2020 Issue. You can read the online version here.


could you please provide me the circuits and all.
means how to do the connections and all please, it is urgent
[email protected]
Hi Sir, This is nice project.. Can u please share the circuits or any link to refer further..
[email protected]
It is more in programming and nothing more to connect with circuits. In-circuit you only need to connect the OLED EYE of the robot according to the pins in the table and then power the Arduino using Raspberry Pi USB
sir, please provide us with the circuit diagram of this project….. we are stuck in between of our work. PLEASE help us.
can you help us by sending your article posted in the EFY magazine November 2020 edition. kindly mail the pdf to my Email id: [email protected]