


 Technology is advancing daily and everything is turning smarter. A number of traditional devices that we used at our homes are becoming smarter now, including the doorbells which are also evolving with new features and styles. Today you will find many fancy doorbells in the market with touch switch system, but they are very costly to set up and everybody can’t afford to have it.
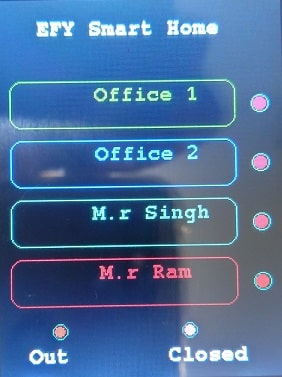
So, we have decided to help you make your own DIY touch display doorbell system. This doorbell system has a lot of unique systems, which will give you a new experience altogether. Another interesting feature of this doorbell system is that it has separate ringing bells for each of the room in your house or office. It also has a special notification system to let the visitors know whether the office is closed or not, or if any of the family members is available or not.
So, let’s start the project.
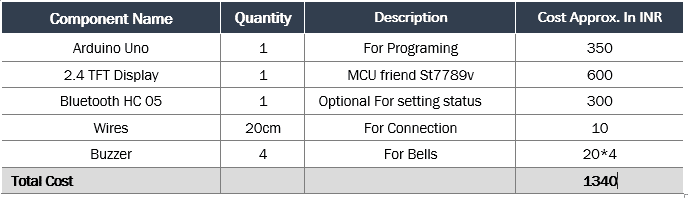
Bill of Material
Setting Arduino Library
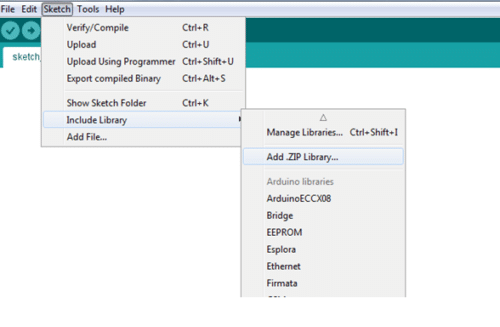
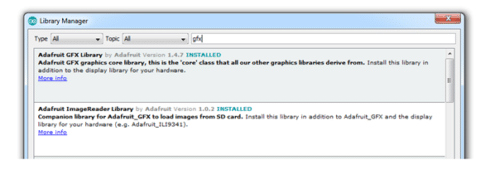
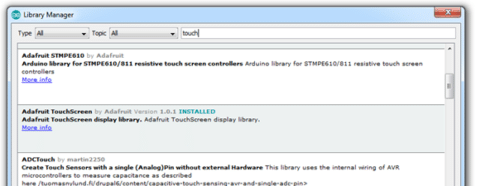
First, we will to install the required library to Arduino IDE. For this, Go to Sketch menu and click on manage library. Then search the library name and click on install. The library we need in this project are Addafruit GFX library and Touch screen library.
NOTE: Every touch screen has their own library. So, find a library according to your TFT screen model and install it. Here we have used MCUFriend 2.4 TFT LCD Library St7789v and installed it in our Arduino IDE. Refer to (Fig 1,2,3,4) .
Coding
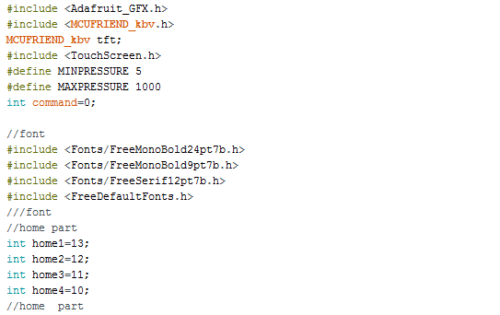
First, we will initialise the libraries in code and then declare the required variables (home1, home 2, home 3, home 4) that we are going to use for separate rooms. After that we will add fonts and colour code for TFT Display (Refer Fig 6).
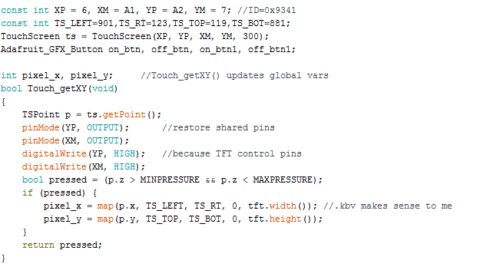
Next, we need to create a function to get the touch points. And in this function, we have to set the range of pressure to enable the touch screen display to read the touch points. After that we will map the values with the TFT Display’s width and height to identify the touch points. (Refer fig 7)
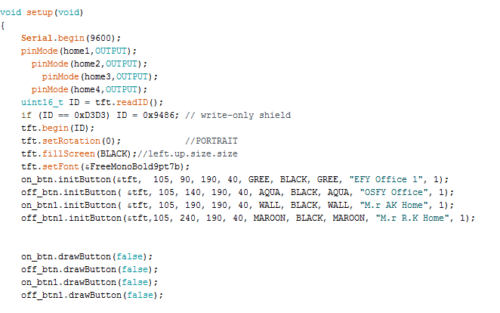
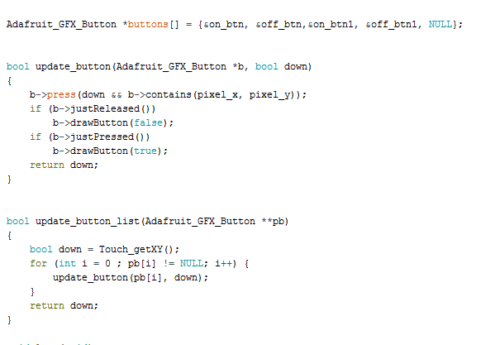
In the next step, we will create a setup function to declare the pin modes of Arduino and then create buttons that we want to display on the screen of Touch Display module. In the below code snippet we have created four buttons for four rooms. Along with buttons, we have also created a few notification dots that show the working status of the bell. The colour of these notification dots will change according to the status (for example, it will turn red when the room is close and maroon when it is open). (Refer fig 8)
Now, we will create a function to check and return the status of the buttons, that is weather the touch buttons are pressed or not. (Refer fig 9).
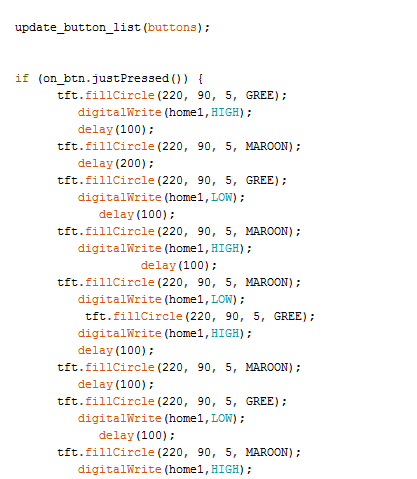
Then in loop function, we will create several ‘if conditions’ that will check the status of the buttons and perform the tasks according to code. (Refer fig 10.)
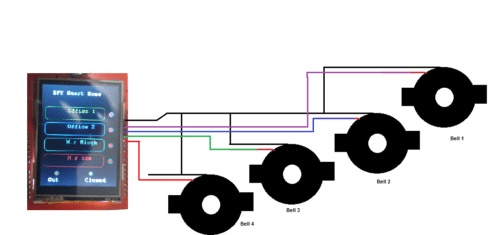
Connection
Now, connect the components as illustrated in Pic
| Arduino | BUZZER |
| GND | (BUZZER 1,2,3,4) -VE |
| Pin 13 | BUZZER 1 VCC |
| PIN 12 | BUZZER 2 VCC |
| PIN 11 | BUZZER 3 VCC |
| PIN 13 | BUZZER 4 VCC |
| Arduino | Bluetooth |
| 5V | VCC |
| GND | GND |
| RX | TX |
| TX | RX |
Testing
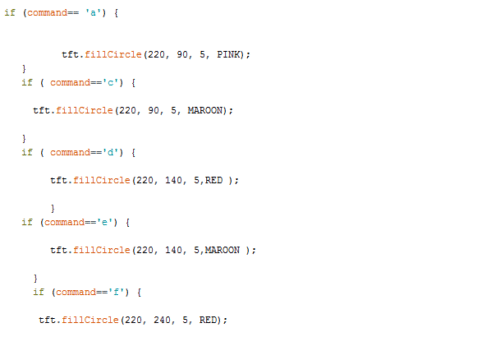
After connecting the components, crosscheck the wirings and connections. If all the connections are ok, then power the Arduino with 5-12 volt DC (You can use AC to DC adapter like cell phone charger or any 9 volt battery). When you power the Arduino, you will get a menu with several names on your TFT screen. Touch the name where you want to ring the bell. If you want to change the status of the office and house like office is closed or out of home, you can simply connect the Bluetooth to any Bluetooth terminal app available at play store and send the commands as you have set previously in code.
Download source folder
We have one another smart doorbell….It works only if hands are sanitized. Build using Arduino and touchless enabled.
