 Nowadays, electronics is being increasingly used in clothing, making them smart and at the same time, fashionable as well. So, we have decided to incorporate electronics into our shoes that can provide data with respect to our fitness such as the number of calories that are burned or the number of footsteps taken while walking or running. This device can be used by athletes, sportspersons, gym-goers or normal people who constantly need to monitor their fitness.
How our fitness tracker works?
- This device uses an accelerometer-based chip that gives accurate data about our movement. The same sensor also records our body temperature.
- This data is then sent to an app in our phone via Bluetooth.
Bill of Material
The following components are required for this project.
- Seeeduino Nano
- Grove Step sensor
- Bluetooth HC 05
- Wire
- 3V to 5V battery
Let’s have an individual look at some of the above components
Seeeduino
It is ATmega 382p-based development board with small form factor. It is similar to Arduino but small in size and with dedicated pins for sensor connections. It has a USB type-C female connection port that we will use to program the board and also in serial debugging. (Refer Fig 1)
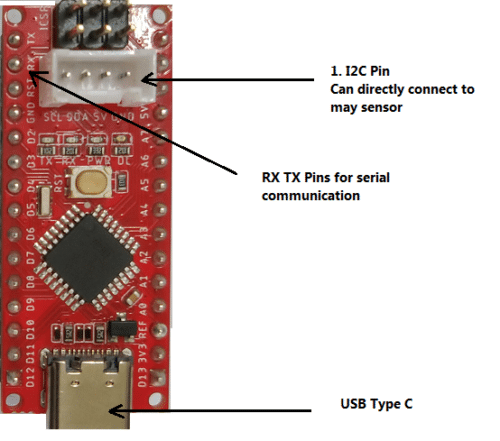
We are going to power it using a 5V battery through the Vin pin.
Grove Step (counter) sensor
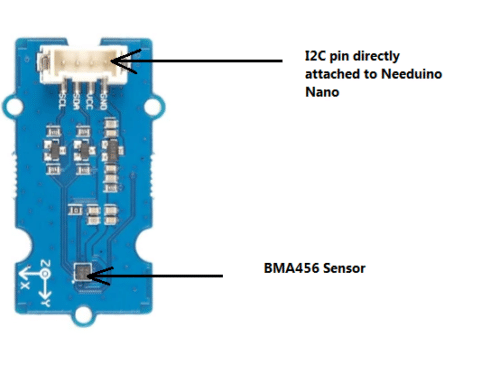
This sensor can be directly attached to the pin slot available in Seeeduino Nano and can be powered by 3V to 5V battery. And the communication between the sensor and the development board takes place through I2C pins. Since the Grove Step sensor is capable of giving acceleration data as well as the number of steps that are taken using BMA456 sensor, it can either be used as an accelerometer or as a step counter.You can check the datasheet of sensor for more details of its pins outs . (Refer Fig 2.)
Prerequisite
Before writing the code, first we have to add our Seeeduino Nano board to Arduino IDE. To do so, follow these steps:
Go to
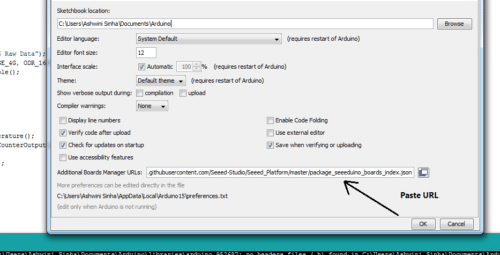
File → Preferences —> Additional Boards Manager URL
Paste the below url of the board package file (for Seeeduino Nano) here and click OK. (Refer Fig 3)
Now, follow the given steps to open Board Manager
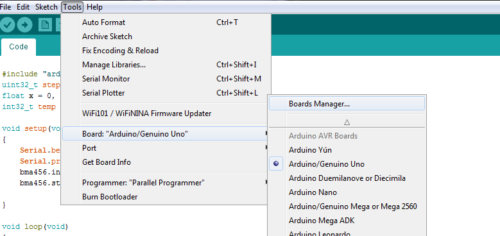
Tools —-> Board —–> Board Manager
Now search ‘Seeeduino AVR’ in board manager and install the package. (Refer Fig 4,5)
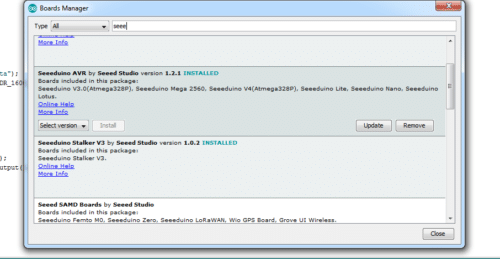
After adding the new board to Arduino IDE, now setup the required library in Arduino IDE for our project.
Go to
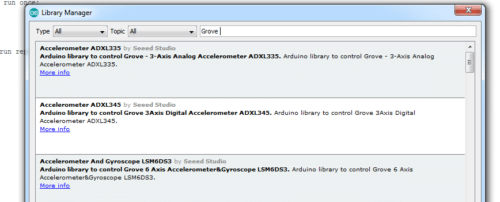
Sketch —–> Include Library —-> click on Manage Libraries. In Library Manager, now search for Grove Step Counter and install it.
Coding
First, initialise the Step counter library in our code. Then create some variables for storing the temperature data,calories burned,steps taken and distance travelled. After that, create a setup function to set the baud rate for Bluetooth. (Refer Fig 7)
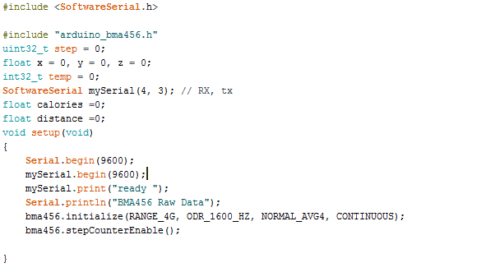
Now, create a loop function where we assign temperature and step count values to the variables previously created.Then we create a code that sends the sensor data over the serial of Arduino board using Serial.println(data to send)/mySerial.println(data to send). (Refer Fig 8)

App Making
To make an app that receives the data from our device and saves it in text format (for later display), you can use either Kodular or MIT app inventor. Here we are using Kodular. (Refer Fig 9)
First create a layout by adding the following components :-
- 3 Text Box
- 1 List Picker
- 1 Bluetooth Client
- 1 File
- 1 Location sensor
- 1 Map
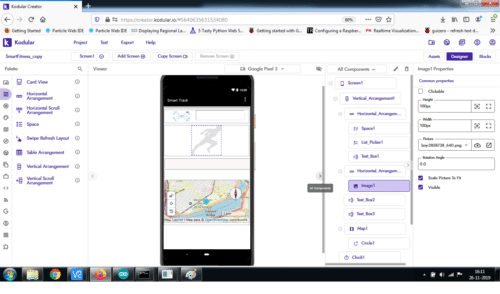
After adding the components and setting the layout of your choice, go to Blocks for programming the app (by joining the code blocks as shown) (Refer Fig 10)

Connection
After uploading the code to Arduino, connect the components as stated below
| Arduino | Components |
| PIN 5V | Bluetooth Hc05 & Sensor VCC |
| GND | Bluetooth Hc05 & Sensor GND |
| RX | Bluetooth Hc05 TX |
| TX | Bluetooth RX |
| SDA(A4) | Sensor SDA |
| SCL(A5) | Sensor SCL |
For powering our device
| Raw/Vin pin | Battery(3- 5 V) +ve |
| GND | Battery -ve |
Testing
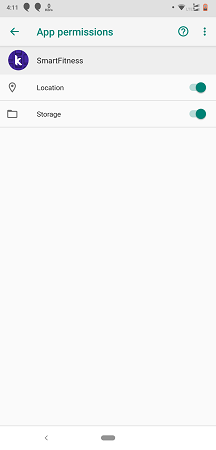
After properly setting all the components, power the Arduino with the battery and then install the app. Allow the app to access your location and storage. (Refer Fig 12).
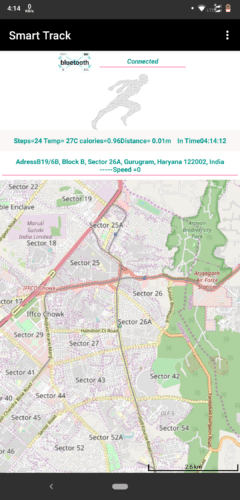
Then open the app, turn on the phone’s Bluetooth and click on the connect button. Select HC05 for connection with device for checking your body temperature, number of steps walked, calories burned, speed, location and the distance covered.(Refer Fig 13,14).
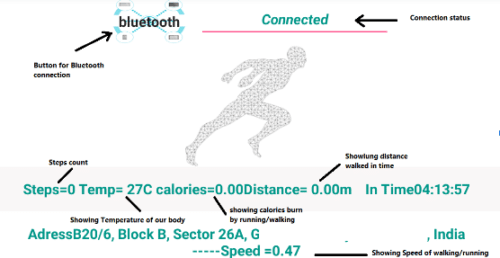
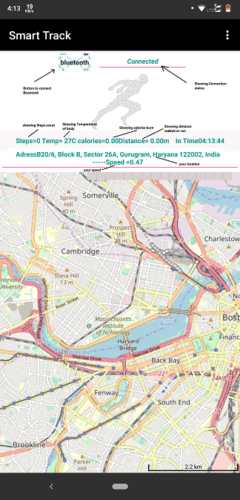
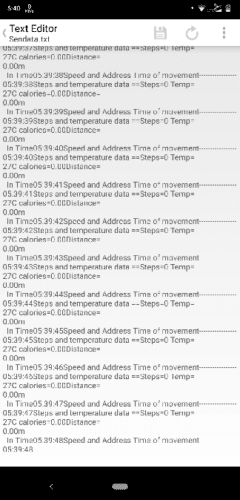
The app automatically saves your data in text file so that you can track and see all your activity. (Refer Fig 15)


Please give circuit diagram clearing showing all the connection