 Traditional key-based locks are now outdated and come with limitations of their own. First, you always have to carry the key with you, and the key might get misplaced or stolen. Such locks are not completely secure either.
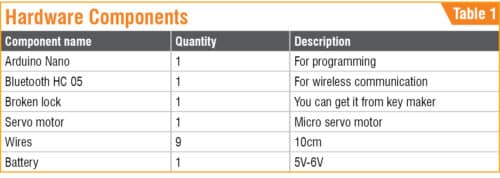
These old locks are now being replaced by modern biometric ones. However, biometric lock use biometric sensors that are expensive. Here is a cheap biometric lock using biometric fingerprint sensor available in your smartphone. Hence, no external biometric sensor is required. The prototype built is as inexpensive as possible and uses easily-available components. Hardware components used are listed in Table 1.
Arduino coding
First, write a program (biometric_lock.ino) in Arduino IDE that enables you to connect your smartphone with the lock and perform the task(s) according to the code. For that, create a string variable that stores the unique device ID for the lock; then, include the servo library in your code.
Next, set serial baud rate to 9600 for HC-05 Bluetooth communication. You can change the baud rate if you are using a different Bluetooth module. Now, define the pin for the servo motor that you will use. Refer the code given in Fig. 1.

Next, create a loop function where you store the device ID sent by Bluetooth in reads string. Then, create an if condition that checks the device ID sent from Bluetooth. If the fingerprint matches in Android app, the app will send the device ID to Arduino. Initially, the servo is in lock position. If device ID set in Arduino and ID sent by app match, the program moves the servo to unlock the lock.
But if the app reads a wrong fingerprint, the servo remains in lock position. Refer Fig. 2 for details.

Development of Android app
There are many tools available for developing the Android app, including Android Studio, Kodular and MIT App Inventor. We have used Kodular. It has different code blocks through which you can make the app with different combinations of these blocks. It is easy and saves time during coding.
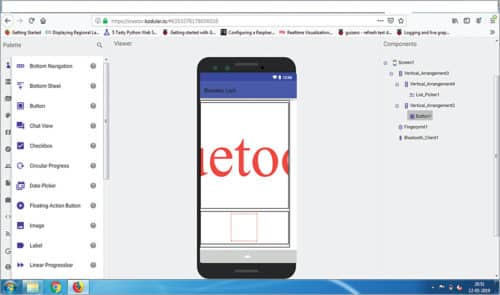
Open any Web browser and search for Kodular. To start making the app, open Kodular and add the following components in the layout (Fig. 3):
- Bluetooth client
- Fingerprint
- List view
- Image button
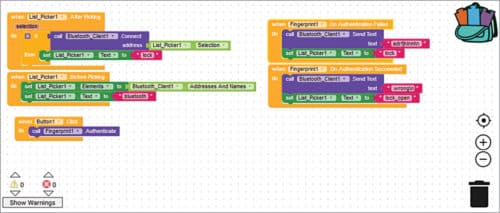
Next, join the code blocks as shown in Fig. 4. Save the code as, say, Biometric_Lock. Then, export Biometric_Lock.apk file to your PC or laptop. Transfer .apk file from the PC to the smartphone. Install .apk file on the smartphone. With this, software development including Arduino coding and app development is complete.
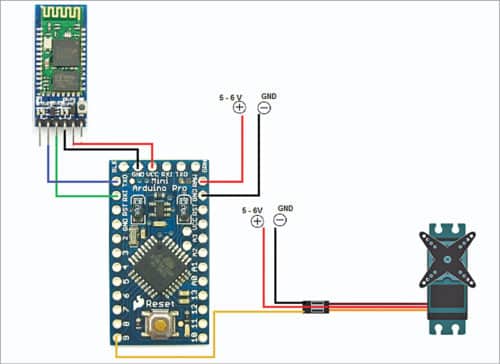
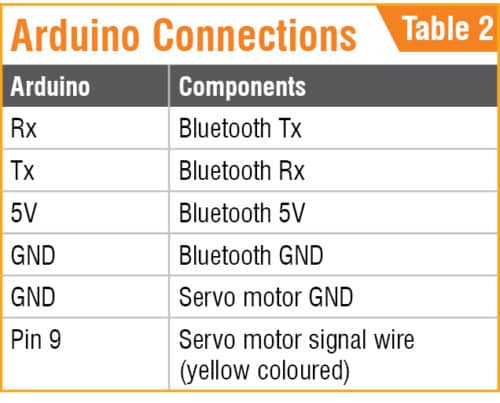
Connect components to Arduino board as given in Table 2 and shown in Fig. 5.
Interfacing the circuit with the lock
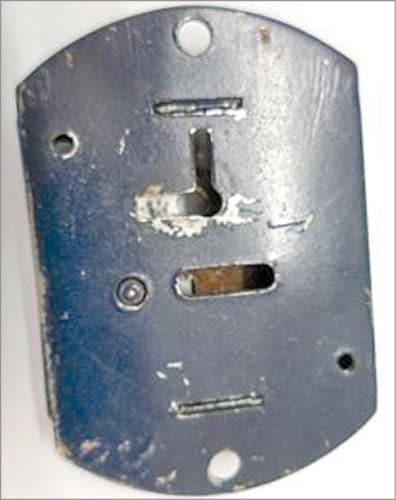
Follow the steps given in Figs 6 through 9 to make the biometric lock system
Step 1. Get a suitable lock from the hardware store.
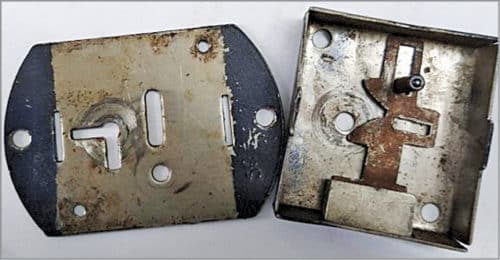
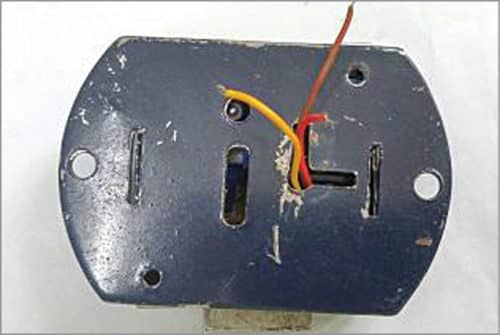
Step 2. Open the cover of the lock and you will be able to see the lever, as shown in Fig. 7.
Step 3. Attach one of the servo motor fins to lever of the lock, as shown in Fig. 8.
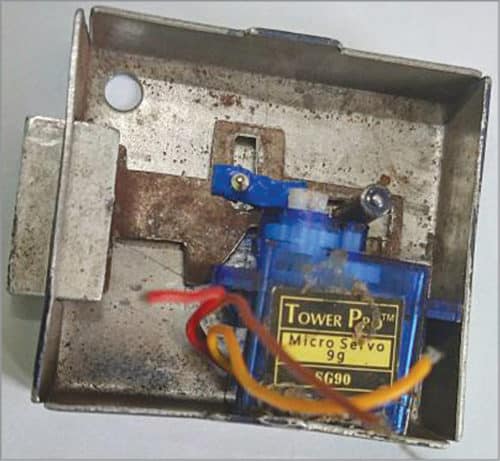
Now, put back the cover of the lock to close it. Extend three wires of the servo from the lock to the circuit. Make sure all wires are connected to appropriate points in the circuit.
Testing
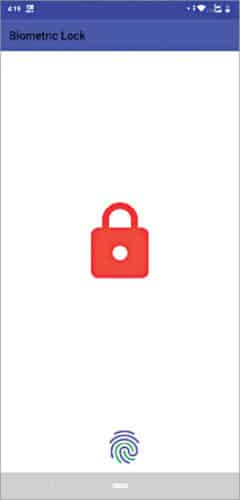
Power on the circuit with 5V-6V battery. Turn on Bluetooth of the phone and pair with Bluetooth HC-05 in the circuit. After successful connection with Bluetooth HC-05, open Biometric_Lock app on the smartphone. You will get an app layout with Bluetooth and fingerprint icons. Touching Bluetooth icon changes into locked icon (Fig. 10).
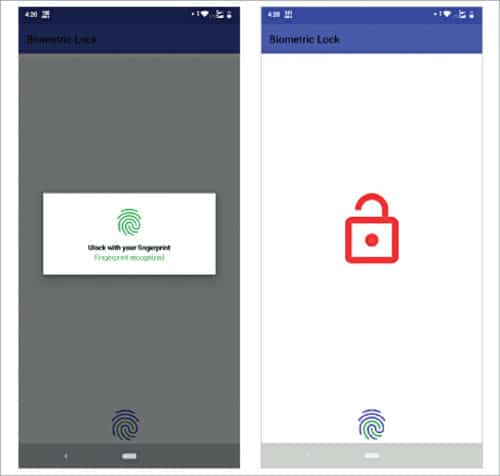
After touching the fingerprint icon, you will get a dialogue box on the screen asking you to unlock using your fingerprint (Fig. 11). Touch the fingerprint sensor, which is normally at the back of the smartphone. If it is the correct finger, the servo will rotate to turn the lock on, and at the same time the locked icon will change to unlocked icon.
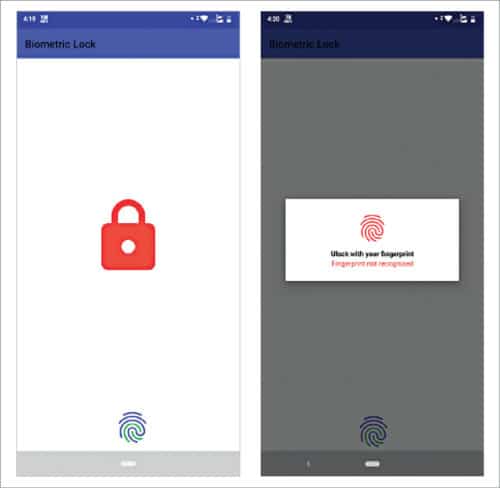
If fingerprint does not match, the lock will remain in locked position. The dialogue box will give error message as “Fingerprint not recognised” (Fig. 12).
Download Source Folder: click here
Ashwini Kumar Sinha is an electronics hobbyist and tech journalist at EFYi


