Choosing the right ratings for the inverter and its battery to be used at home is not that easy. There are many parameters that you need to know before buying an inverter, such as load requirement, size of the inverter, back-up time, size of battery, etc. Presented here is a program in Python that helps you select the right inverter based on some common parameters. This article also describes how to create a standalone application so that you can run the program without Python software, if needed.
Software program
Python is a high-level programming language with rich syntax. There are lots of packages available for Python. We used wxpython package for graphical user interface (GUI).
First you need to install Python; we installed its 2.7.6 version. You can download it from the link https://www.python.org/. Then you need to install wxpython package. you can get wxPython3.0-win32-py27 for 32-bit Python 2.7 version or wxPython3.0-win64-py27 for 64-bit Python 2.7 version from here.
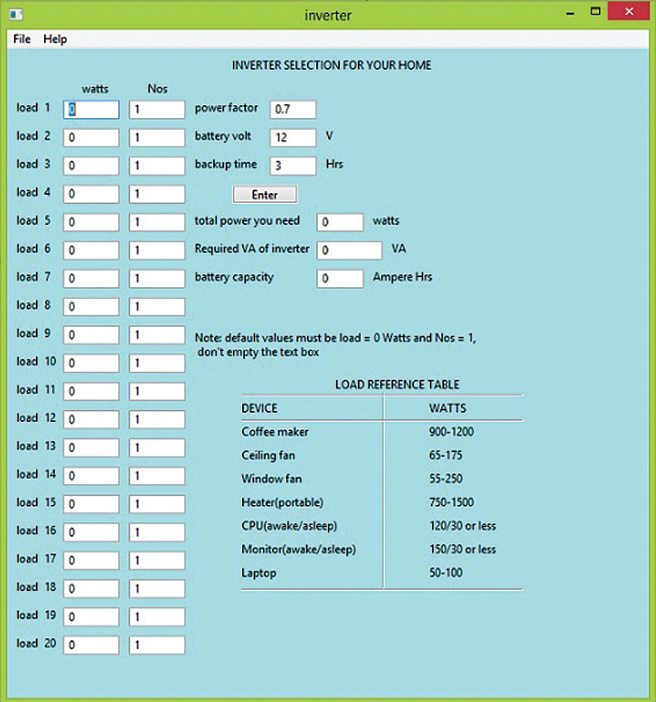
To run the application, just right click on inverterApplication.py file, select Edit with IDLE option and press F5 key on the keyboard. You will see the default program output window as shown in Fig. 1.
There are 20 edit boxes on left side of the screen for entering wattages of different electrical loads that you may like to connect to the inverter. You can enter the number of appliances corresponding to each load under Nos column. By default, power factor is 0.7, battery is 12V and back-up time is 3 hours. You can change these parameters as per your requirement.
Most people do not know the wattage of their electrical loads. So, the screen has a reference table on right hand side bottom showing the wattages of some common electrical loads.
Capacity estimations
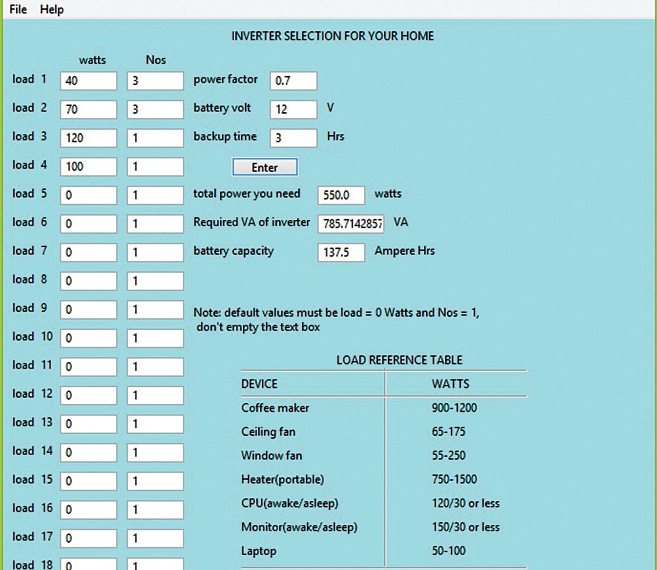
Let us assume, you have three tubelights (40W each), three ceiling fans (70W each), one TV that consumes 120W and a laptop that consumes 100W. The total power required would be (3×40 + 3×70 + 1×120 + 1×100) = 550 watts.
Calculating inverter capacity. Normally, the inverters are available with VA (voltage x ampere) ratings. To know the VA rating of an inverter, you also need to know the power factor of the inverter. Assuming, the power factor is 0.7, which is true in most cases, the required VA of your inverter can be obtained by dividing the total power by power factor as follows:
VA = Total power/Power factor = 550W/0.7 = 785.7VA
But 785.7VA is not a standard rating for any inverter available in the market. So you should select an inverter having a rating of next higher available value, such as 800VA.
Calculating battery capacity. The next step is to decide which battery to buy. The type and capacity of battery would depend on the back-up time you require. A domestic inverter normally uses a 12V battery, but the batteries have different ampere-hour (Ah) ratings. If you want an inverter battery that gives three-hour back-up time, you can calculate the battery capacity requirement as follows:
Battery capacity = (Total power × Back-up time)/Battery volts
In this case,
Battery capacity = (550 × 3)/12 = 137.5Ah
Here Ah stands for ampere-hours.
But again, 137.5Ah is not a standard rating for the batteries available in the market. So, again, you should buy a standard battery with ratings slightly higher than this value, such as battery with 12V, 140Ah rating. The program output for this example is shown in Fig. 2.
Making a standalone application
You may not have Python software installed in your system to run this application. In that case, follow the steps given below to make a standalone application, so that you can run the program even without the software.
1. Download and install py2exe: click here
You can choose either 64-bit or 32-bit depending on the PC you have.
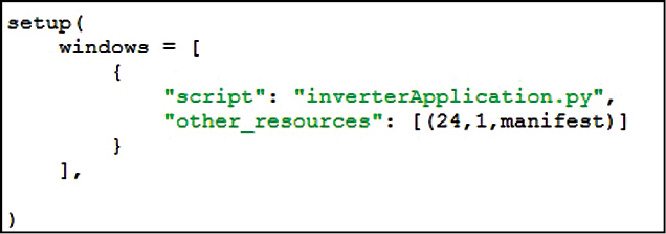
2. Create a setup.py file by downloading the source folder present at the end of the article. In the setup.py file, enter the script name as inverterApplication.py as shown in Fig. 3.
If you choose Python, wxpython and py2exe for 64-bit PC, you need to do some changes in setup.py file as shown in Fig. 4. Replace processor Architecture=”x86” with processor Architecture=”*”

3. Copy the inverterApplication.py and setup.py files into a folder, say, inverterselection in your hard drive as shown in Fig. 5.
4. Now go to command panel and type as shown in Fig. 6 for 32-bit or as shown in Fig. 7 for 64-bit.
If there is ‘mscvp90.dll missing’ error message, you can download the missing .dll file from http://www.dll-files.com/dllindex/dll-files.shtml?msvcp90 and put it in Python27/Dlls folder. If it still shows the same error, put the mscvp90.dll file in c:/windows/SysWOW64 folder and reboot your system.
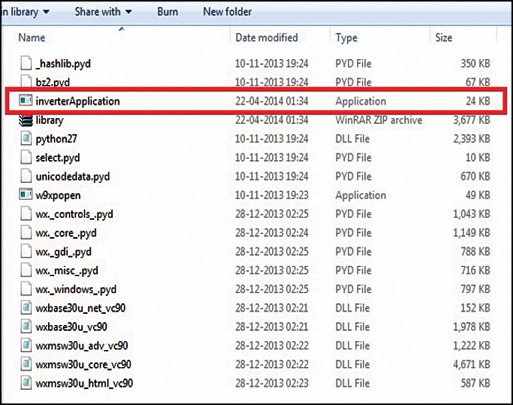
5. Now you should be able to see build and dist folders as shown in Fig. 8. If you open dist folder, you will see many other files, including inverterApplication file, as shown in Fig. 9.


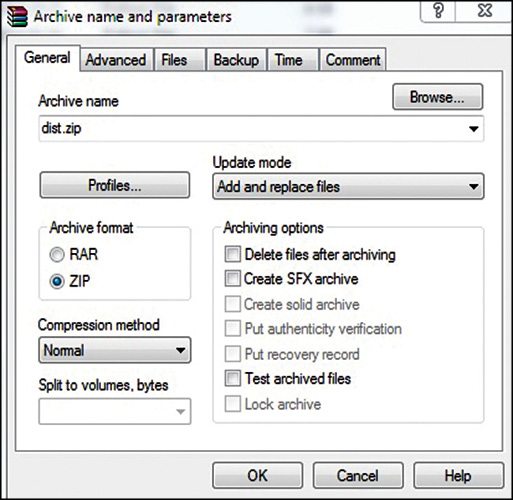
6. Compress or zip the dist folder using WinRAR or a similar application as shown in Fig. 10.
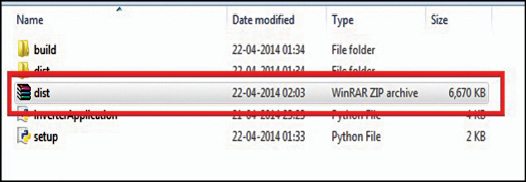
The dist.zip file is created with reduced size as shown in Fig. 11.
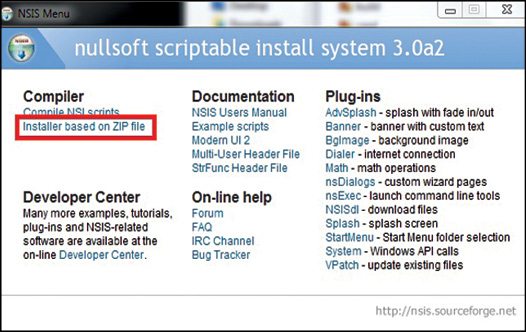
7. To create an installer, you need to download NSIS software, which can be found at http://nsis.sourceforge.net/Main_Page. After installing the software, double click the NSIS icon and select ‘Installer based on ZIP file’ option as shown in Fig. 12.
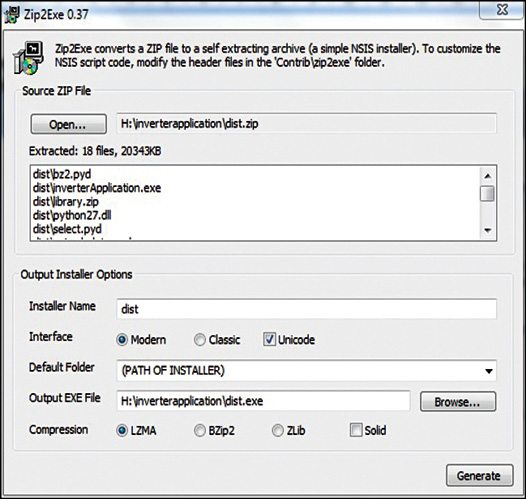
Now, click Open button and browse your dist.zip file. Then click Generate button as shown in Fig. 13.
Finally, hit the Test button shown in Fig. 14.
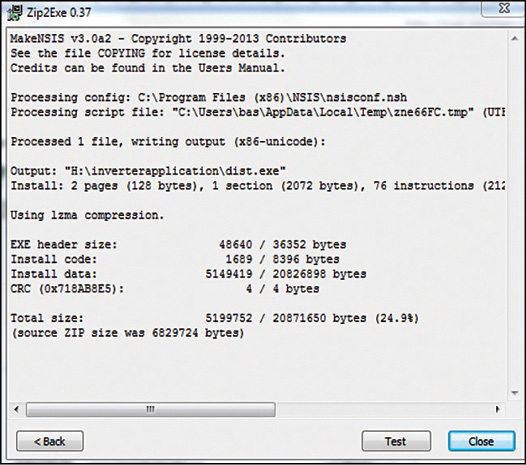
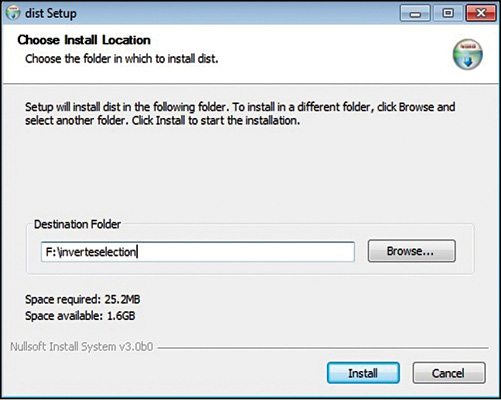
After hitting the Test button the dist setup window will appear. Click Install button as shown in Fig. 15; dist application will be created as shown in Fig. 16.
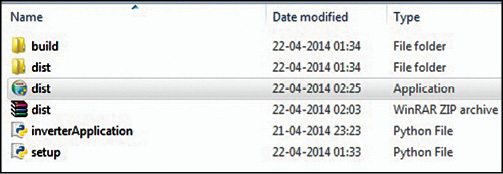
Finally, delete both dist and build folders from the list shown in Fig. 16. Double click on dist application; an installation window will pop up. Click Install option. A new dist folder will be created. Under the dist folder you will find InverterApplication file. Double click on this file to run the application. You can also run the dist application file in some other compatible system without Python software.
Download Source folder: click here
The author is an M.E. from J.J. College of Engineering, Tiruchirappalli. His interests include space science, computer programming and digital art


