
RFID and NFC tags are ubiquitous in our daily lives, powering systems like metro and bus cards, parking lots, office attendance systems, entry gates, and hotel room access. While these cards offer convenience, losing one can be incredibly inconvenient. That’s where having a cloned card as a backup can be useful.
At the same time, it’s essential to understand the security vulnerabilities of RFID and NFC technology, as skimming and cloning are common exploitation methods. In this project, I’ll guide you through the process of cloning an RFID card and creating an exact copy.
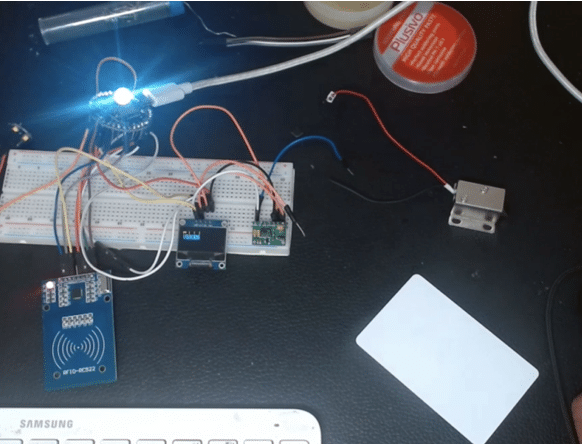
Important Note: This project is strictly for educational purposes. It aims to demonstrate the technical process and highlight associated security risks. Encrypted cards cannot be cloned using this method, and I strongly discourage any unethical use of this knowledge. Please use this guide responsibly.
Required Components (Bill of Materials)
To get started, you’ll need the following components:
| Component | Description | Quantity | Price (INR) |
|---|---|---|---|
| IndusBoard Coin | Development Board | 1 | 1400 |
| USB Type-C Adapter | Power/Data Adapter | 1 | 100 |
| RFID Reader/Writer | MFRC RFID Reader/Writer | 1 | 150 |
| RFID Cards | Blank Cards to Clone | 2 | 10 |
Coding the RFID Reader/Writer
To code the RFID reader/writer module, I used the MFRC522 library, which simplifies interfacing with the module via the SPI protocol.
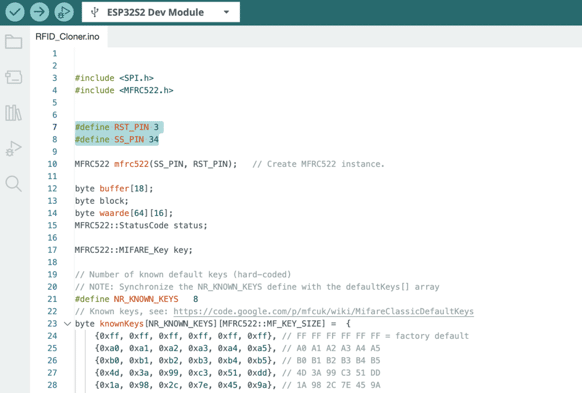
Here’s how I set it up:
- Install the Library: Download and install the MFRC522 library.
- Define Pins: Configure the reset (RST) and slave select (SS) pins for your connections. While the RFID module uses the hardware SPI pins of the IndusBoard by default, you need to define these two pins explicitly.
- Code Functionality:
- Read a Card: Retrieve data from an existing RFID card.
- Copy Data: Save the read data to memory.
- Write Data: Transfer the saved data onto a blank RFID card.
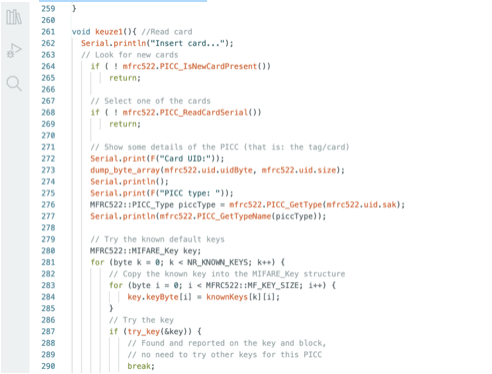
Once the code is complete, you can upload it to the IndusBoard. A downloadable version of the code is available at the end of this guide.
Connecting the Hardware
The RFID reader/writer module communicates via SPI, so you’ll need to connect its pins to the SPI pins on the IndusBoard.
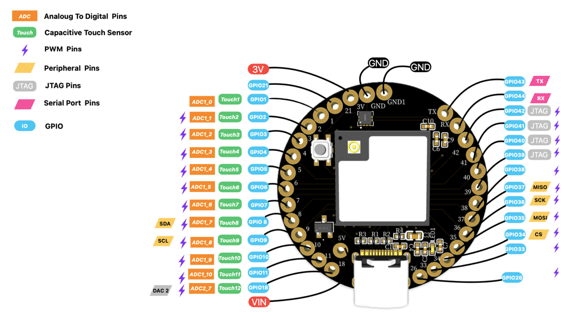
Pin Connections:
- Connect MISO, SCK, MOSI, SDA, and CS pins of the RFID module to the respective GPIO pins (35, 36, 37, 38) on the IndusBoard.
- Power the module using a 3V supply and ensure a common ground connection with the IndusBoard using the RFID module’s GND pins.
Also Check: RFID-Based Authentication System Using Arduino
Testing the RFID Cloning Setup
Now that the hardware is connected and the code is uploaded, you can begin testing. Here’s how:
- Launch Serial Monitor: Plug in the device and open the Arduino IDE’s serial monitor.
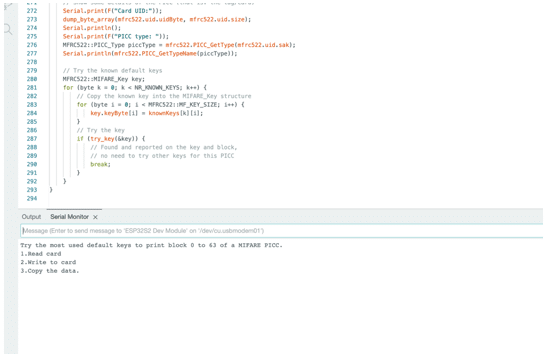
- Select an Option: The monitor will display three options:
- 1: Read the data from an RFID card.
- 2: Write the data onto a blank card.
- 3: Copy the card data for backup purposes.
- Clone a Card:
- Place the card you want to clone on the RFID module and select 1 to read its data.
- Replace the original card with a blank one and select 2 to write the cloned data onto it.
- Verify Success: Once complete, the cloned card should work identically to the original.
Also Check: RFID based Projects Ideas
Download Source Code
Conclusion
This project offers valuable insights into RFID technology and the vulnerabilities inherent in its design. Understanding the process of cloning cards serves as an important reminder of the need for robust security measures to protect against such exploits.
Once again, I emphasize the importance of ethical practices. Use this knowledge responsibly and solely for educational purposes. Let’s work toward building more secure and reliable technologies!


