
Earlier, we used the power of chatGPT and converted it into voiceGPT, making it the most advanced voice assistant that can talk. And we have ended the project with a promise to come up with a more advanced feature and make it its next version, so here today we are going to make it more advanced by adding the multilingual facility to our voiceGPT.

POC Video Tutorial In English:
POC Video Tutorial In Hindi:
You heard right, you can now talk to CHATGPT in your own language, and it supports more than 100 languages. Now, unlike Alexa, you can make a smart assistant that can talk to you in more than 100 languages.
So let’s make this project with a collection of the following materials-
Bill of Materials
|
Components |
Quantity |
Description |
Price Approx INR |
|
Raspberry Pi 4 |
1 |
1 GB |
4000 |
|
USB MIC |
1 |
Microphone |
100 |
|
Speaker |
1 |
For Audio out |
100 |
|
5v Dc Adapter |
1 |
5V 2A |
100 |
|
Total |
4300 |
ChatGPT Voice Control – Setup
First, like earlier projects, we need to do the initial setup of openAI and get the API key for open AI. You can read the previous version of this project for those initial setup instructions.
After setting up an AI account, you can also add billing if you want; however, you get 5 dollars of free credit for developers to develop applications around them, so it depends on your usage and how you have planned to use it. Now we are ready to code.
Here I have made two versions of the multilingual code:
One is the manual one, in which you manually enter the language code you want your voice assistant to talk with. Then we developed further that asks you to enter the text, and it automatically detects that language and uses that language in voiceGPT to talk to you with that. So let’s proceed with coding.
Code for Talk to ChatGPT
So here is the code:
First, we need to import the speech recognition for NLP, and then GTTS. You can also use OpenAI Whisper instead of this.
Then we need to set the model of ChatGPT that we are going to use. Here we are going to use multiple different languages, so we need to use the “text-davinchi-003” model.
Next, we need to set the API of Open AI.
We have made the chatGPT function where we set the chatGPT query prompt, model to use, and temperature, among other things. You can change this value according to your needs.
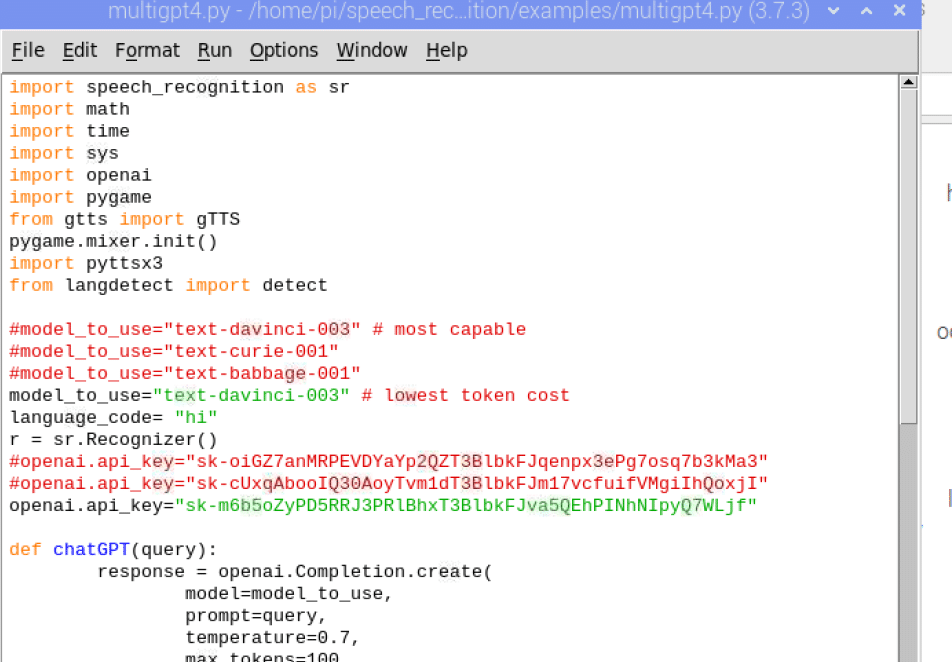
Now we create the loop function, where we continuously check the mic and capture the human voice by filtering other noise in the background.
Next, here comes the important part where we set the language code to make NLP recognize the voice speaking in our choice of language and transfer it to chatGPT to answer in that language, and then use NLP to process that language into voice and speak out in our language.
So in code, we set the language of that particular language that we want the chatGPT to talk with. Here, I want to use Hindi, so I set the language code of Hindi, i.e. “hi”
Now, our NLP will recognize whatever we say in Hindi, and the chatGPT will answer in Hindi, and then NLP processes the same in the Hindi voice as the answer.
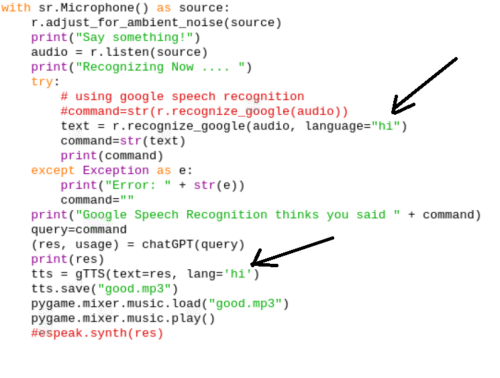
Now that our code is ready, you can run it and then speak in Hindi or any other language code you have set in the code, and then it will recognize it and answer it using ChatGPT.
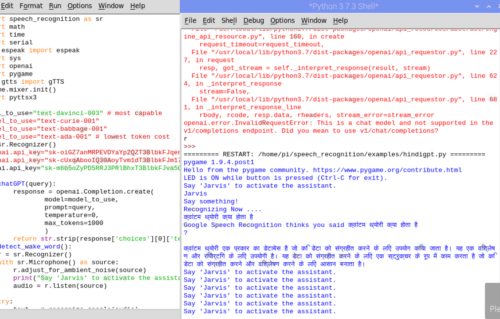
Multilingual Voice Chat with ChatGPT
But wait, we have promised to make it multilingual, which means it will automatically detect the language and change the language to talk with. You only need to run the code once; there is no need to manually change the language code to talk with.
So our next step is to modify the above code and make the next version of the code to detect the language automatically. Here we need another module named “languagedetet”.
So, install the module by running the following command in the terminal.
sudo pip3 install langdetect
Now in the code that we made, we import the “langdetet” Python module along with OpenAI and another Python module, and then we create another function.
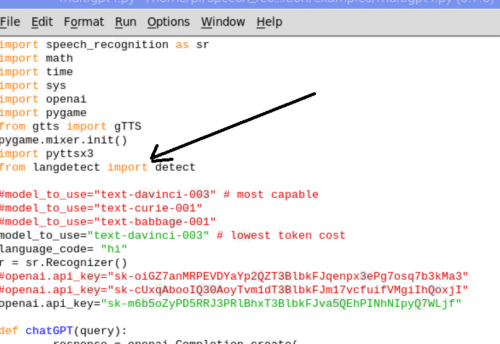
After this, we create another function named detect_language that asks for text input and then it automatically detects the language in text query input. Here you can use any language text as input like Korean, Devanagari, Marlin, Latin, etc. it will automatically detect them.

Now after the detention of language, we set the language code as the detected language that is detected by the detect_language function, and then in the while loop we capture the audio and extract the voice of a human and then use NLP in a particular language that is detected by language detector functions.
It converts it into the text of the same language and transfers it to CHATGPT as a query and then it takes cutout and again it uses the NLP to convert the text in the same language and do voice output in that language.
Congrats now our code is ready and the VOICEGPT speaker with multi-language support is read now.
Testing ChatGPT Voice Control System
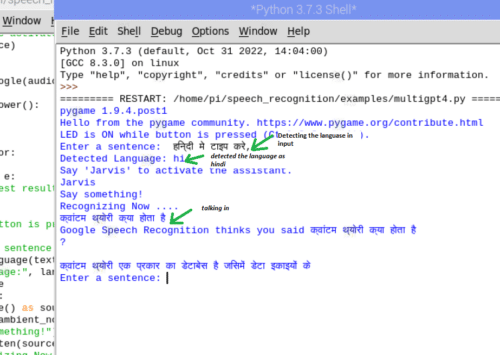
Now you can run the code, it will ask you to input the query, you can put any text in that language it detects that; now you can talk to ChatGPT in that language, it understands and answers using CHATGPT.
Note: this is the second version of VOICEGPT, It’s still under experiment and you will get updated versions with interesting features soon.


do u have any kind of circuit connection diagram.
No , There no need for connection and circuit diagram , You can directly install and run the code in raspberr pi or even in any linux laptop
Hi, source code is available on github?, can you provide link..?
Can you please share the source code?
It do not require circuit diagrm.
Updated , check the bottom button to download
Can it be modified to identify language from speech instead of text? is there a dedicated library for this?