


This project aims at developing a simple time-lapse photography  device with Raspberry Pi 3 and Pi camera.
To get the most out of nature without tiring yourself, time-lapse photography is the best technique.
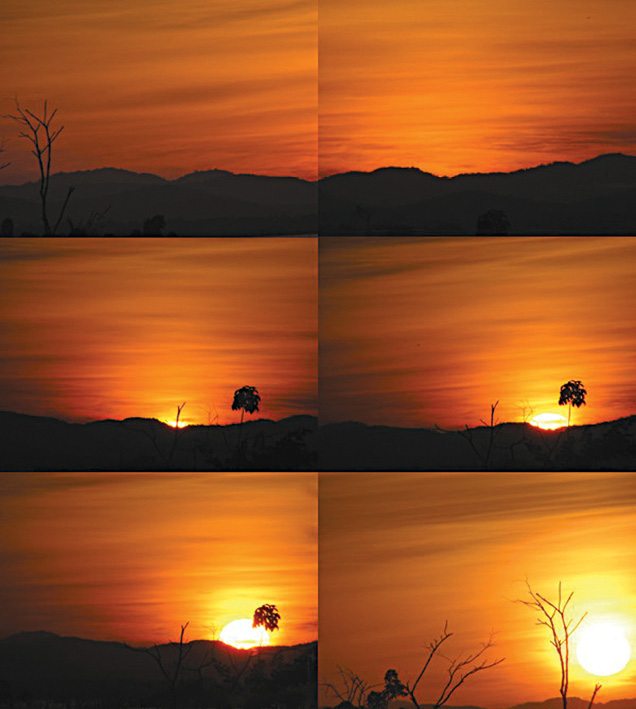
For time-lapse photography the film frames are captured at much lower rate than the normal speed used to view the frames in sequence. Here, a photographer takes several pictures while the camera is locked in a still position for a preset duration that can vary from half an hour to several days. When it is played at normal speed, time appears to be moving faster. One example where time-lapse photography can be used is the scene of the Sun rising (Fig. 1) or setting.
How it works
The process is simple. A camera fitted on a tripod is placed from where the natural scenery can be shot. Then, the duration is fixed and the camera is left to do the job.
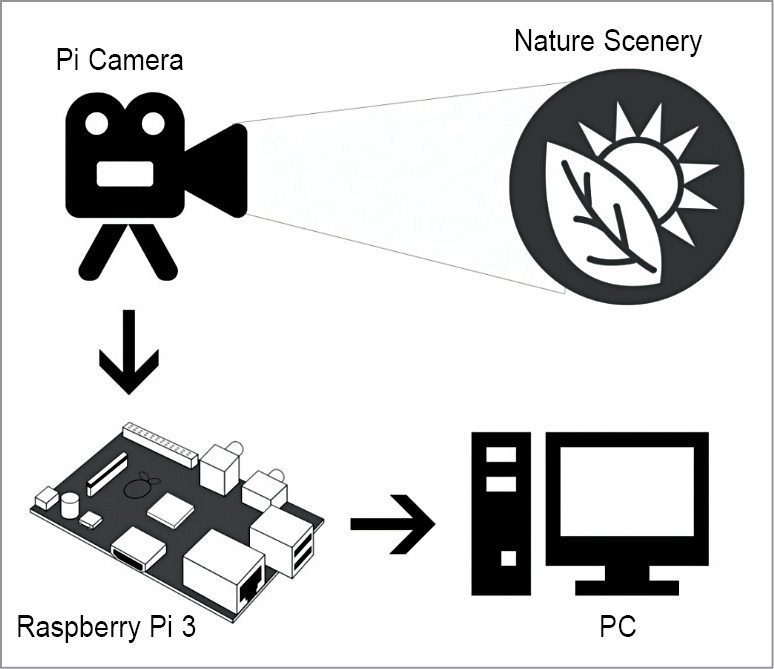
After the camera has finished taking photographs for the preset duration, you can download all images into your PC and analyse the flow of photos with respect to time. Then, there are two options:
1. You select individual photos among the bunch of photos taken by time-lapse technique and send these for further processing.
2. You combine all photos to make it into a video (Fig. 2), depicting how nature changes with respect to time.
Applications of time-lapse photography include:
• Landscapes and celestial motion
• Plants growing and flowers blooming
• Fruits rotting
• Evolution of a construction project
• People in a city
The following are required to get started with time-lapse photography:
1. Raspberry Pi 3
2. SD card with latest Raspbian OS installed
3. Pi camera
4. Power adaptor (5V, 2.5A)
5. Mouse
6. Keyboard
7. HDMI to VGA adaptor
8. Standard PC monitor
Setup for Time-Lapse Photography Device
To set up please follow the steps below:
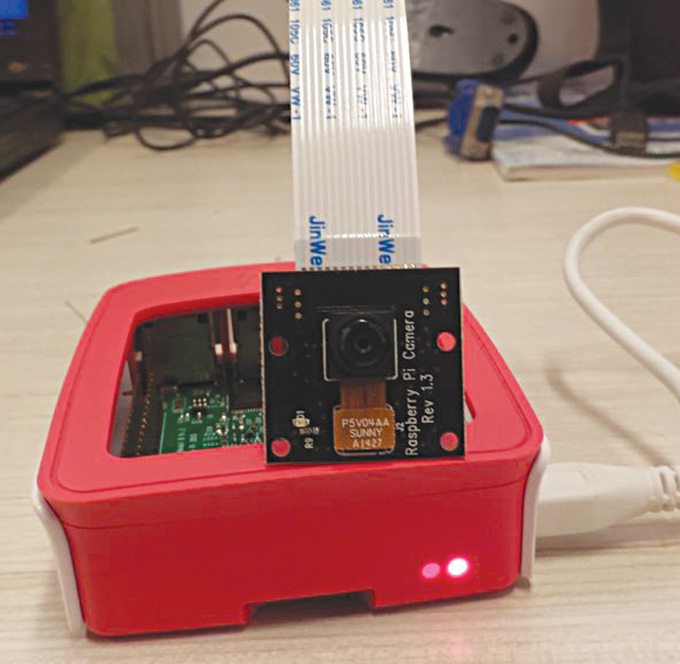
Enable Pi camera. Connect Pi camera with Raspberry Pi 3 (Fig. 3). Connect the monitor to Raspberry Pi via VGA to HDMI converter and also plug in the USB mouse and keyboard.
Boot up Raspberry Pi 3. You will see Pi desktop (assuming you have already installed Raspbian OS). Open the terminal and type the following:
[stextbox id=”info”]$ sudo raspi-config[/stextbox]
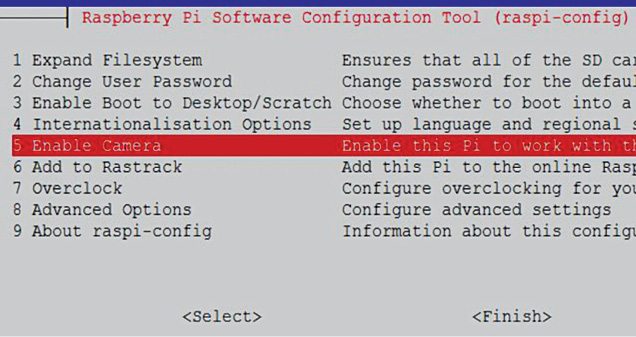
Select Enable Camera, Finish and Yes to reboot (Fig. 4).
Install Python support. To install a Python support for Pi camera, type the following command:
[stextbox id=”info”]$ sudo apt-get install python-
picamera python3-picamera
$ sudo apt-get install ffmpeg[/stextbox]
Start Python environment by entering the following:
[stextbox id=”info”]$ sudo idle &[/stextbox]
This will bring up Python environment. Python is an easy language to learn and understand; that is why the project is based on it.
Test the camera. We have installed all necessary files. Let us see if the camera is ready.
Go to File menu of Python environment. Select a new file. A blank Python environment will open
(Fig. 5). Open CameraTest.py code for testing the camera. Save and press F5.
You will see the preview for a few seconds and then a .png file will be saved on the desktop.
If.png gets saved, you can safely assume that the camera is working. If not, redo the setup carefully.
Final steps. Type the following command against the prompt:
[stextbox id=”info”]>>> sudo idle &[/stextbox]
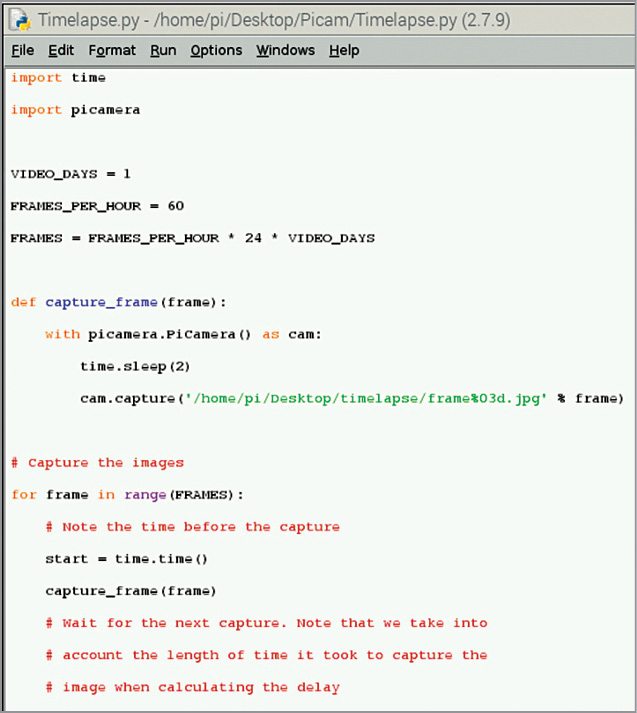
Go to File menu of Python shell and open Timelapse1.py code in Python environment (Fig. 5). Save and press Alt+F5 (to execute). To stop execution in Python IDLE, press Ctrl+F6.
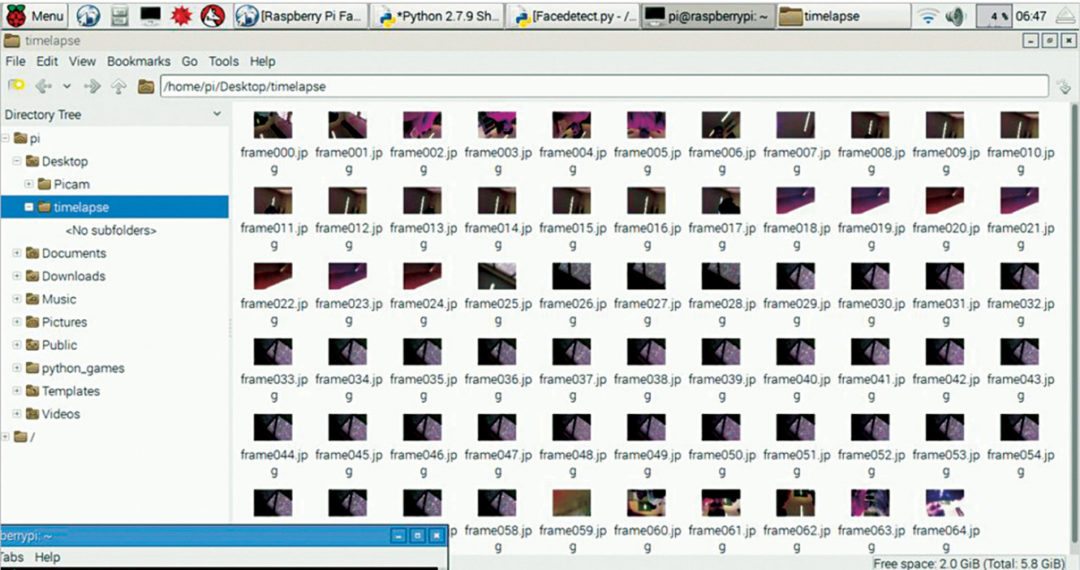
Open the destination folder and you will be able to see the captured images stored in the folder. The photos will appear in a systematic manner (Fig. 6). Open Image Viewer and view photos one after the other, and enjoy.
Now that you have made your own Raspberry Pi time-lapse photography device, the only thing left is to focus the camera at a beautiful location and relax for the preset duration, until the camera does its job.
Download the source code
Vivek G.R. was technical manager at Kits‘n’Spares till recently

Please inform me-where can i get the assembled “Time Lapsed Photography” Module ?
Regards
K majumder
You may please contact Kits’n’Spares or visit their website : http://www.kitsnspares.com to get the project.
need documentations