 This controller circuit based on an infrared (IR) object sensor (Sharp 2Y0A21) is used for saving power of the mirror light near a washbasin. The circuit contains manual on and off switches and an additional automatic switching system.
Circuit and working of Washbasin Mirror Light Controller
The circuit diagram of the washbasin mirror light controller is shown in Fig. 1. It is built around bridge rectifier BR1, 5V voltage regulator 7805 (IC1), LM358 op-amp (IC2), NE555 timer (IC3), two BC548 transistors (T1 and T2), 12V single-changeover relay (RL1), object sensor (Sharp 2Y0A21) and a few other components. If you forget to turn off the light, the circuit automatically turns it off after a few seconds.
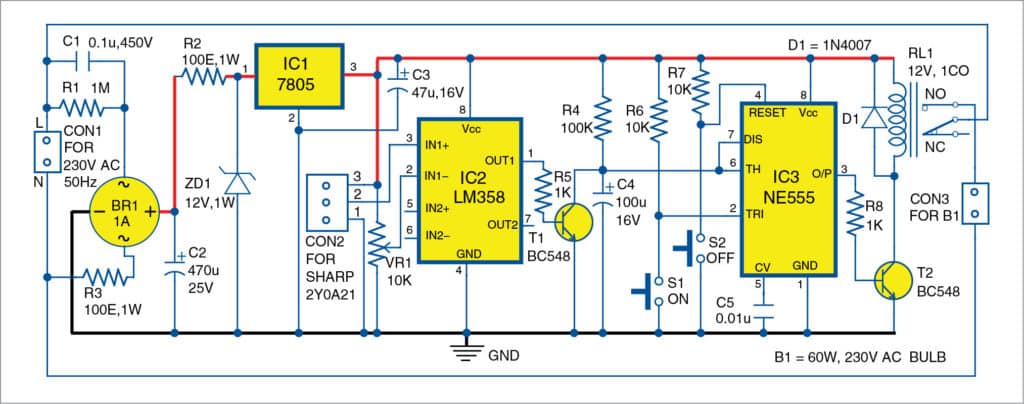
Light bulb B1 connected across connector CON3 is turned on with the help of switch S1 and turned off using S2 after using the washbasin. LM358 (IC2) is configured as a comparator. Its non-inverting input (pin 3) and inverting input (pin 2) are used as inputs. Pin 2 of IC2 is connected to voltage-divider potmeter VR1. Using VR1, vary the reference voltage at pin 2. Initially, output pin 1 of IC2 is low.
NE555 (IC3) is designed as a monostable multivibrator. On time of IC3 is adjusted to eleven seconds with the help of timing capacitor C4 and resistor R4. Output pin 3 of IC3 is fed to relay driver transistor BC548 (T2).
When S1 is pressed, IC3 is triggered and, hence, its output pin 3 goes high, and mirror light bulb turns on through relay (RL1) contacts. When S2 is pressed after use, the light turns off.
If you forget to switch the light off, the sensor comes into action. Object sensor output is connected to inverting pin 2 of IC2. Under normal conditions, voltage at pin 3 of IC2 is low. When a person comes in front of the sensor connected across CON2, voltage at pin 3 is higher than voltage at pin 2 of IC2. Hence, output pin 1 of LM358 is high. This output is connected to the base of transistor T1. Collector and emitter of T1 are connected across C4. Discharging time of C4 extends the on time of the light bulb.
When the sensor detects the absence of a person in front of the mirror, the circuit automatically turns it off after eleven seconds. This saves energy and prevents unnecessary power consumption.
Construction and testing
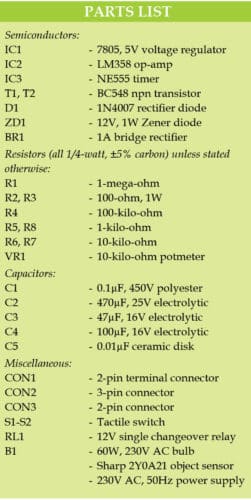
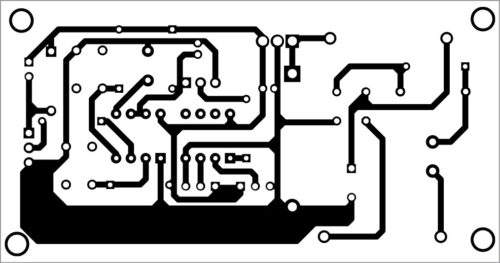
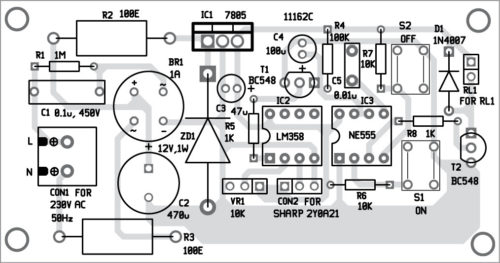
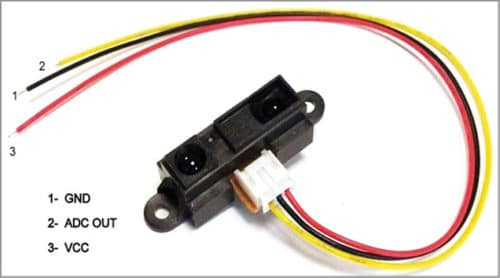
An actual-size PCB layout for the washbasin mirror light controller is shown in Fig. 2 and its components layout in Fig. 3. After assembling the circuit on the PCB, connect 230V AC, 50Hz across CON1. Connect RL1 to the PCB and bulb B1 across CON3. Mount S1, S2 and the Sharp 2Y0A21 sensor (Fig. 4) on the front panel of the cabinet.
Download PCB and component layout PDFs: click here
For testing the circuit, stand in front of the sensor and press S1 to turn the bulb on. To turn it off, either press S2 to immediately turn it off, or move away from the sensor and the bulb will automatically turn off after eleven seconds.
Riju Thazhathu Veettil is R&D engineer at Technonics R&D Lab, Malappuram, Kerala


