Earlier, an electronic development board was primarily used by engineers working on a prototype or by innovative hobbyists. But today, every aspect of our world has an electronic connection. So it isn’t surprising that developer boards have advanced to keep pace with the times.

What’s available?

Development boards from the Italian Arduino family of boards are the most famous ones. Because of the open source hardware and software that they feature, these boards are inexpensive and have a bundle of clones to choose from. Their simple coding environment attracts a lot of beginners and non-professionals.
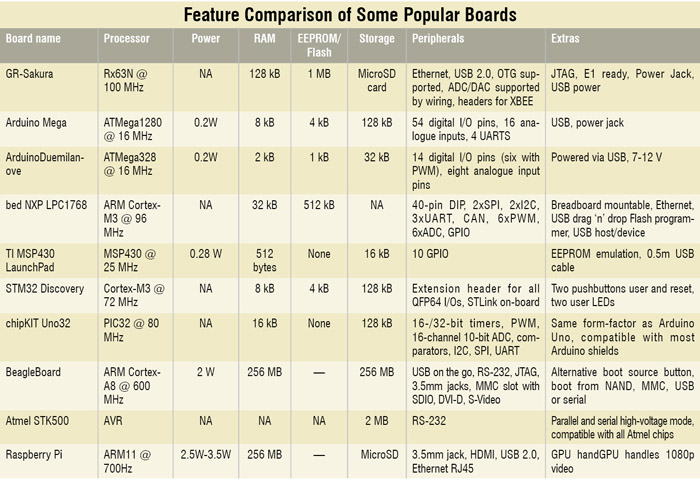
If you want something more than a basic microcontroller-based board, you have BeagleBoard. BeagleBoard is basically a fanless single-board computer powered by a decent ARM Cortex processor. With low battery life, BeagleBoard is not really apt for most of the applications that the Arduino trumps in due to very low power consumption.
Another major open board is the PandaBoard. It is probably one of the most popular, highly specified developer boards available—it comes with a dual-core processor clocked at 1 GHz and is capable of handling 1080p video streaming with ease.
What are the developments?
The release of Raspberry Pi last year took the hacker world by a storm. A single-board computer was available for a mere $25-35, and was sold out just as quickly as it was made available for purchase online, crashing some e-shop servers in the process.
Raspberry Pi is a strong competition to BeagleBoards and PandaBoards. It comes equipped with 256MB RAM and its own ARM CPU and Broadcom GPU. It also features Ethernet, HDMI and a microSD slot. It is definitely the first choice for those who plan to boot Linux variants and run some software to turn it into a media centre or a gaming system.

A few years ago, NXP too had come out with a development board named ‘mbed board.’ Priced at $60, it comes in a 40-pin DIP package and is small enough to fit onto a breadboard easily. The best part about this board is its development environment including the editor, compiler and library. Reference documents are all completely Web-based, freeing the user from having to install or maintain any software on the host system. NXP also helps mbed beginners by providing them a HelloWorld.bin file along with a guide to get started on the board at the product page on mbed.org.
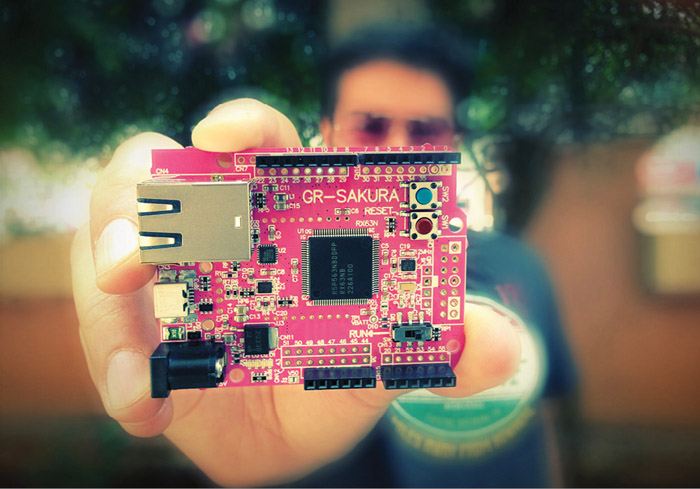
Variety is something that we all want to see in the market. Renesas correctly understood that and came out with a cherry blossom (sakura) flavoured board called ‘GR-Sakura.’ It is the latest board on the block. At first glance, it looks like a board that has the best of both—the Raspberry Pi and the Arduino families.
What is GR-Sakura?
‘GR’ prefix stands for ‘Gadget Renesas,’ which is a project that offers a series of boards bundled with an ‘easy to start with’ cloud environment for rapid prototyping. Like all open hardware boards, GR-Sakura is targeted at both beginners as well as engineers looking forward to do some rapid prototyping.
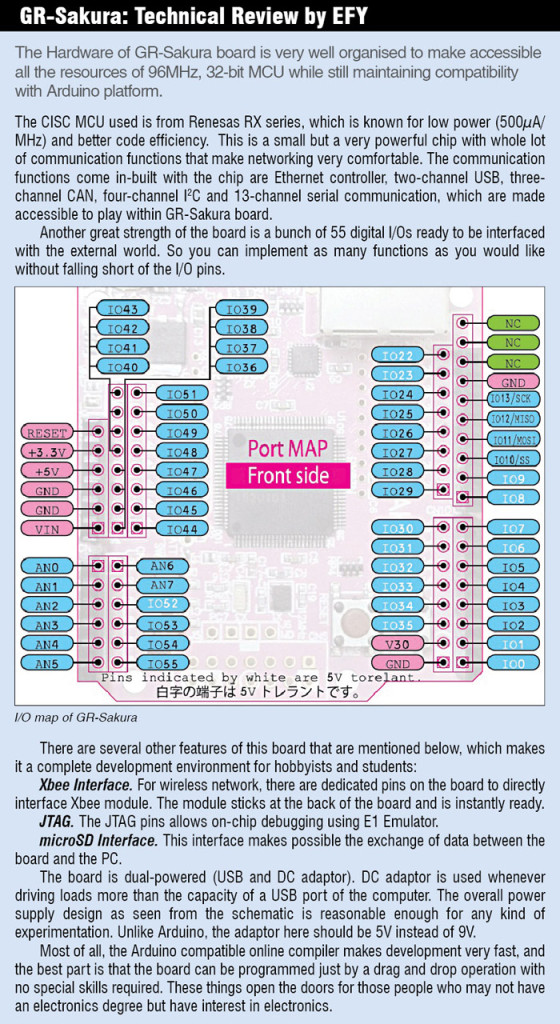
The board is powered by a power-efficient Rx63N MCU that is clocked at 100 MHz (165 DMIPS). It comes with 128kB RAM and a full megabyte of Flash. The board features Arduino-compatible headers, which makes it compatible with many forms of Arduino shields.

Renesas has worked to make GR-Sakura an easy-to-set-up board for the user to easily design and create original ideas for electronic gadgets. Plug in some sensors, develop code to manipulate the input, connect some output devices and you are done. In case you are not really interested in sitting in front of a PC punching in code, you can utilise another feature of this board that allows you to easily program the board through a smartphone.
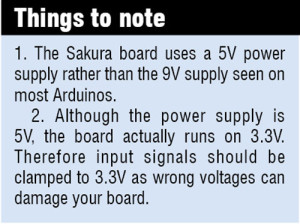
There is one important difference between Arduino boards and Sakura—Sakura runs on 3.3 V, while Arduino uses a 9V power supply. Keep this in mind while using the shield in order to ensure that you do not fry the device.
Getting started
Setting up GR-Sakura is quite easy. You can begin by plugging in the mini-USB cable to your PC. This cable functions as both the power supply and the data transfer cable for the board. The switch will flicker and the blue LEDs start blinking to notify power connectivity.
Next, press the red reset button on the board. Once done, your PC will detect the Sakura board as a new memory drive. As you open the drive, you can find the link that takes you to the Sakura website where you will be greeted with further instructions. One interesting thing is that the Sakura board works not just with Windows but with an Apple Mac computer too.


