 This wireless gate alarm uses infrared (IR) and 433MHz RF modules. IR transmitter unit emits 36kHz signal and is fitted on one side of the gate’s frame. IR receiver unit and RF transmitter module, along with the encoder, are fitted on the opposite side of the gate’s frame. The alarm unit is kept inside the house, and it uses 433MHz RF receiver module and musical alarm circuit.
Circuit and Working
Circuit of the wireless gate alarm has three units, namely, IR transmitter unit, IR receiver unit and alarm unit. Modulated invisible IR beam is present between transmitter and receiver units installed at the gate.
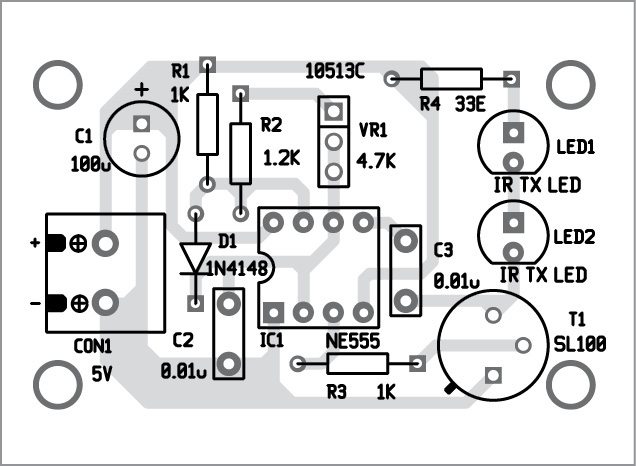
Circuit diagram of the IR transmitter unit is shown in Fig. 1. By adjusting potmeter VR1, frequency can be set at 36kHz. At this frequency, maximum range is obtained (more than five metres).
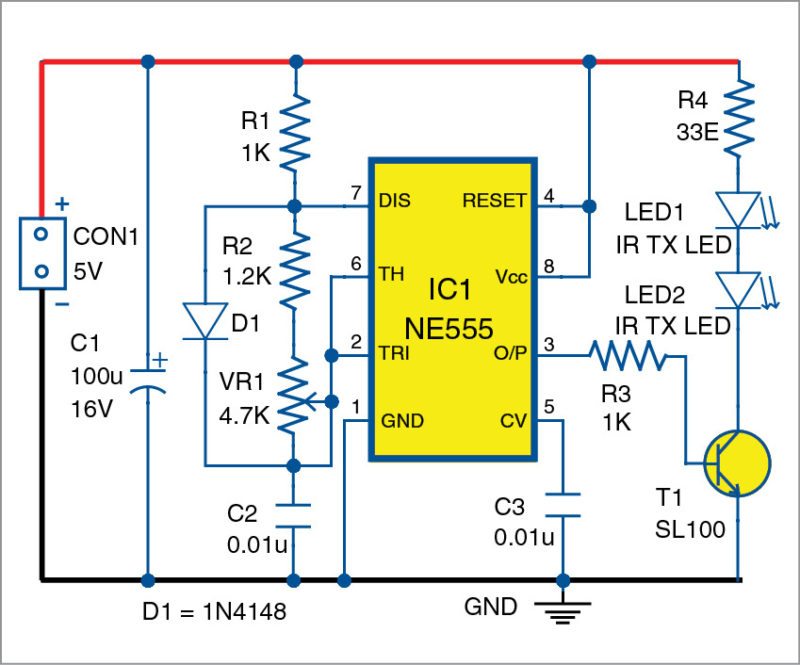
IC NE555 (IC1) is wired as an astable multivibrator. Output signal from NE555 is amplified by npn transistor SL100 (T1) to drive two IR-transmitting LEDs (LED1 and LED2) in series.
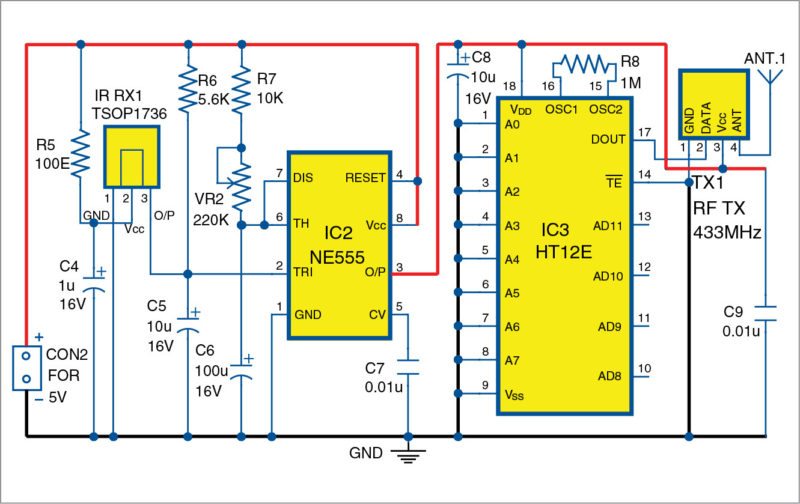
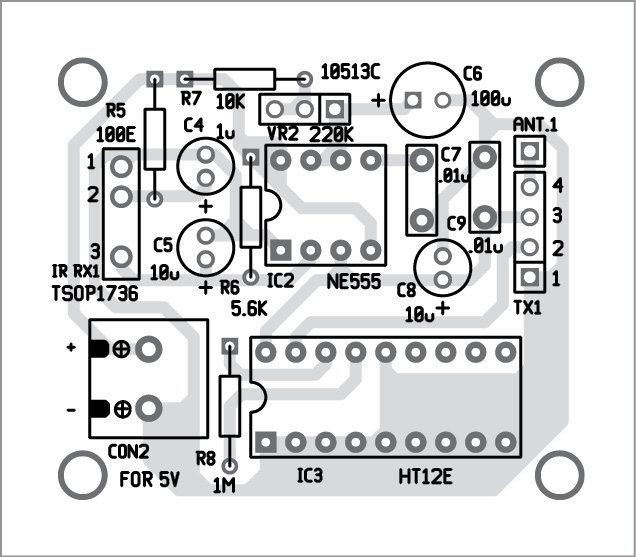
Circuit diagram of the IR receiver unit is shown in Fig. 2. It is built around IR receiver module TSOP1736 (IR RX1), timer NE555 (IC2), encoder HT12E (IC3), 433MHz RF transmitter module (TX1) and some other components.
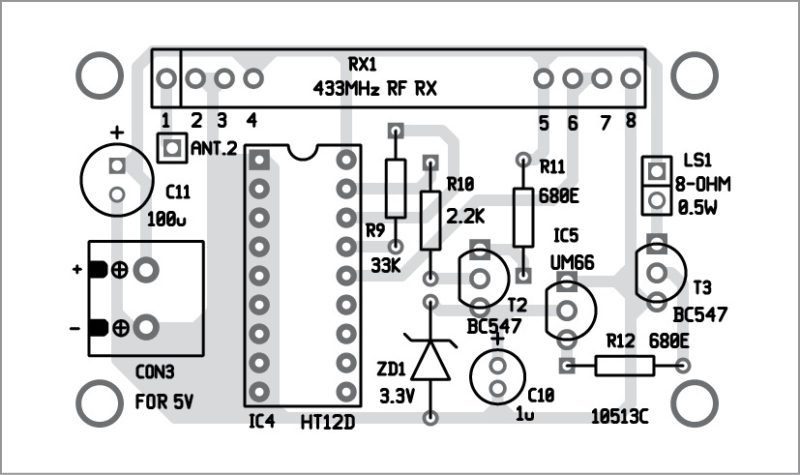
Circuit diagram of the alarm unit is shown in Fig. 3. It is built around 433MHz RF receiver module (RX1), decoder HT12D (IC4), melody generator UM66 (IC5) and some other components.
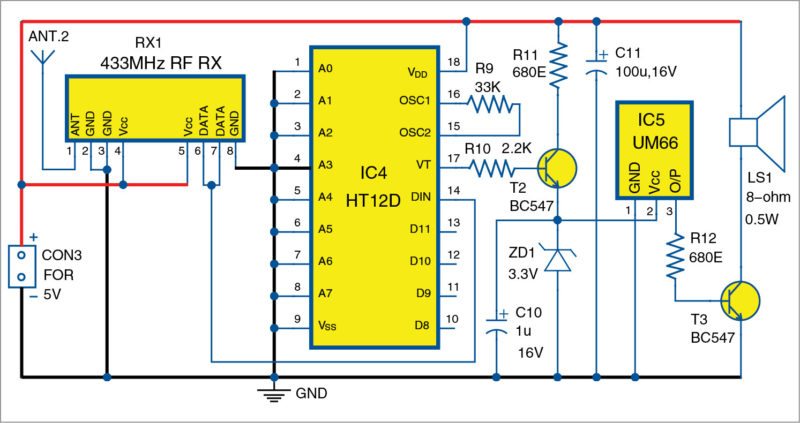
Encoder IC3 encodes four-channel transmitting signals. The address pins A0 through A7 of IC3 are used for security codes. Here, all the address pins are grounded. Decoder IC4 decodes four-channel signals. IC3 has the same address pins as IC4.
When a person crosses the gate, IR beam is interrupted for a moment. Then, output of TSOP1736 sensor goes high. IC2 gets triggered and output pin 3 goes high.
This output signal of around 5V is applied to IC3 and TX1, which transmits the signals to the remote alarm unit. The transmitted signal received by RX1 is fed to pin 14 (DIN) of IC4. Pin 17 of IC4 goes high when a valid RF transmission signal is received.
Transistor T2 (BC547) conducts when pin 17 of IC4 goes high. When T2 conducts, IC5 gets power supply, and it produces an alarm sound through loudspeaker LS1.
Construction and Testing
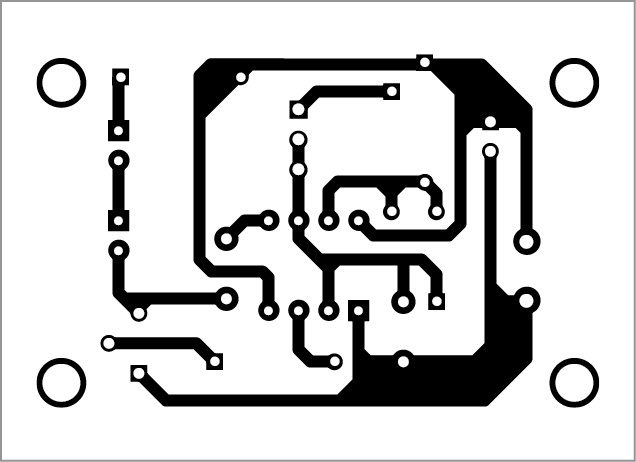
A single-side PCB layout for the IR transmitter unit is shown in Fig. 4 and its component layout in Fig. 5. Assemble the unit in a suitable enclosure and fix on the frame of the gate.
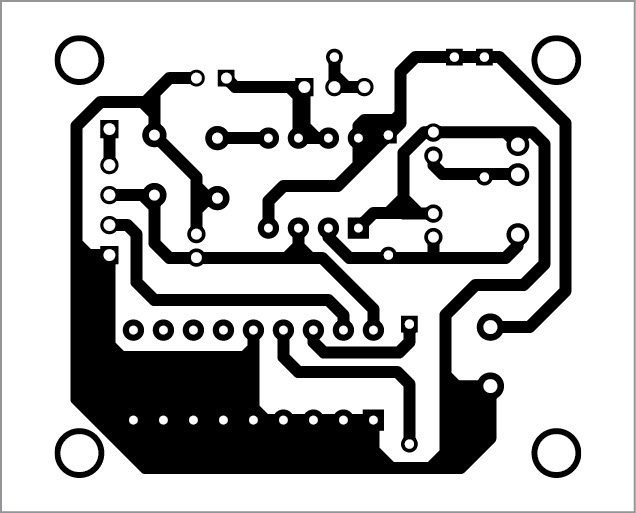
A single-side PCB for the IR receiving unit is shown in Fig. 6 and its component layout in Fig. 7. Assemble the unit in a suitable enclosure and fit at the other side of the gate.
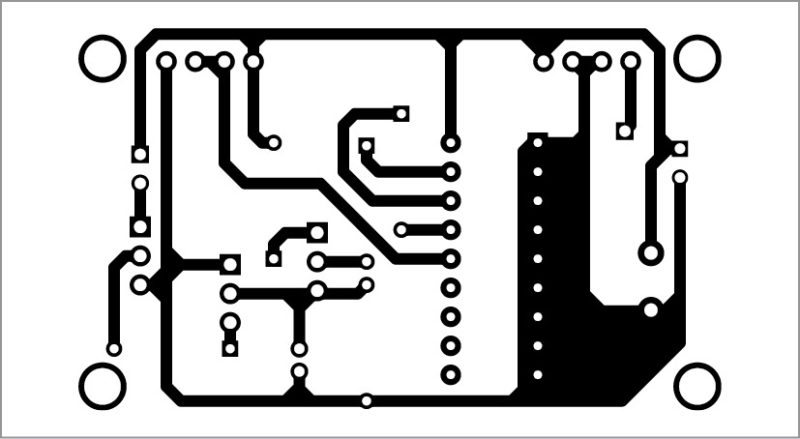
A single-side PCB layout for the alarm unit is shown in Fig. 8 and its component layout in Fig. 9. Assemble the unit in a suitable enclosure and keep it inside the house.
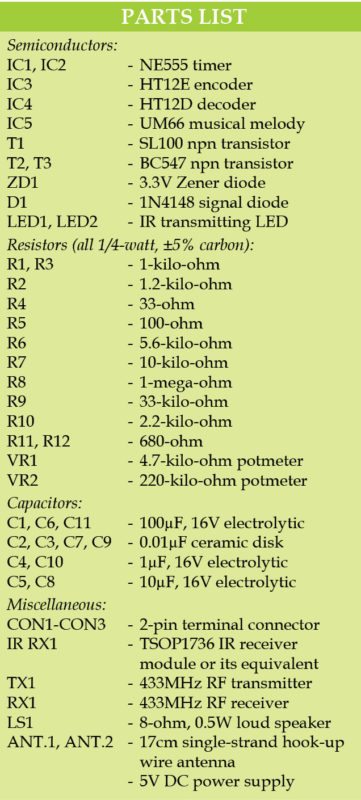
All three units work on 5V DC power supply. Use an antenna for transmitter and receiver RF modules; a 17 cm single-strand hook-up wire can be used as the antenna.


worth
IS THERE ANY SUBSTITUTE FOR TSOP 1736 IR RECEIVER
CAN I USE TSOP1738
can i use TSOP1738 instead of TSOP1736
YES you can use it
can i have documentation of this
can i use adapter to power this unit, if yes what is the amps rating
can i use adapter to power this if yes, what is the amps rating